
Editing Project Settings
This tutorial walks you through finding and editing the settings for an existing project in Zibit. By the end, you'll know how to update your project's title and description, review its display configuration, and adjust inactivity reset behavior—all from a single page. These settings are the foundation for how your project is identified and how it behaves when left idle on a device.
The My Projects dashboard and your project cards
The My Projects page is your starting point for managing all your projects. Each card shows a project's name, status badge, and collaborators at a glance.
To edit a project's settings, click the more_horiz (three-dot) button in the bottom-right corner of the project card. This opens the project actions menu where you can access settings.
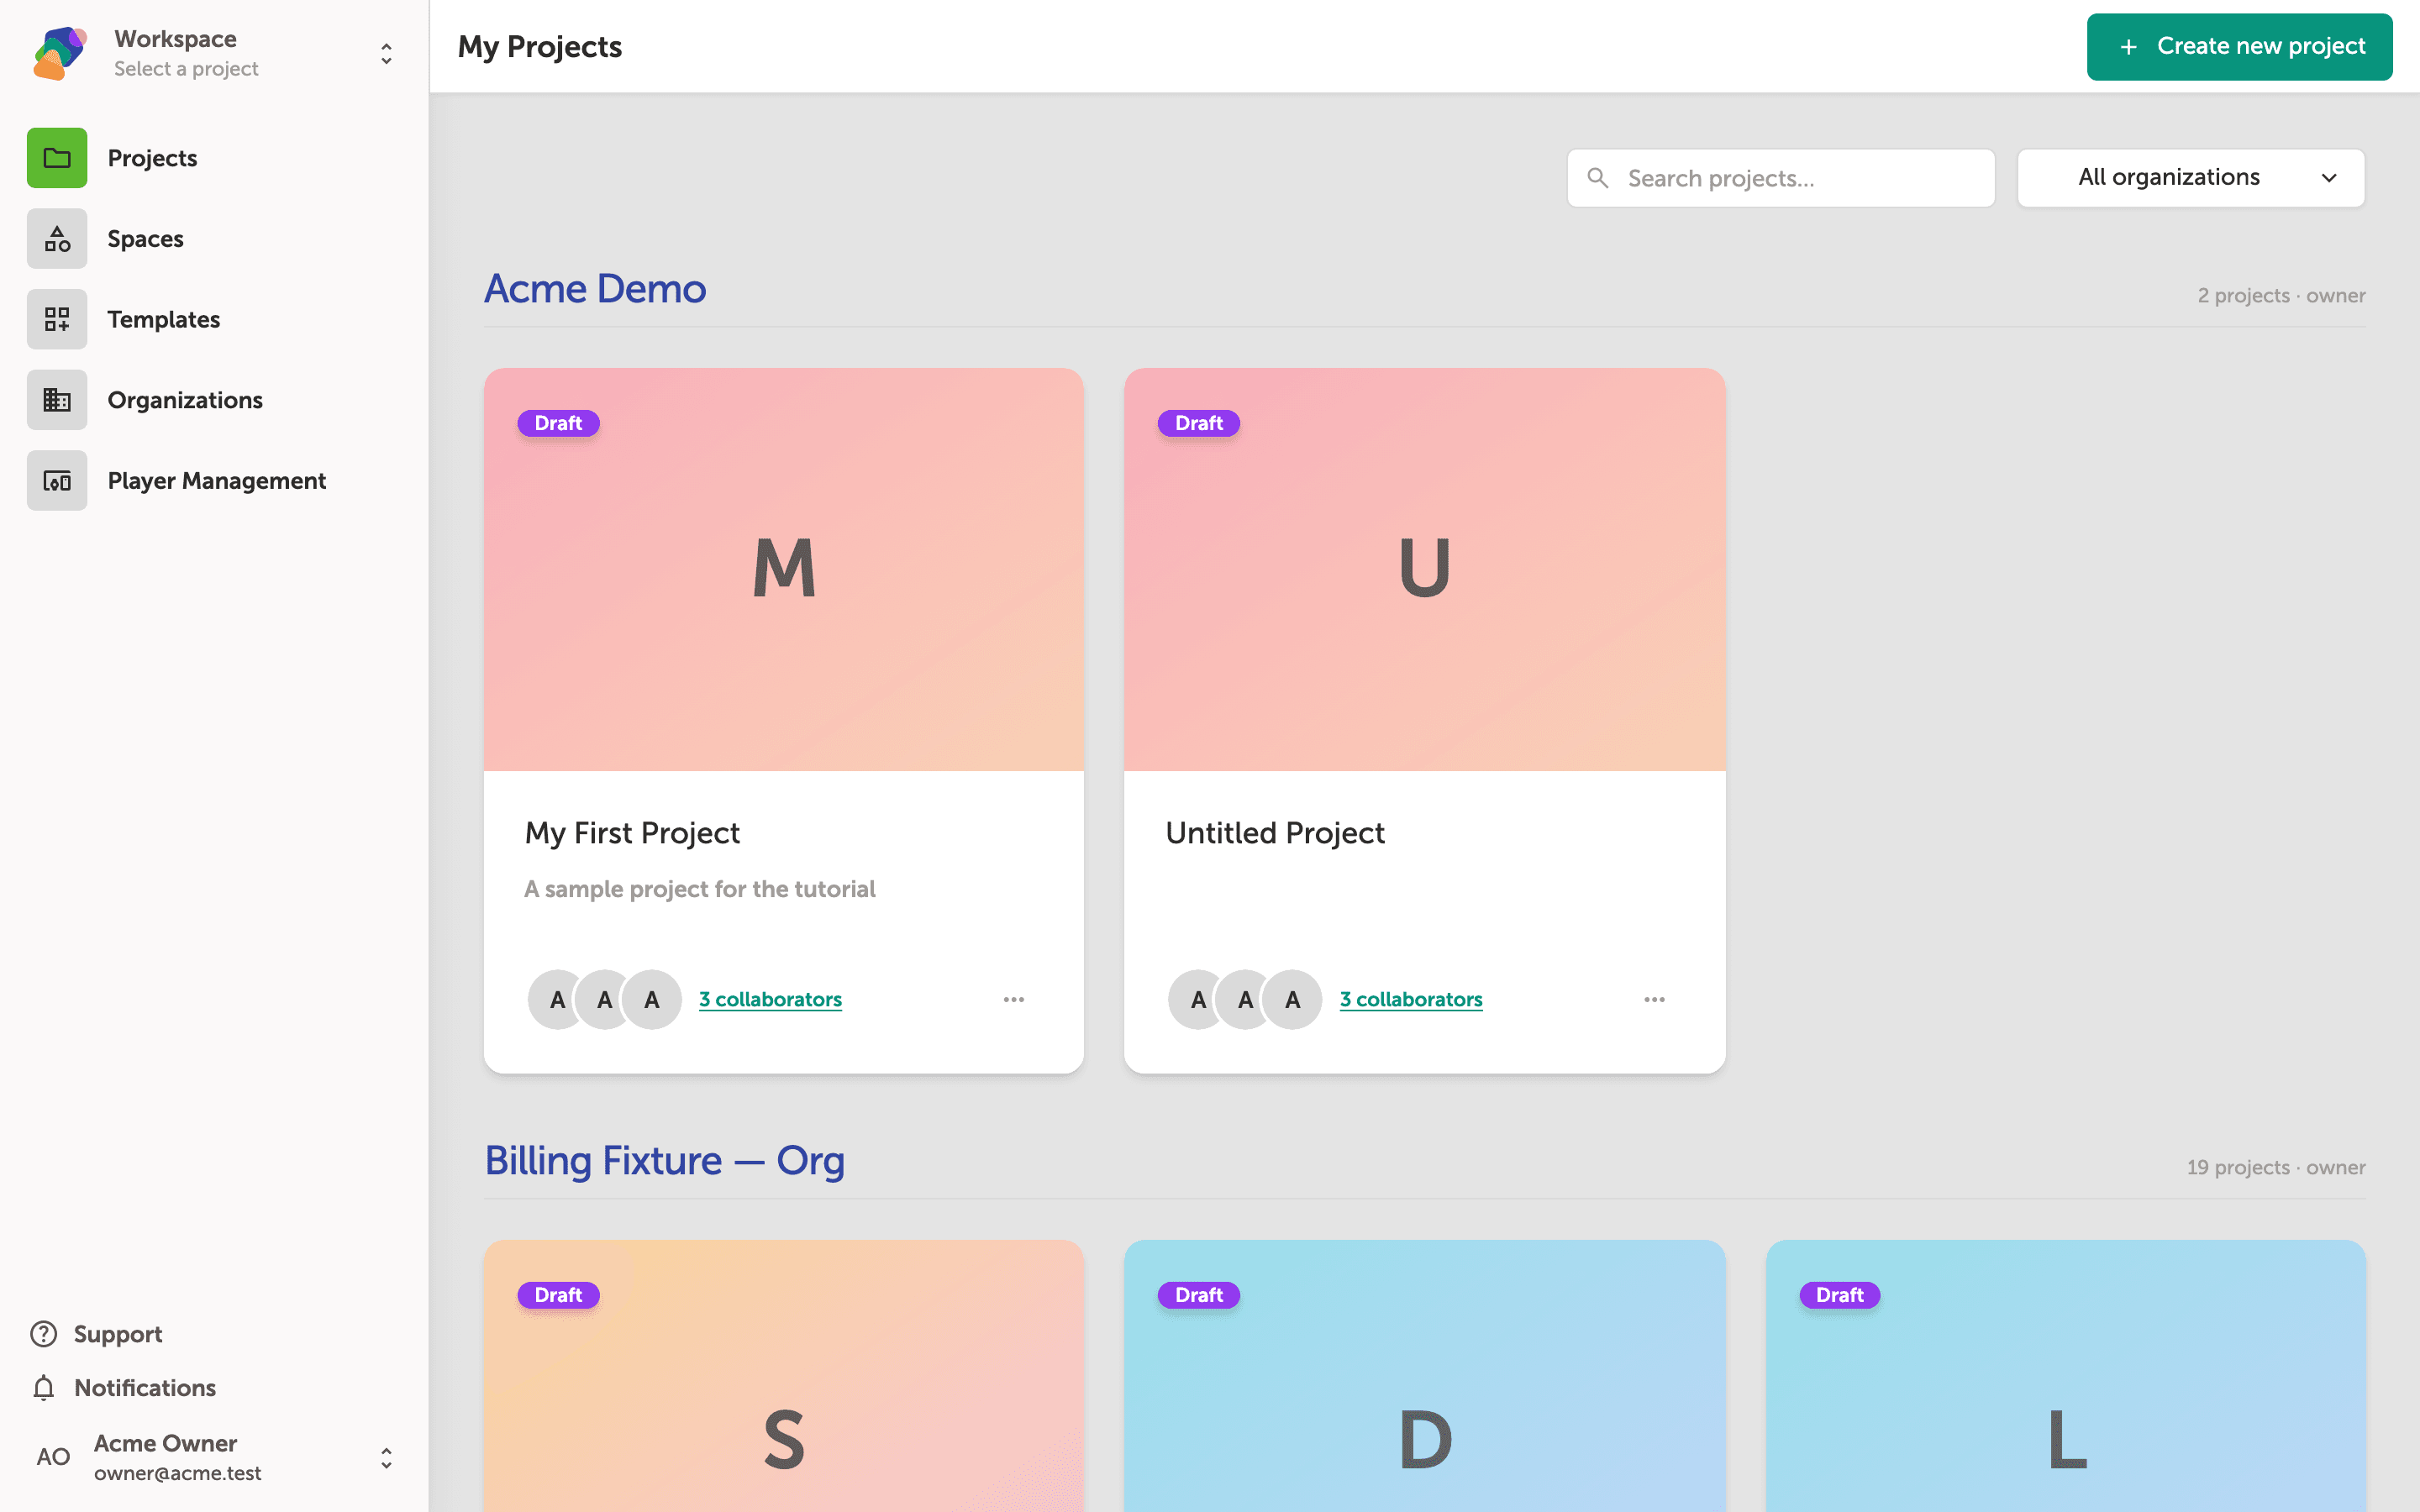
Opening the project actions menu on a card
Click the more_horiz (three-dot) button in the bottom-right corner of any project card to open its actions menu. You'll see options including Duplicate, Edit settings, Refresh thumbnail, Invite or manage..., Move to organization..., and Delete project....
To reach the project configuration page, click Edit settings. This takes you directly to the settings for that project so you can update its name, description, and other details.
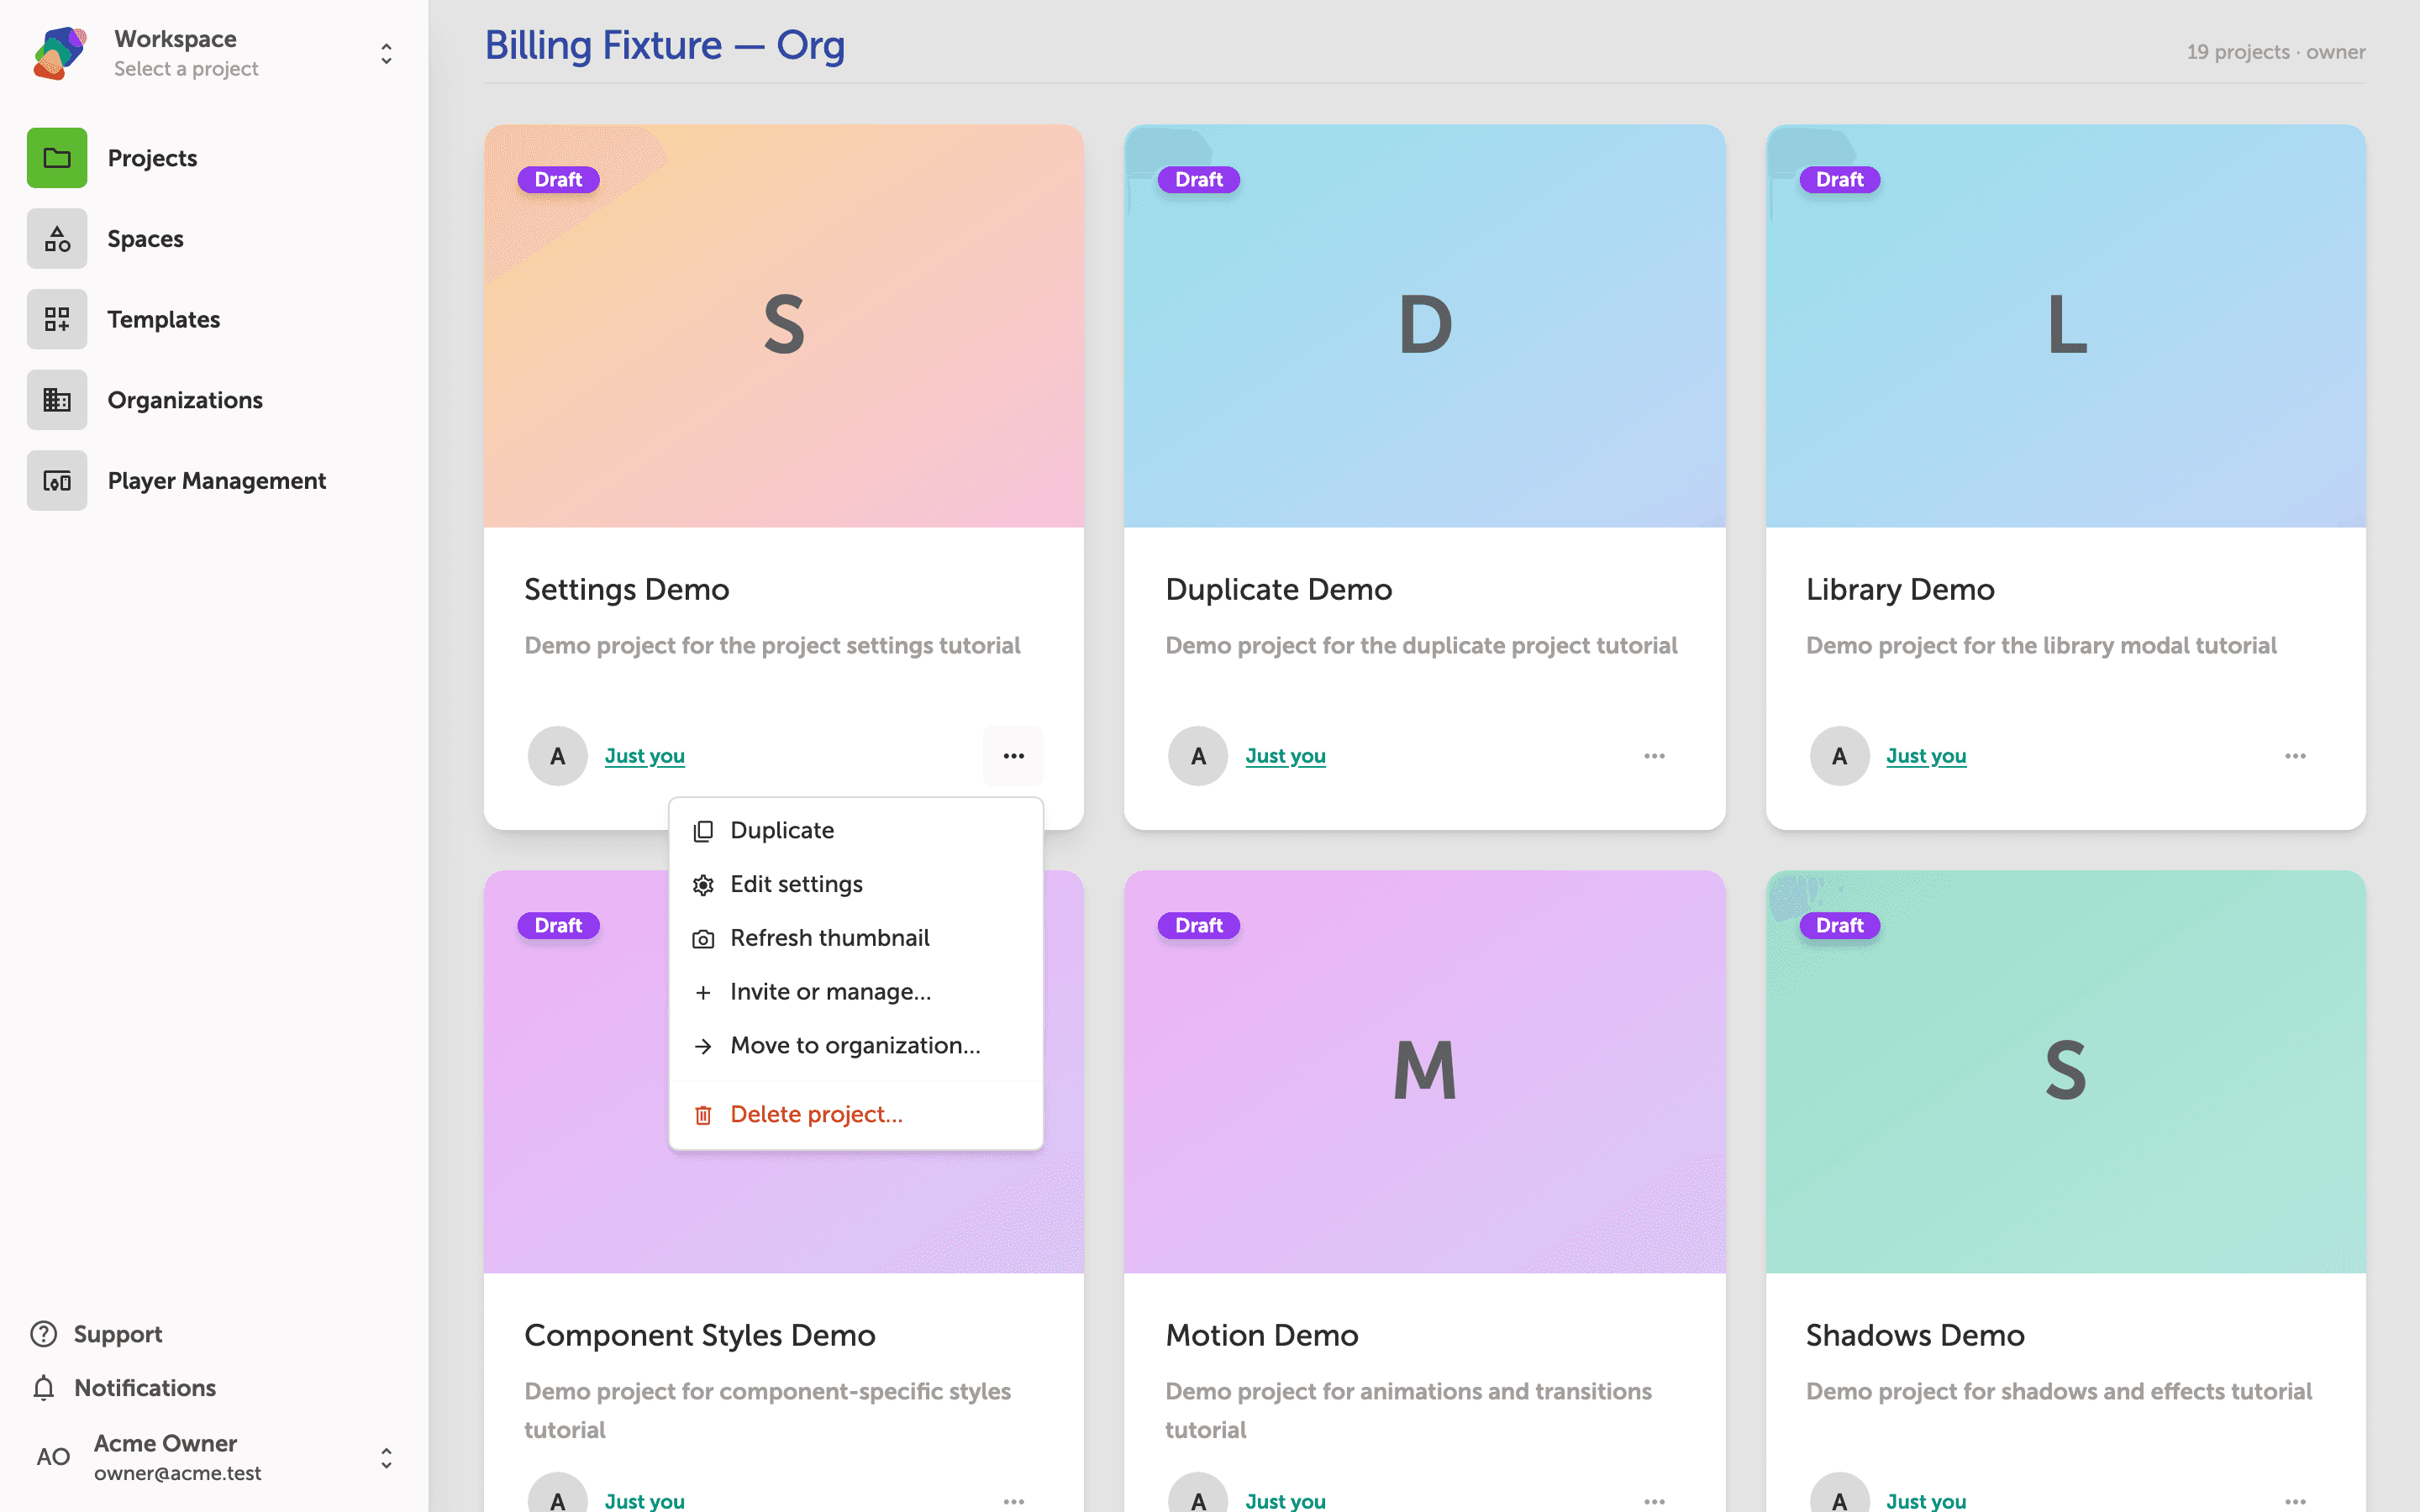
Reviewing the Project settings page
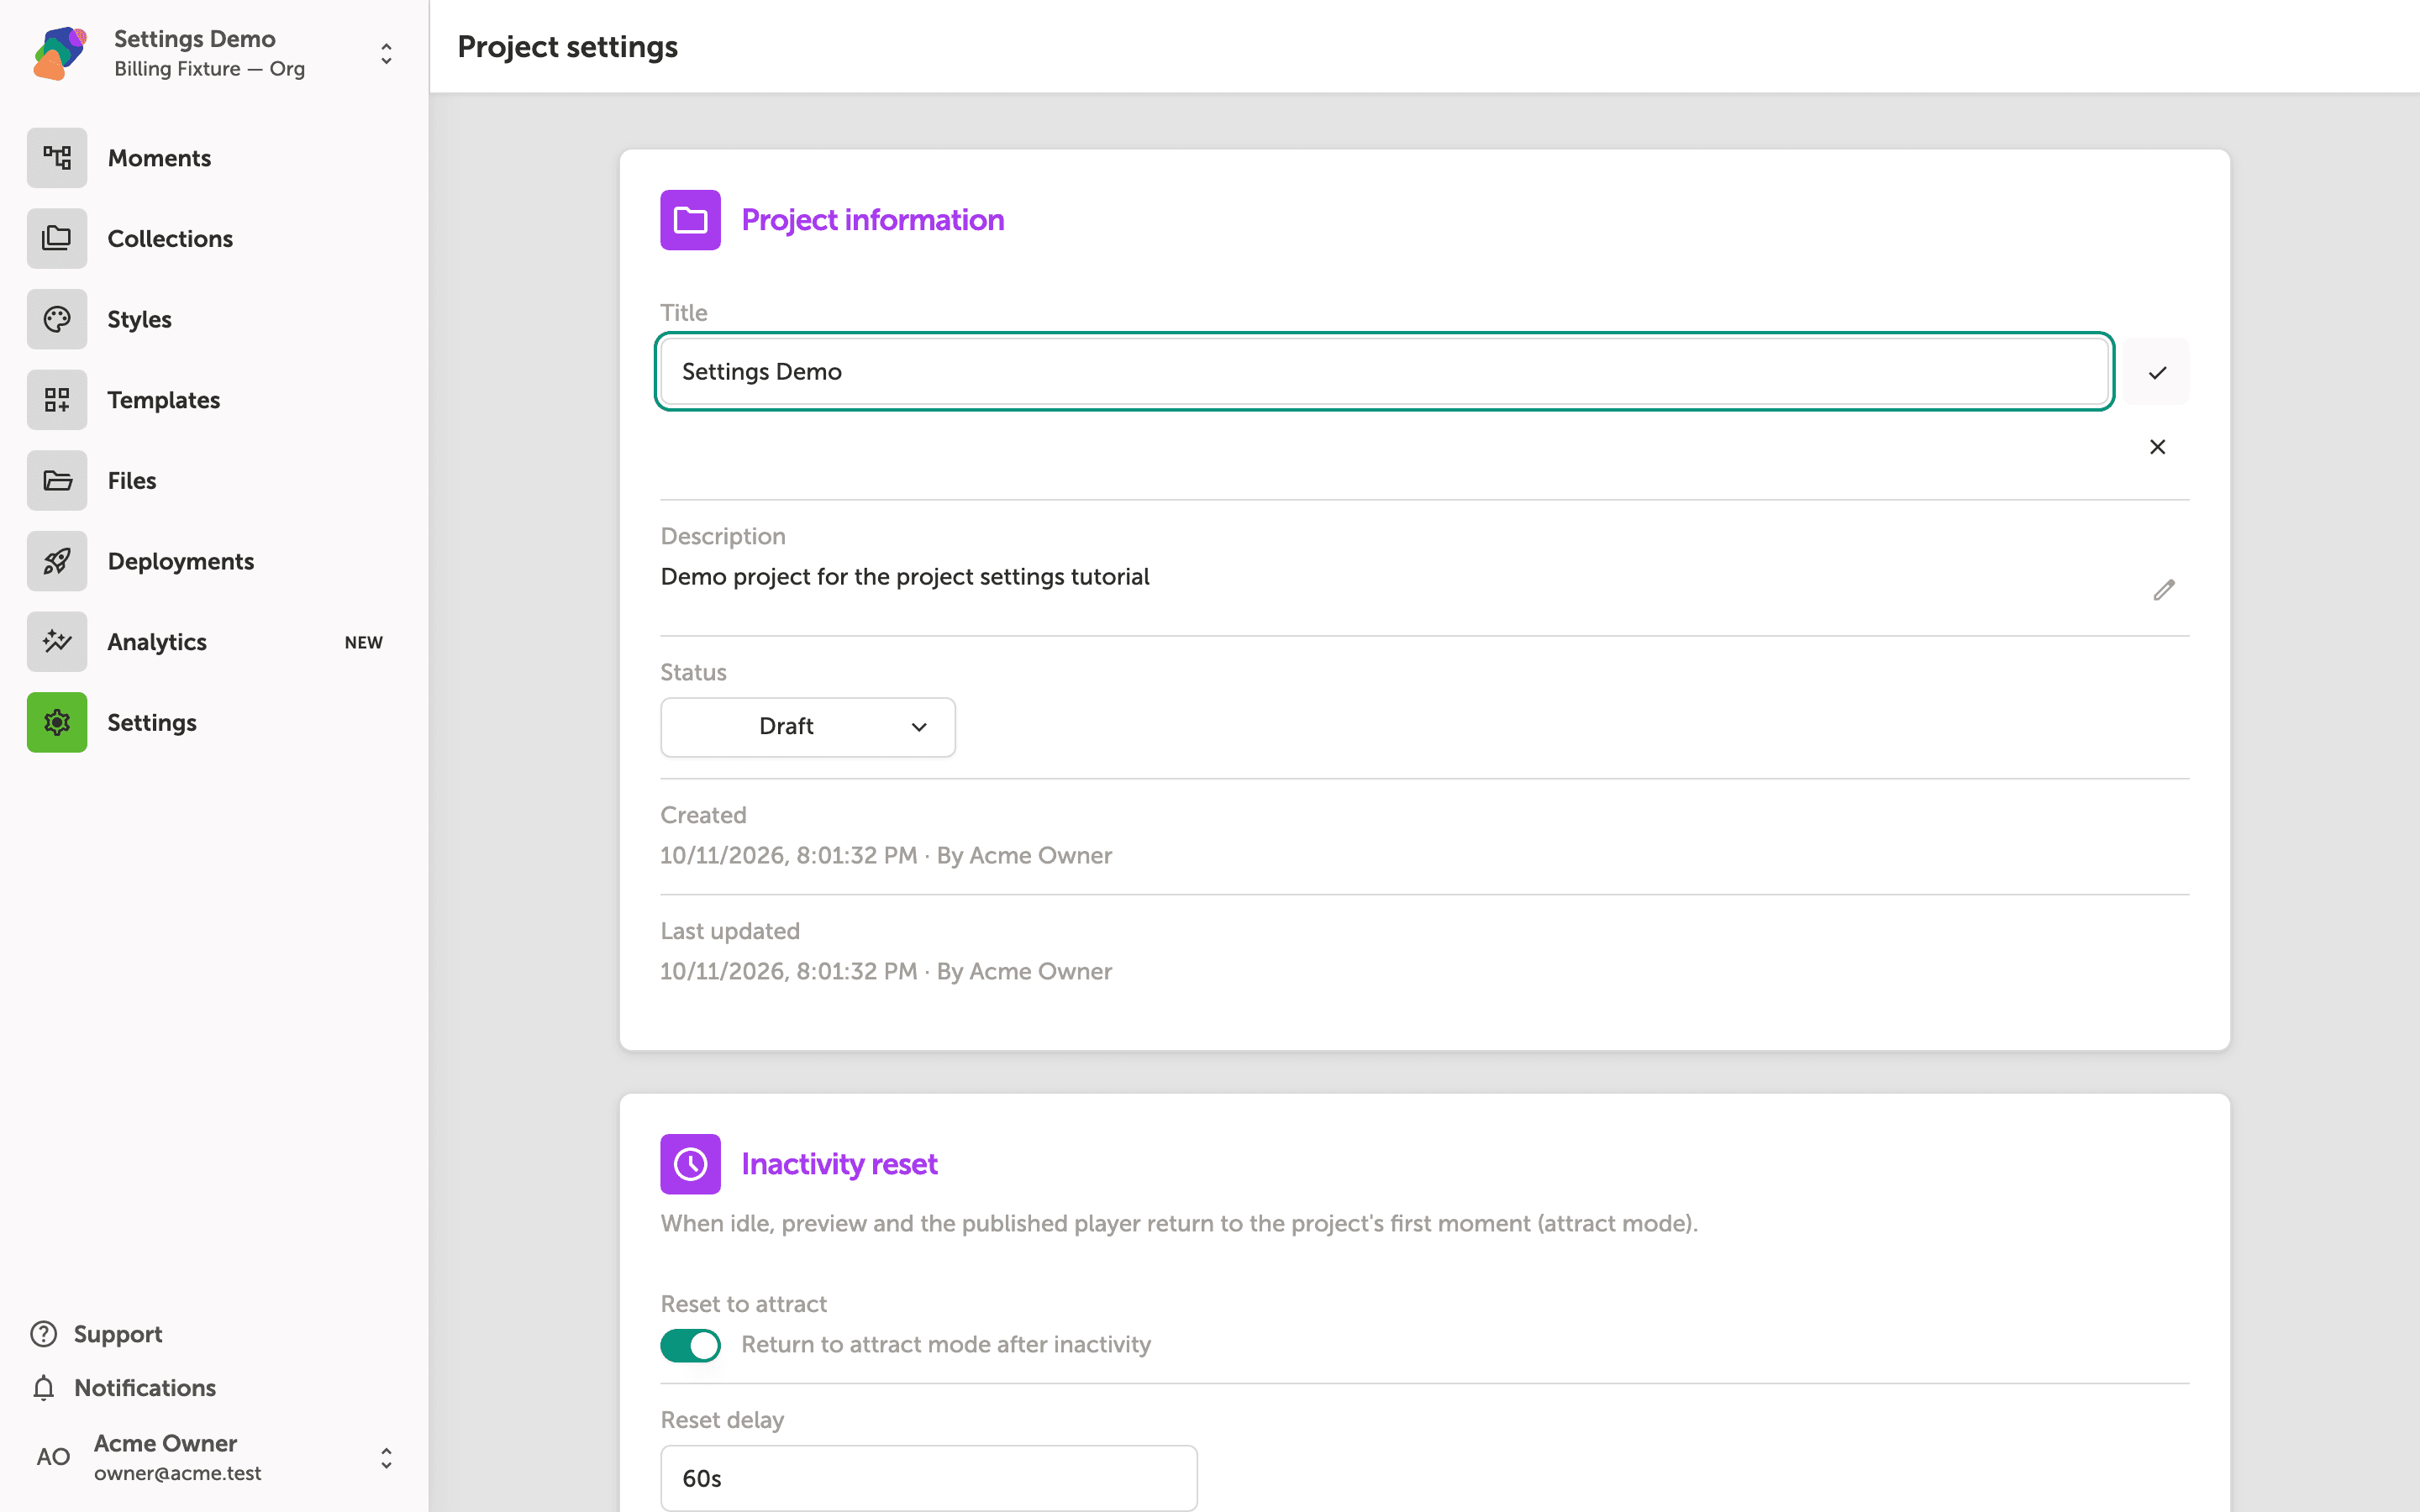
The Project settings page is your central control panel for a project. The Project information section at the top shows the project's Title, Description, and Status (currently set to Draft). Click the edit icon next to Title or Description to update either field inline.
Below that, the Inactivity reset section lets you control what happens when a visitor stops interacting. The Reset to attract mode after inactivity toggle is on by default, and the Reset delay field sets how long the player waits before resetting—the default is 60s, but you can enter any duration such as 5m.
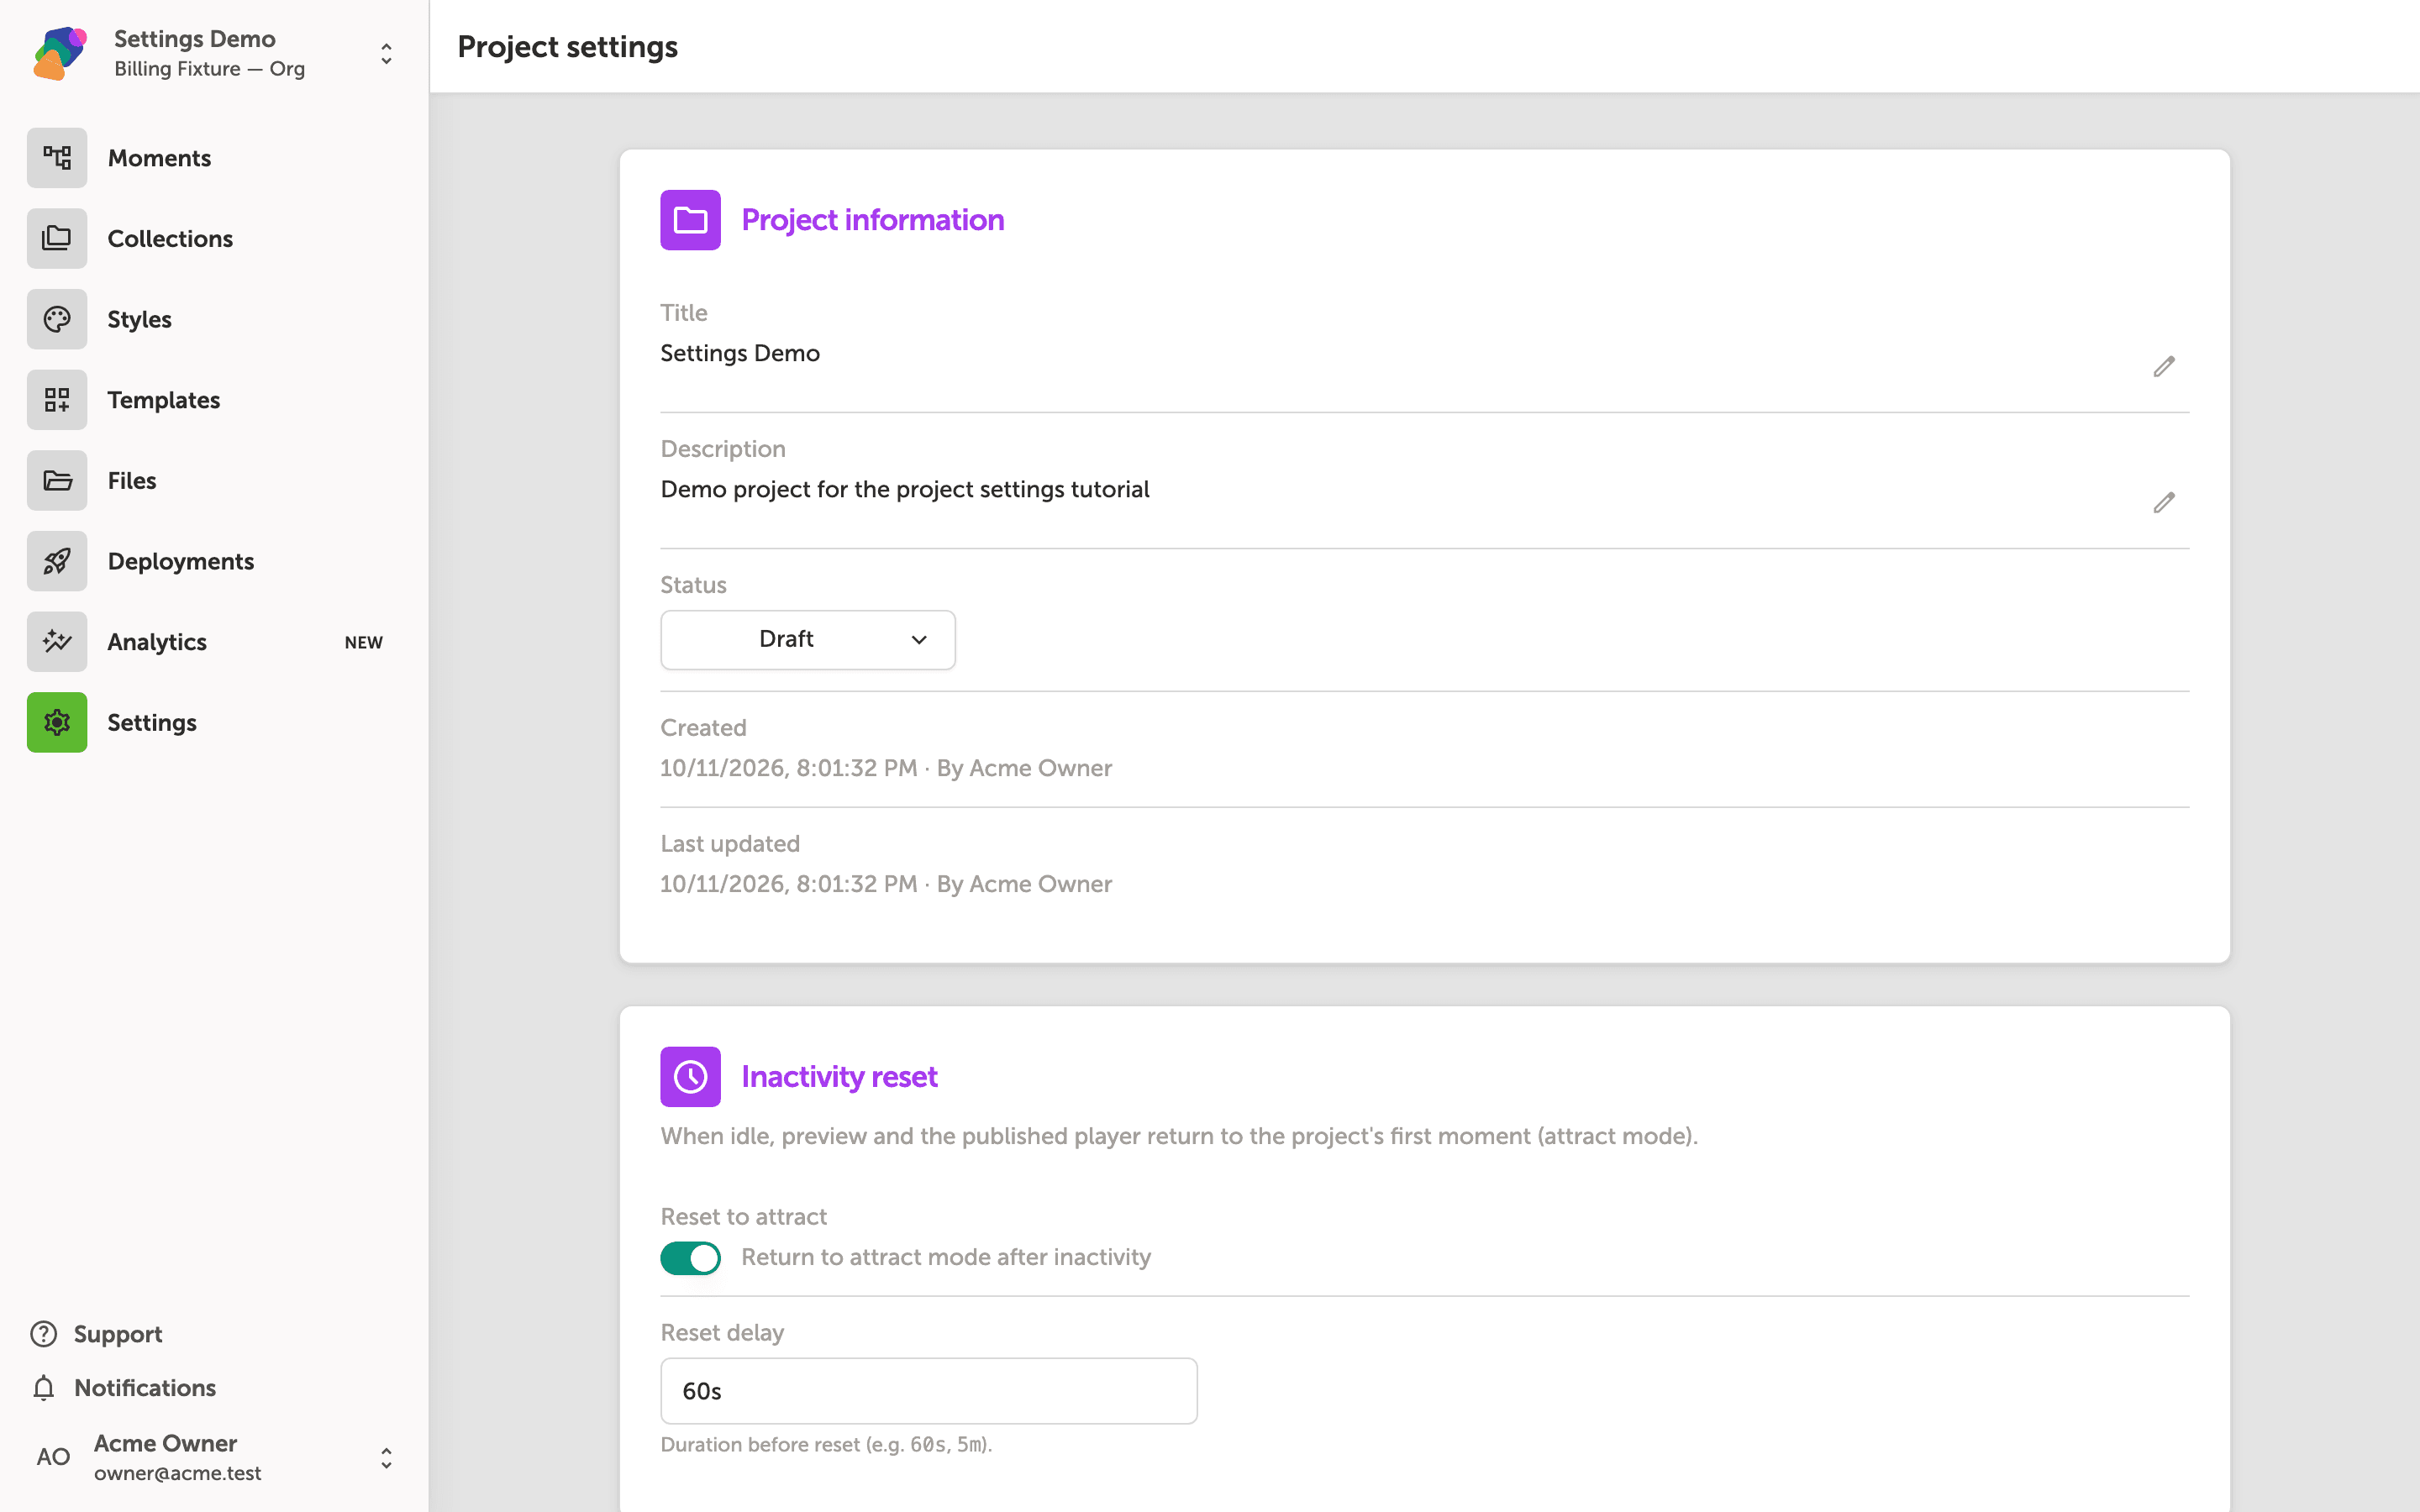
Editing the project title inline
Click the Title field under Project information to edit it directly—no separate dialog opens. Type your new name and click the check button to confirm, or close to discard the change.
The Description and Status fields sit just below the title. To update the description, click the edit (pencil) icon beside it. Use the Status dropdown to switch the project between Draft and any other available states.
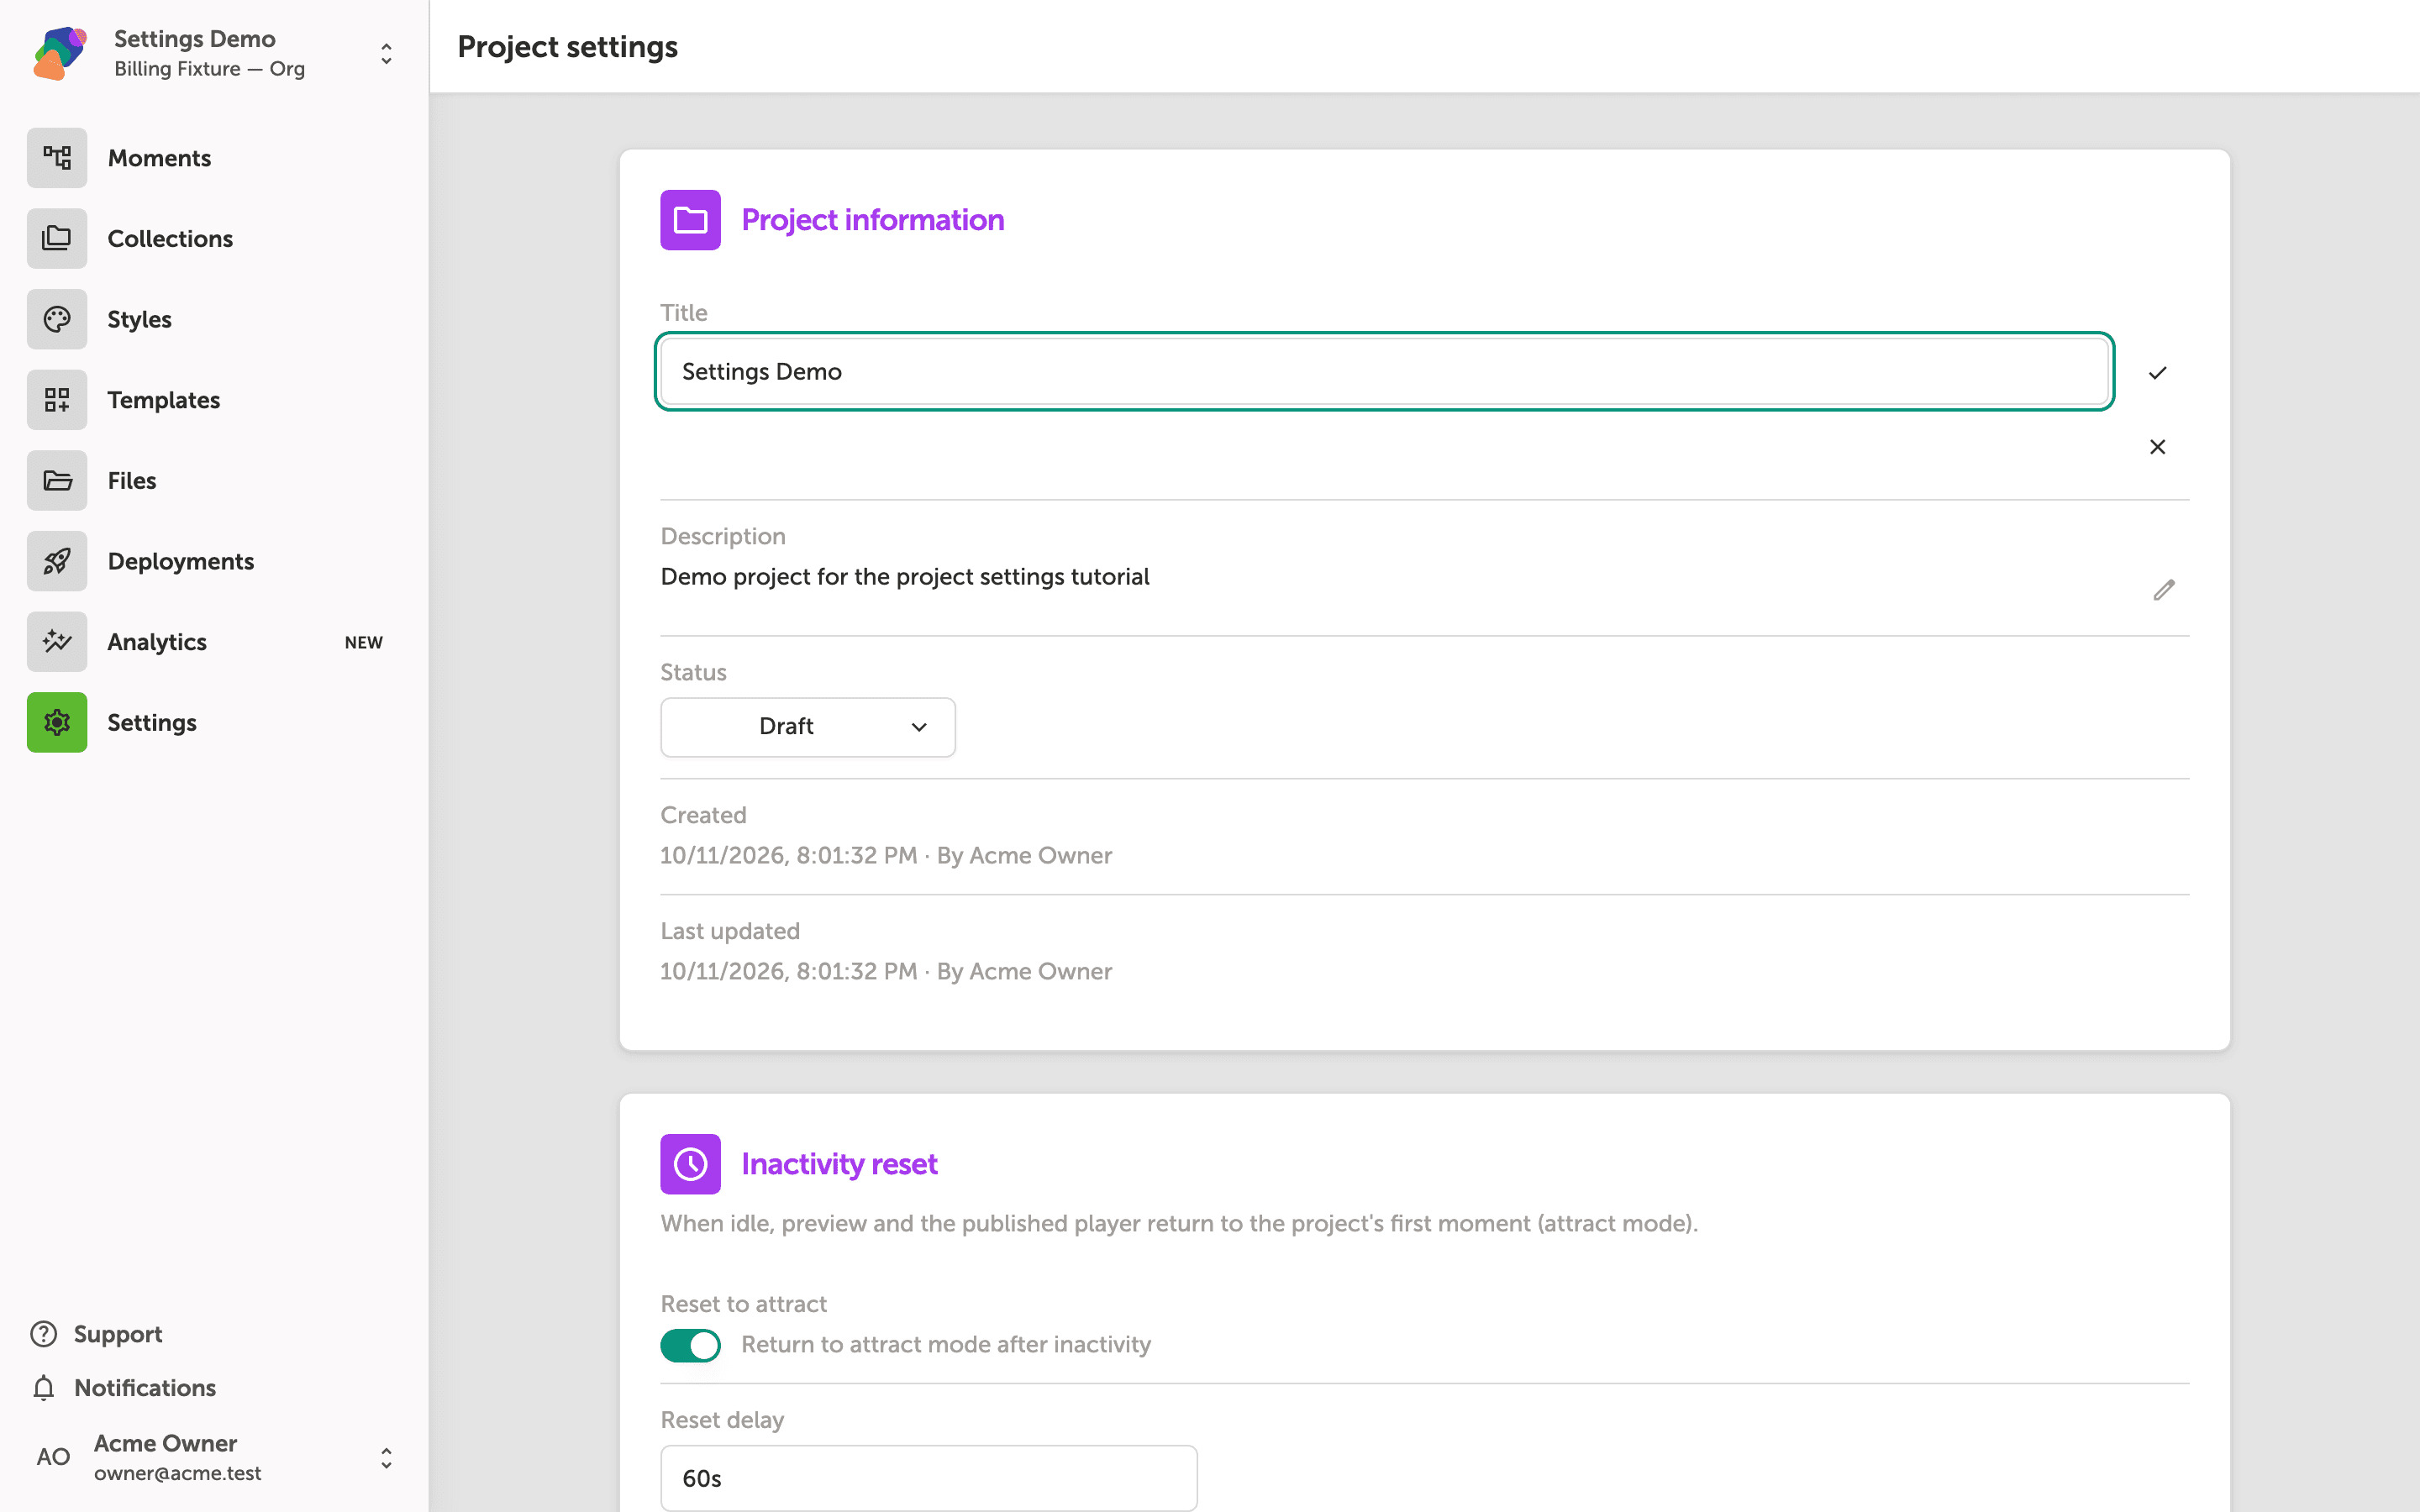
Reviewing project information and inactivity reset settings
The Project settings page collects all configuration for your project in one place. Under Project information, you can update the Title field inline—a checkmark confirms your save—and edit the Description using the pencil icon. The Status dropdown lets you mark the project as Draft or another state.
Below that, the Inactivity reset section controls what happens when a visitor stops interacting with a published kiosk. The Reset to attract toggle is currently on, and the Reset delay field is set to 60s, meaning the published player returns to attract mode after 60 seconds of inactivity. This setting has no effect in authoring preview—it only applies to the live published player.
With your project settings in order, you're ready to move into the deeper work of shaping your experience. Here are some natural next steps to explore:
- Build out your moments—start adding and arranging the screens that make up your project's flow.
- Set up a style set—define the typography and colors that apply across your entire project.
- Configure your displays—add a second screen and edit name, size, and orientation.
- Link a collection—connect reusable data to power dynamic content inside your moments.
- Share your space—invite collaborators to your space so your team can work on projects together.