
Sharing a Project with Collaborators
This tutorial walks you through sharing a project with colleagues in your organization—from finding the right project on your dashboard to inviting people by name or email and reviewing who already has access. When you finish, you'll know how to grant access quickly and keep your collaborator list accurate as your team changes.
Finding your project on the My Projects dashboard
The My Projects page shows all the projects you have access to, grouped by space. Each project appears as a card with its name, a collaborator count, and a more_horiz (three-dot) menu button in the bottom-right corner.
To start sharing a project, locate the card you want to share and click its ⋯ menu button—labeled "Project actions" for that project. This opens the options you need to manage collaborators.
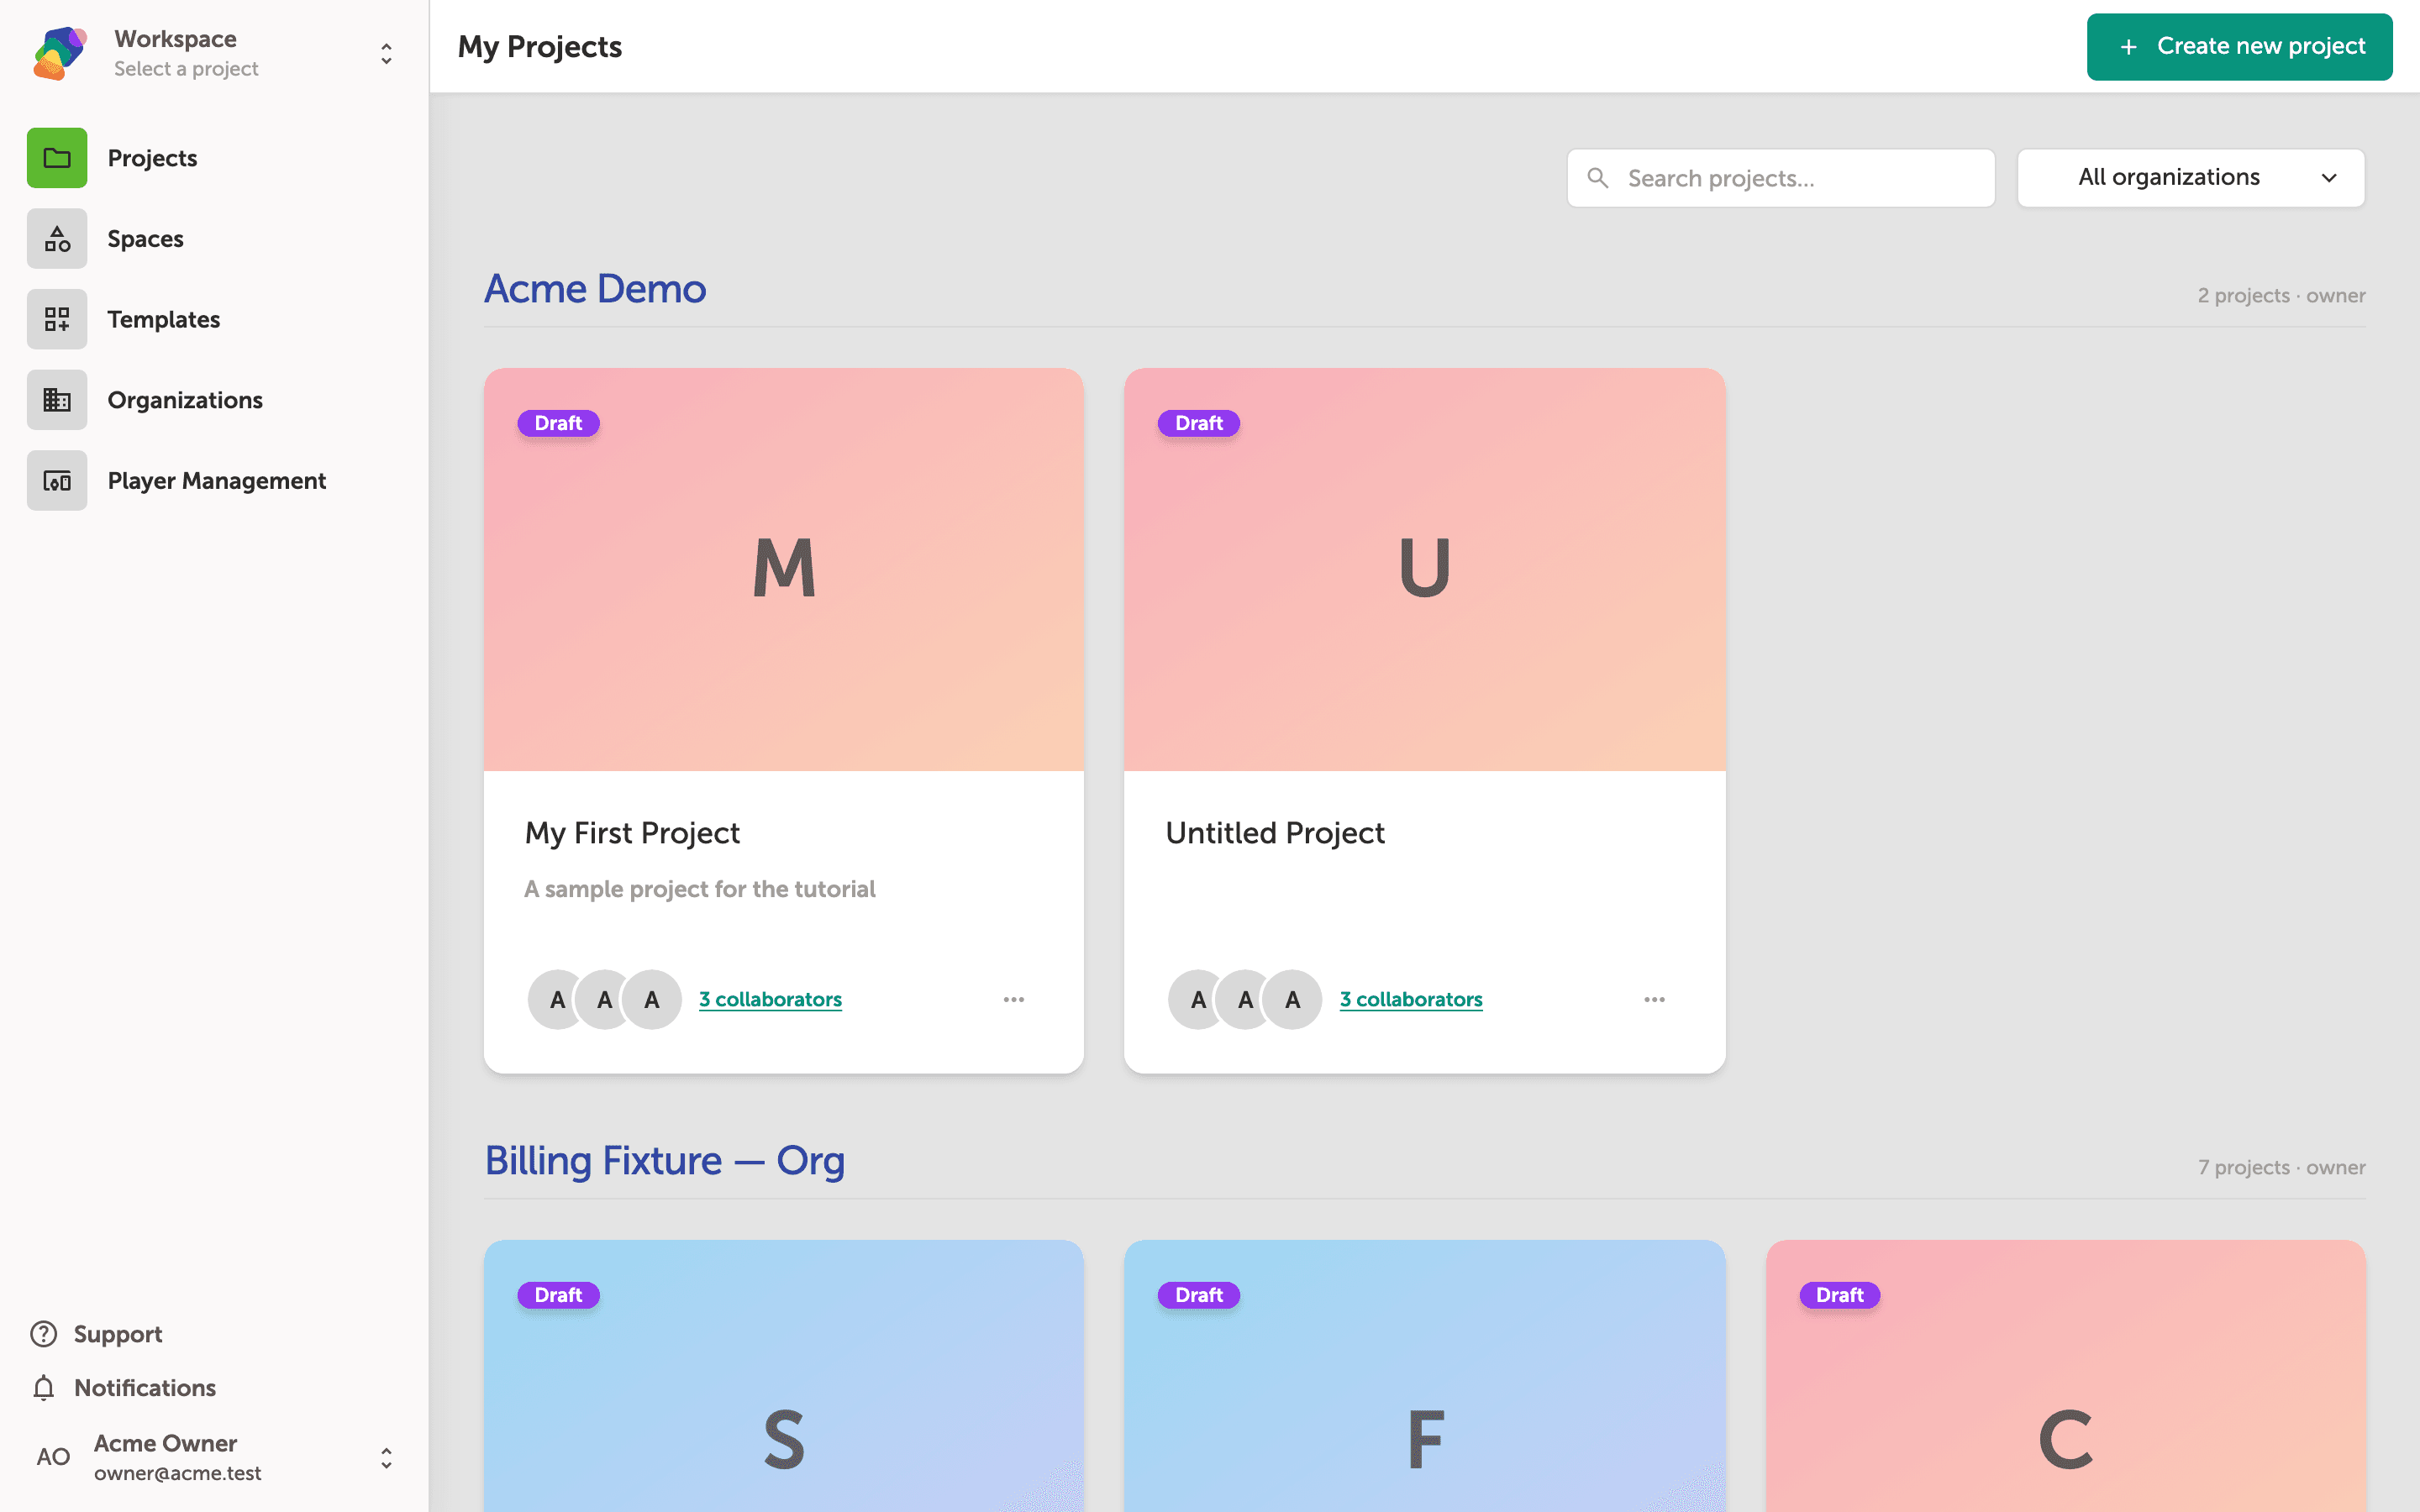
Opening the project card menu to access sharing options
Click the more_horiz (three-dot) button on any project card to open the project actions menu. You'll see options including Duplicate, Edit settings, Refresh thumbnail, Invite or manage..., Move to organization..., and Delete project....
To open the sharing panel, click Invite or manage.... This is the entry point for adding collaborators to your project.
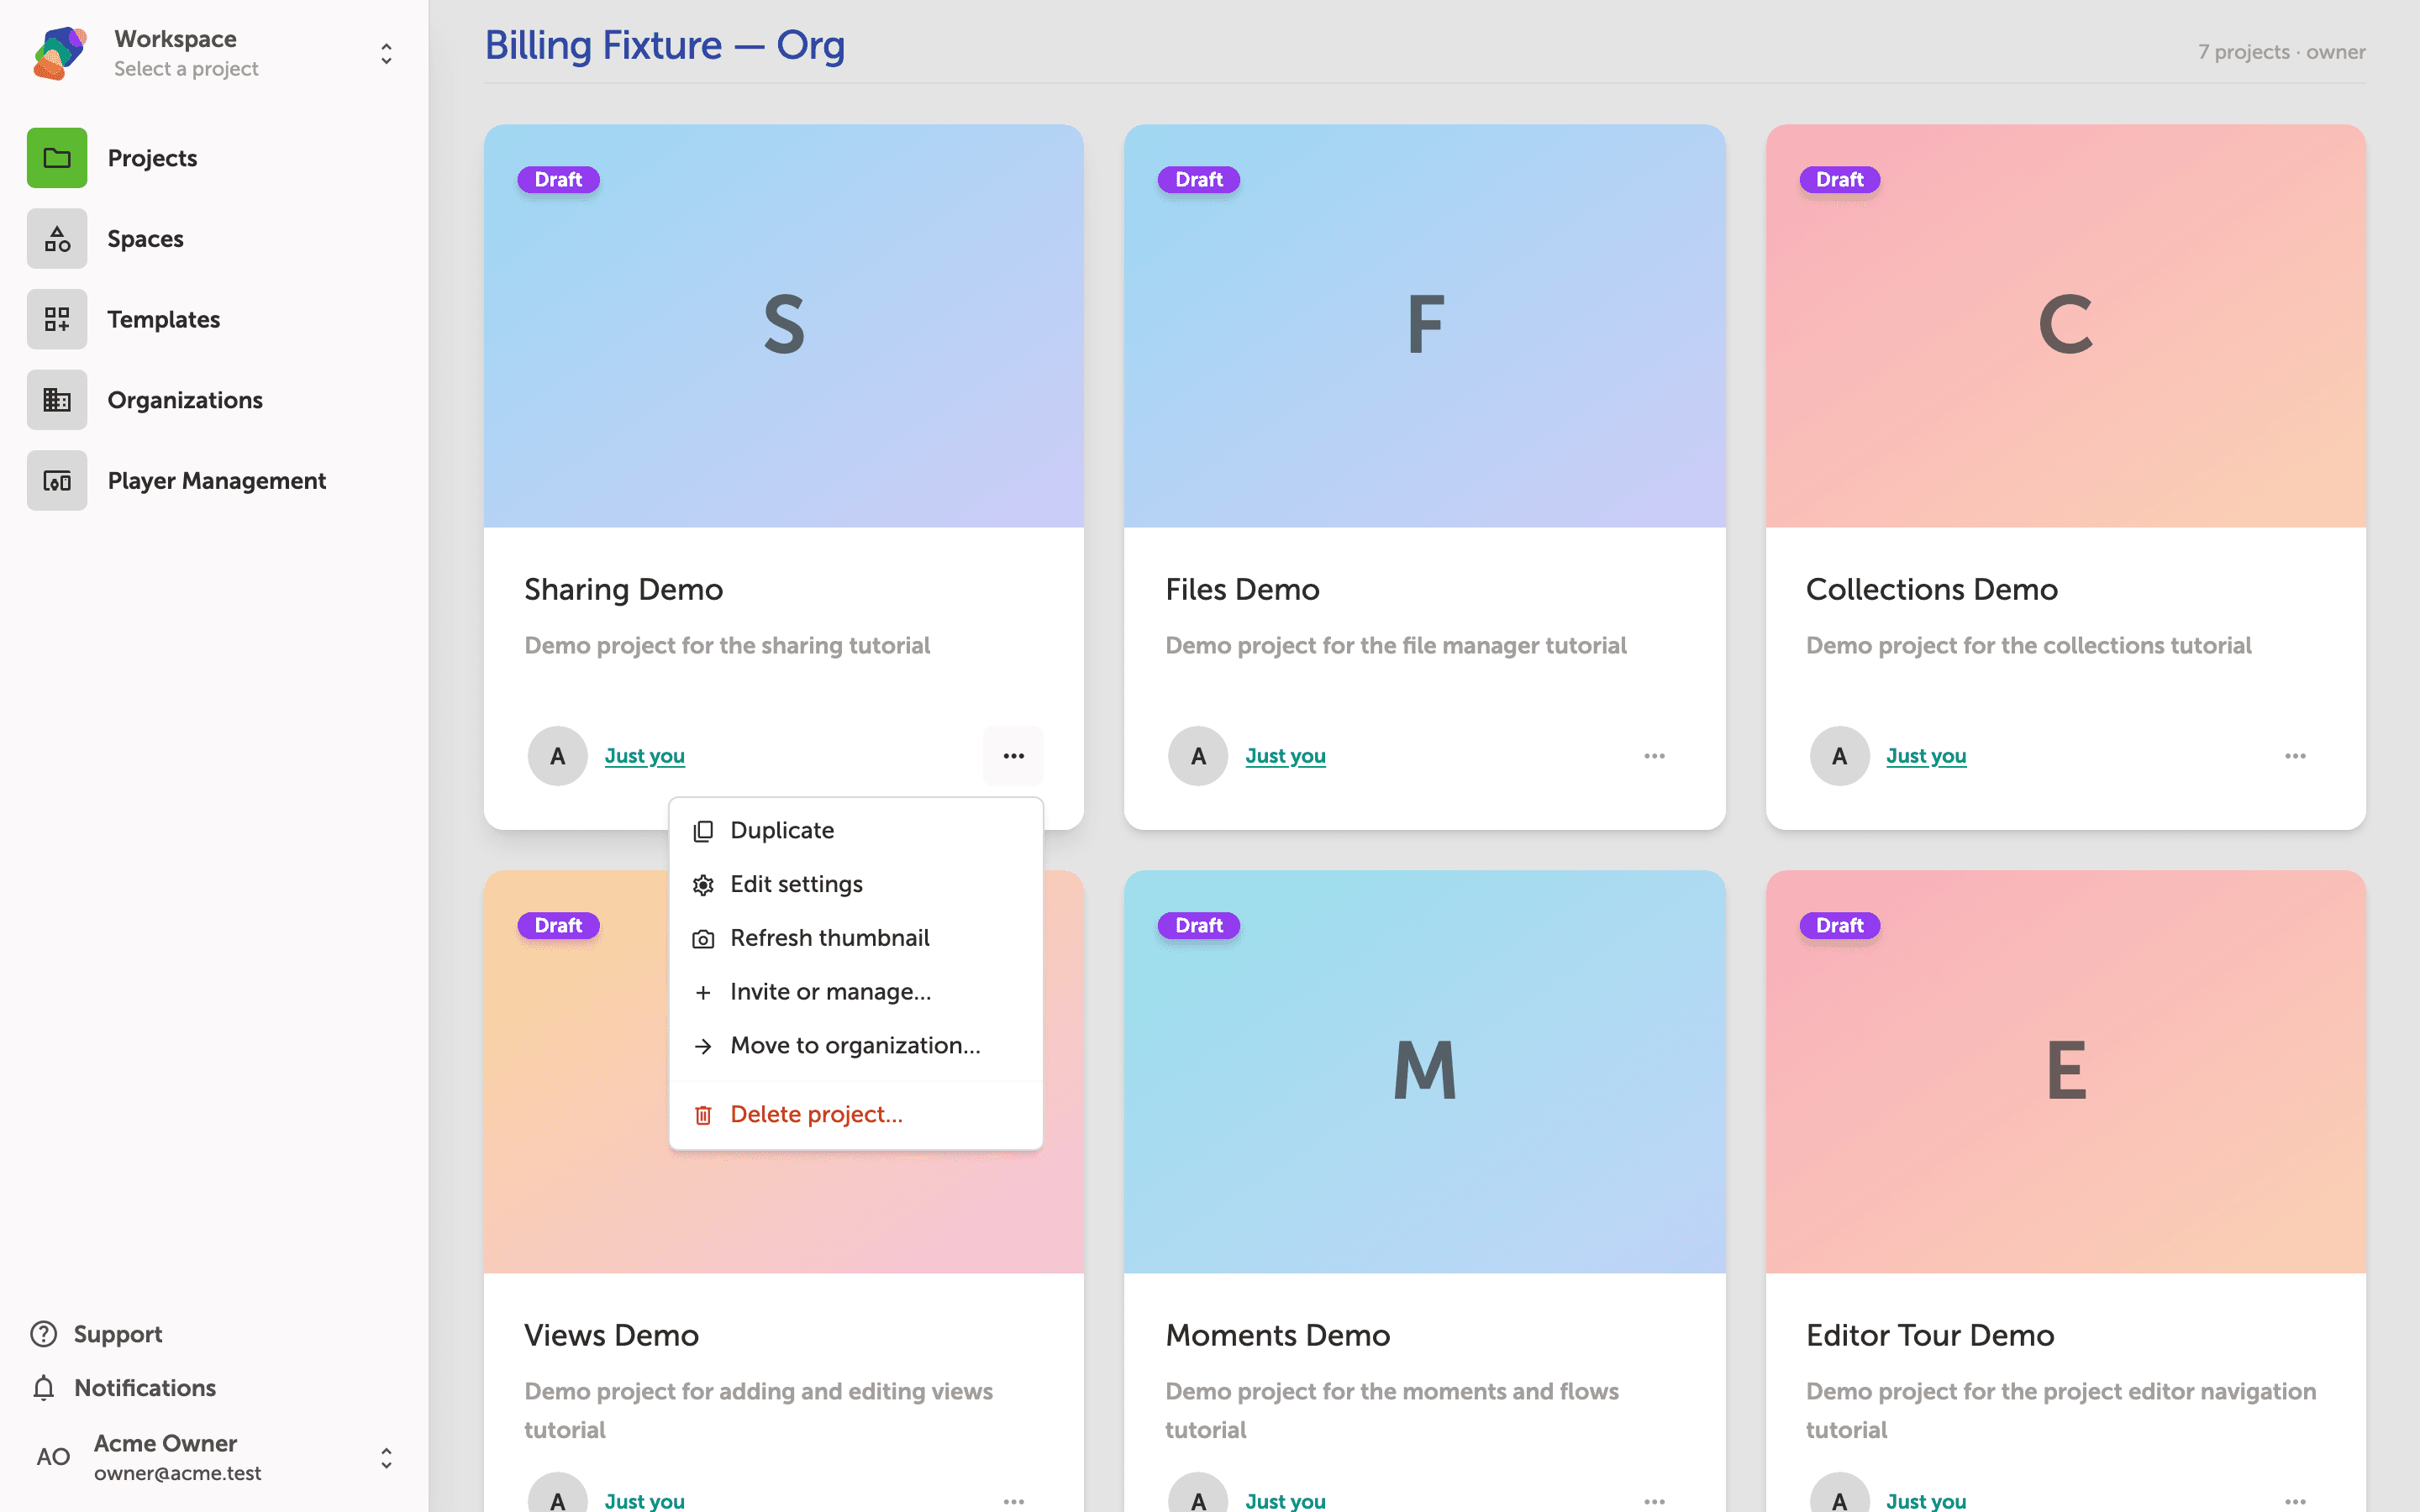
The Share dialog for inviting people and teams
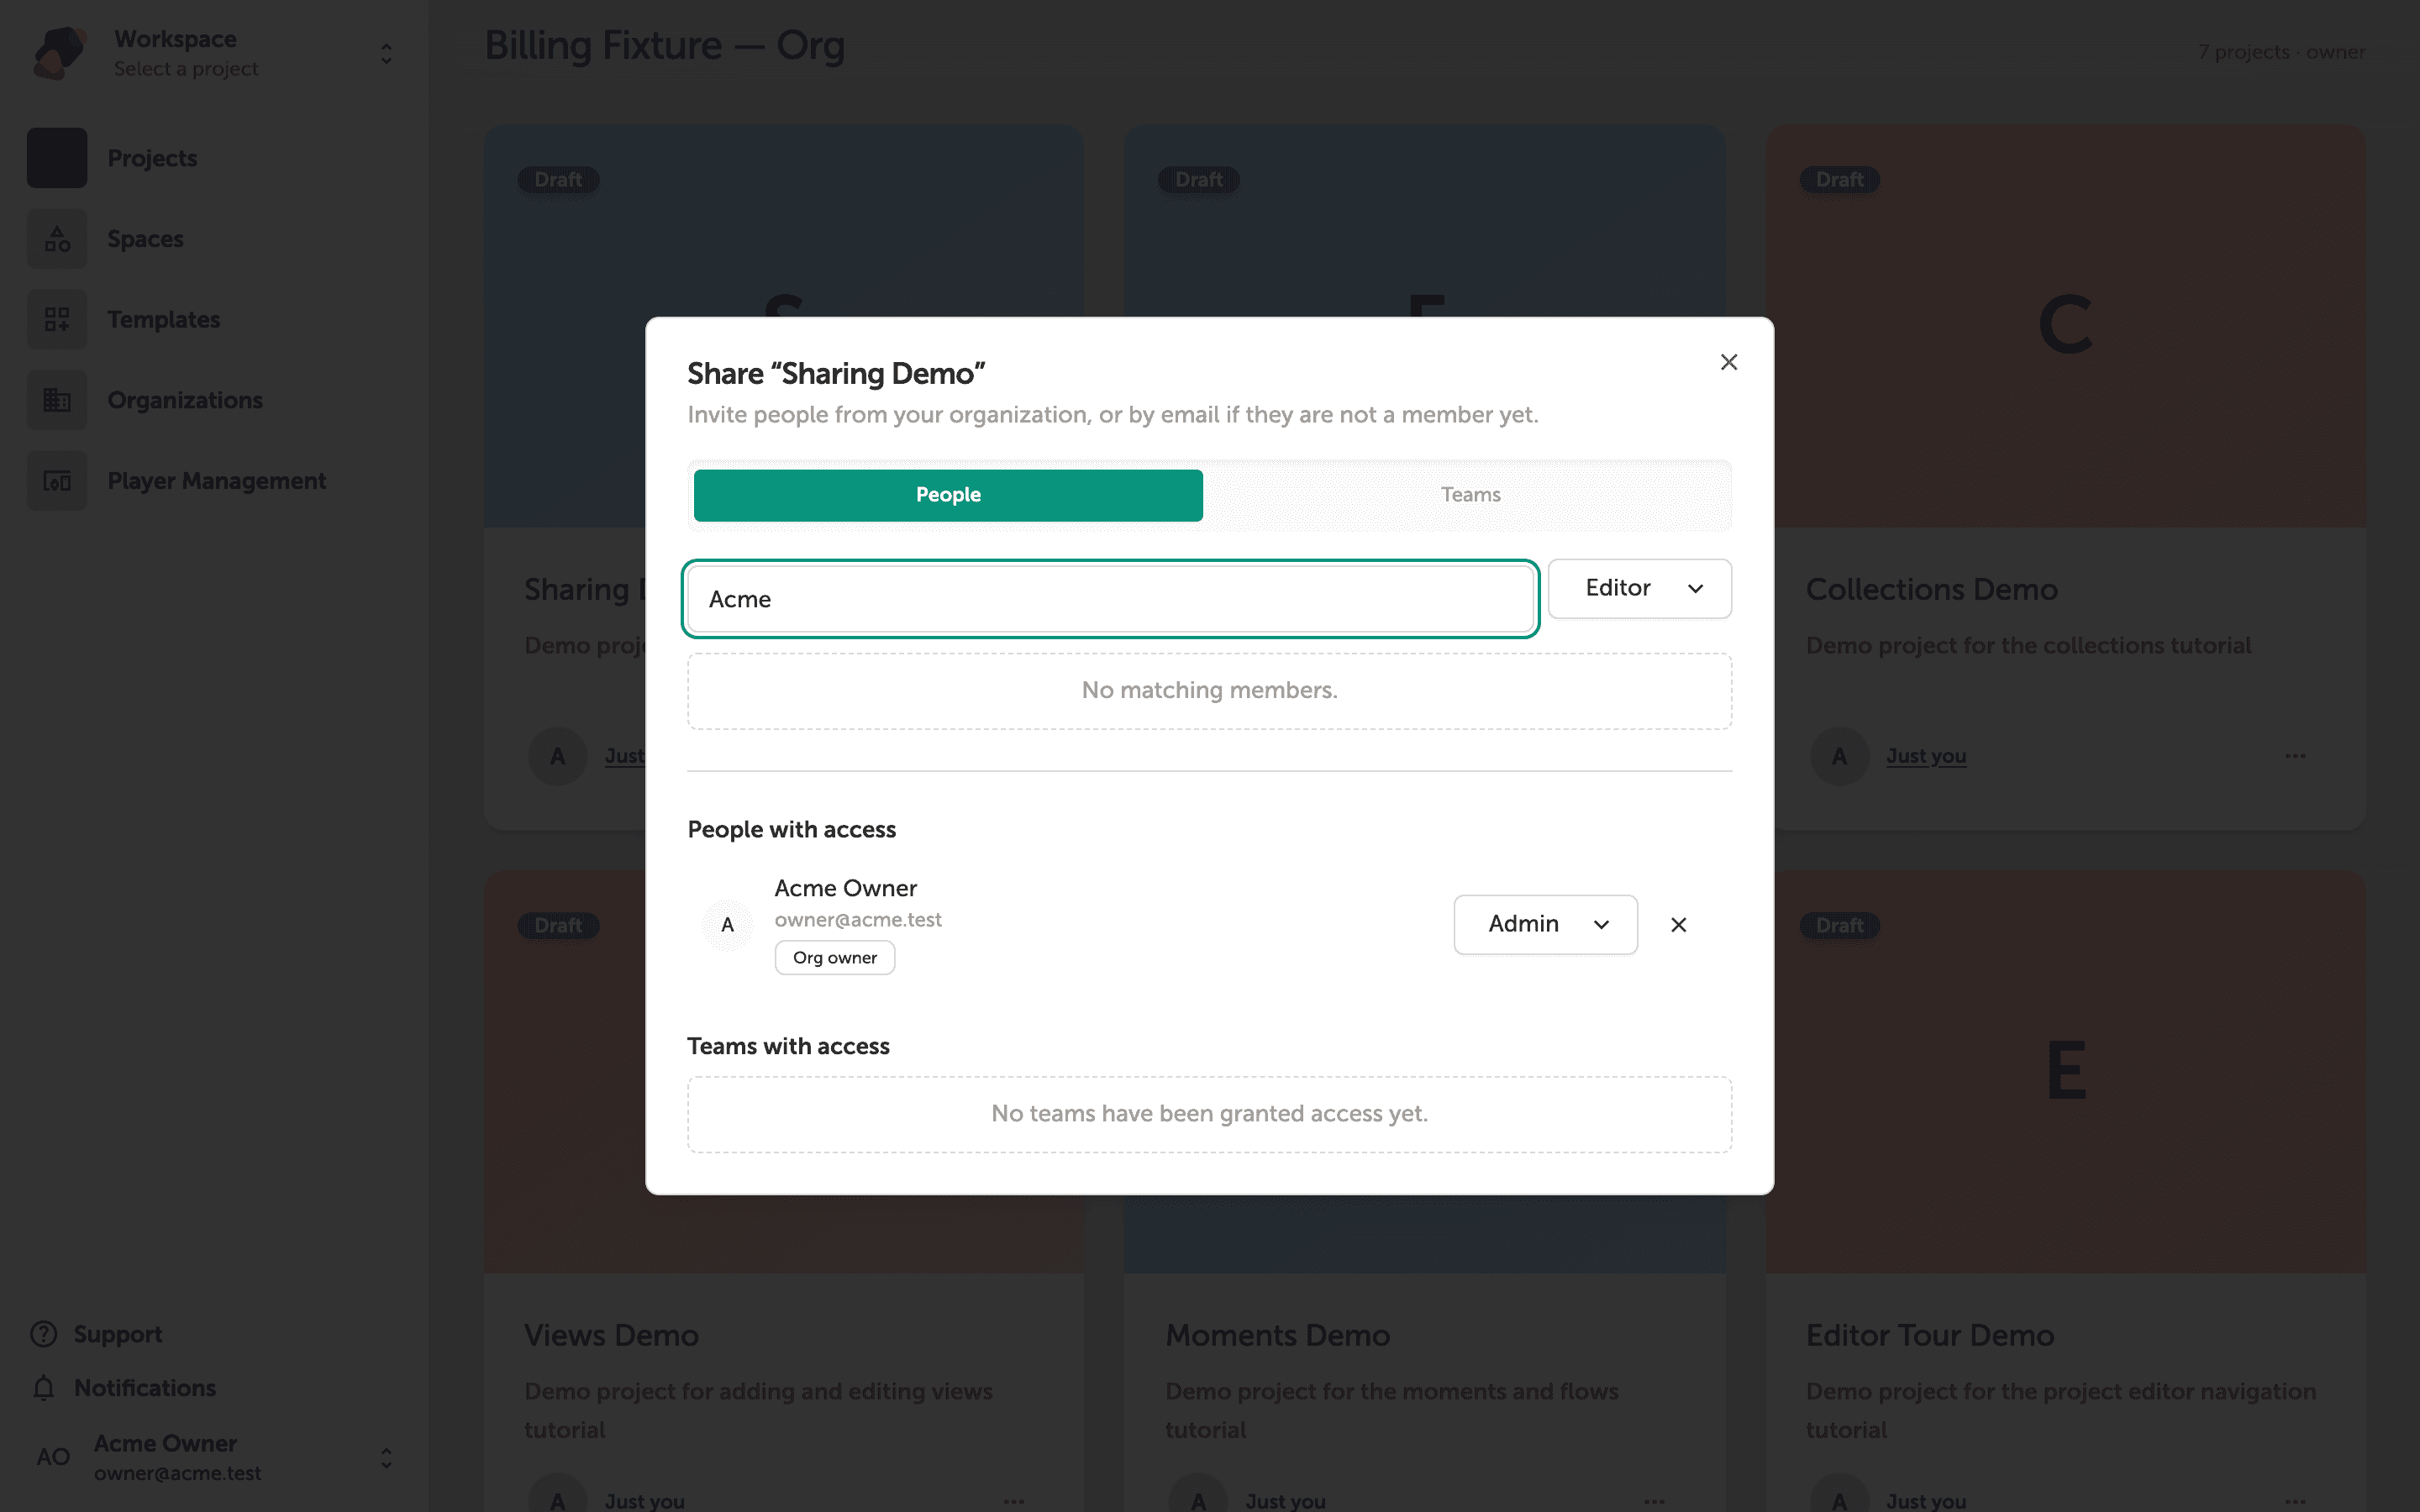
The Share "Sharing Demo" dialog gives you two ways to grant access: the People tab (active by default) lets you invite individuals, and the Teams tab lets you grant access to an entire team at once.
To invite someone, type their name or email address into the Search by name or email field. Use the Editor dropdown next to the search field to set their permission level before you send the invite. Below the search area, the People with access and Teams with access sections will list everyone who already has access to this project once they finish loading.
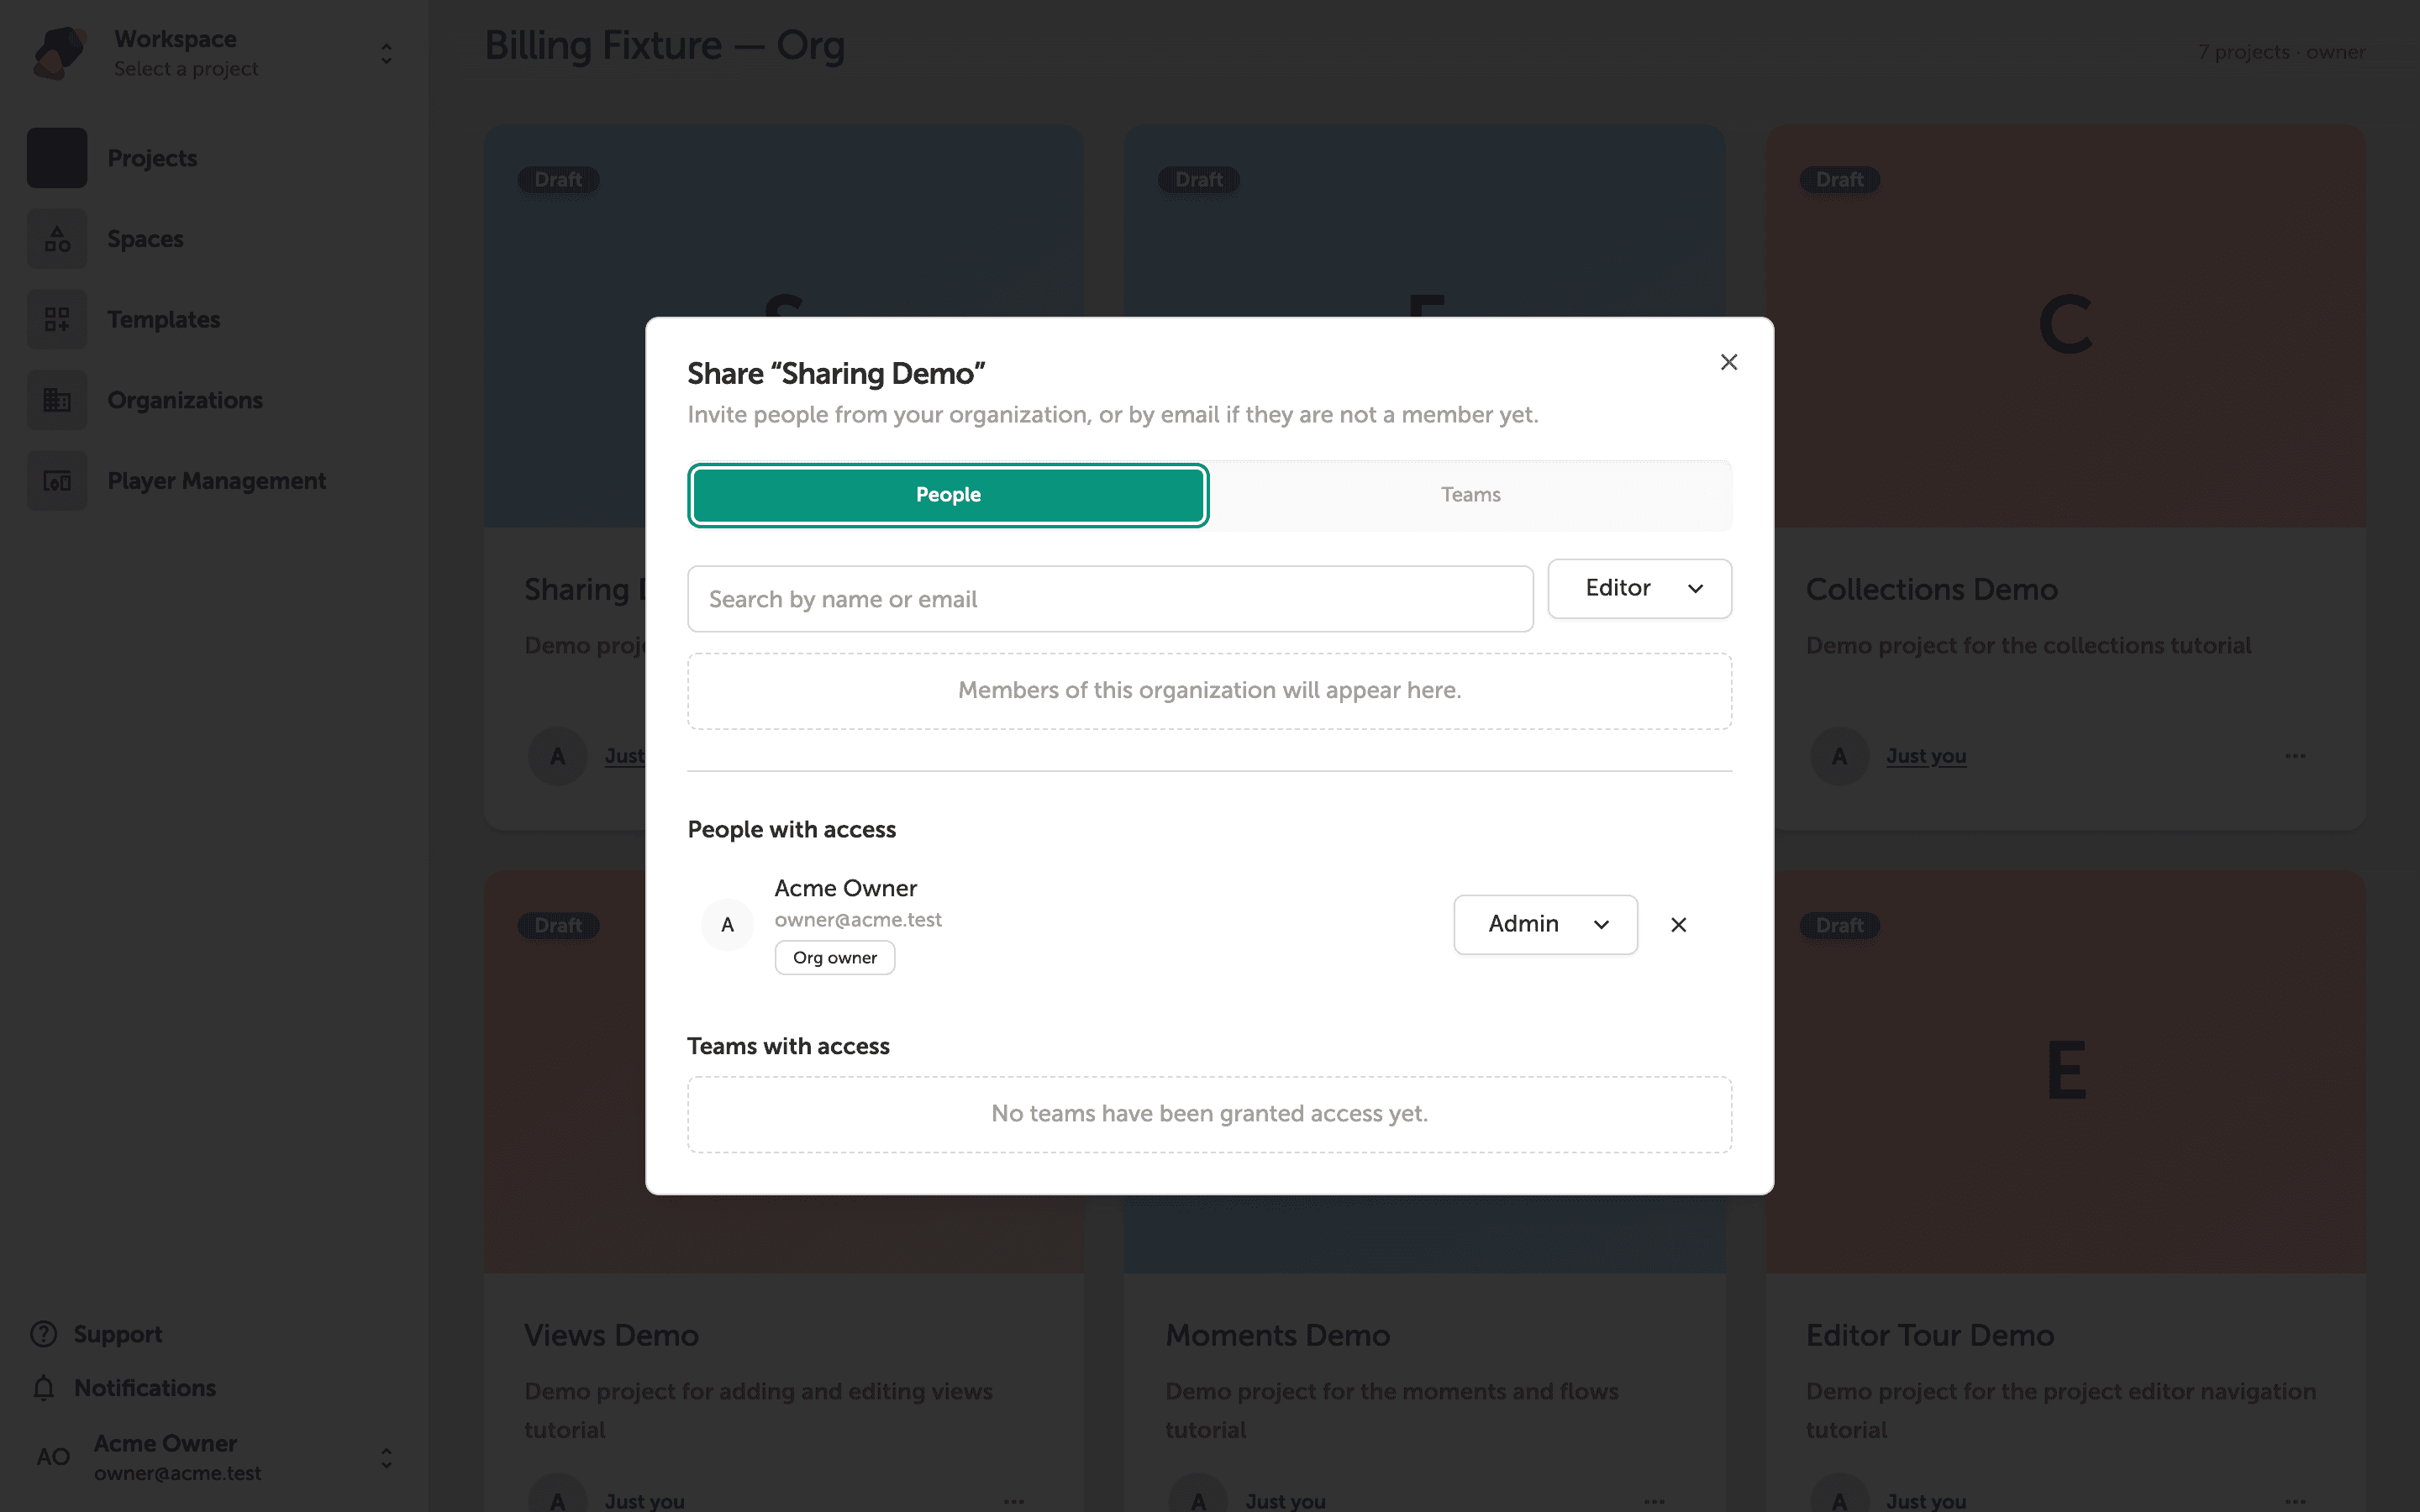
Searching for a member by name or email
Type a name or email address into the Search by name or email field. Zibit searches your organization's members as you type and displays matches in the dropdown below the field.
The role dropdown next to the search field is set to Editor by default. You can change it before selecting a person if you want to grant a different level of access. The People with access and Teams with access sections below will update once the results finish loading.
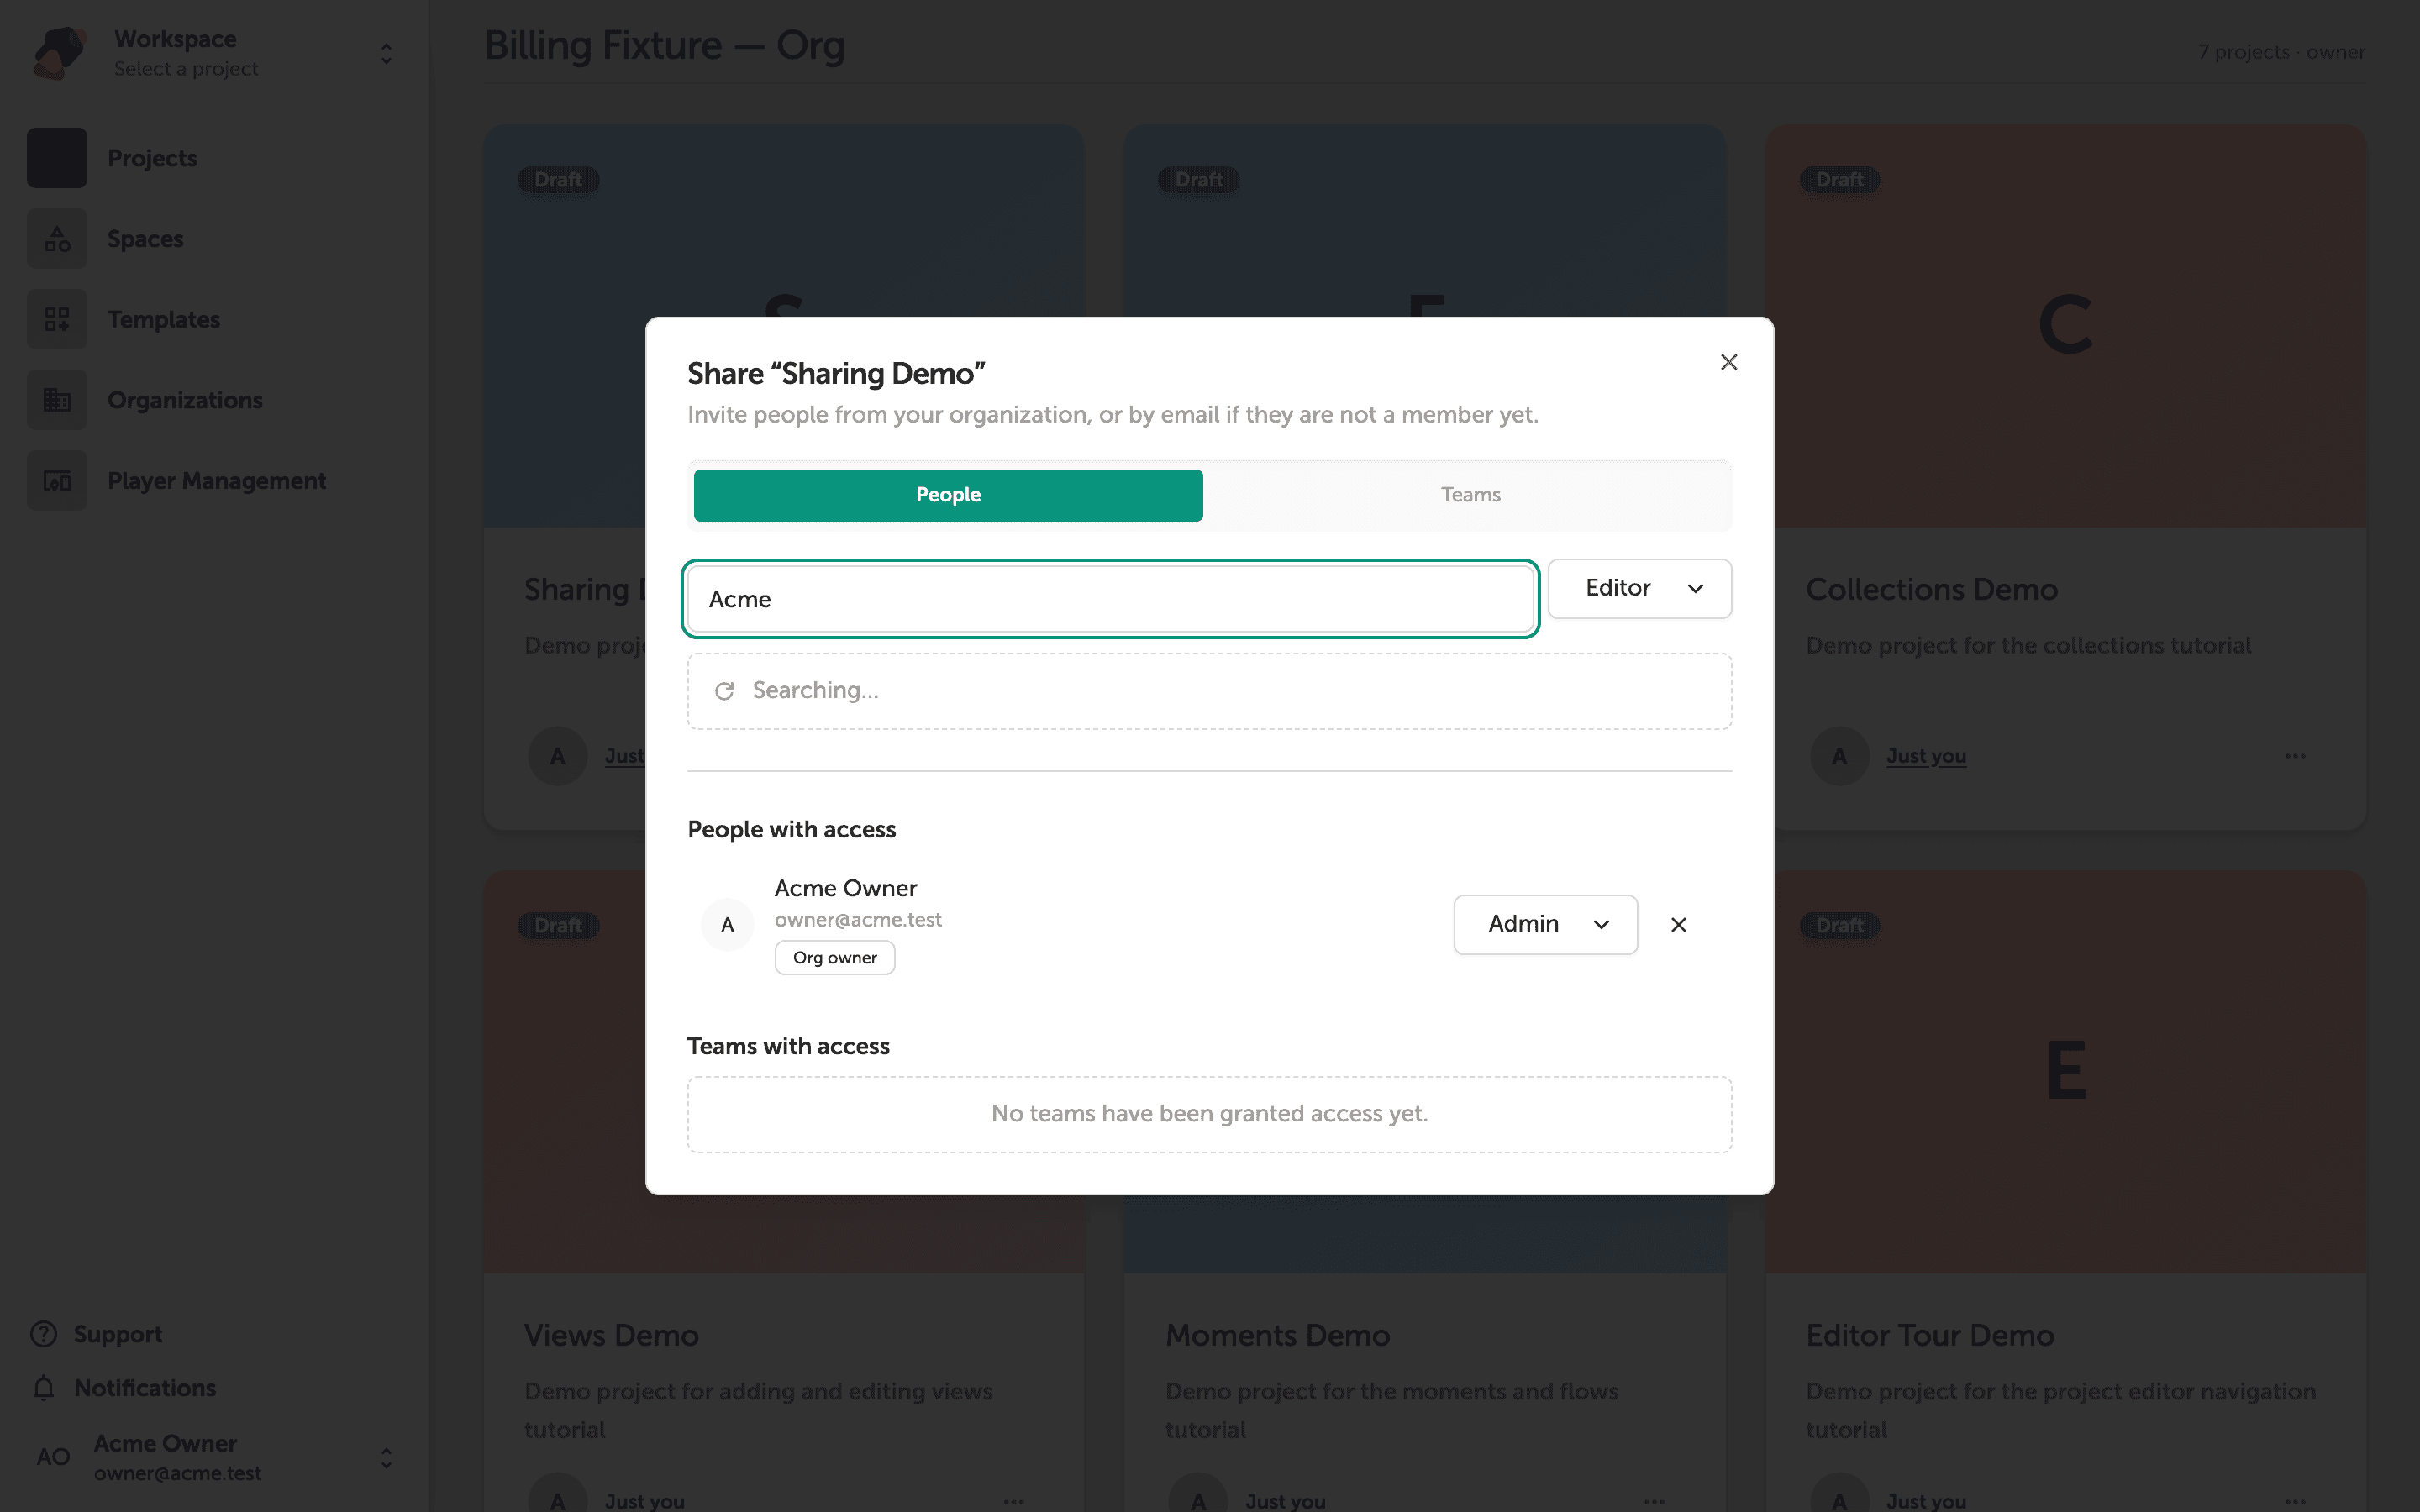
Reviewing who currently has access to the project
The Share "Sharing Demo" dialog shows two sections below the search field: People with access and Teams with access. Once they finish loading, these lists display every individual and team that has been granted access, along with their assigned role. You can use the Editor dropdown next to the search field to set the role for anyone you are about to invite.
The People and Teams tabs at the top let you switch between managing individual collaborators and team-level grants. Use these sections to audit access at any time—for example, to confirm that a new gallery colleague has the right role before a kiosk goes live.
With sharing set up, your team can work on the project together without stepping on each other's contributions. From here, you might explore how roles affect what collaborators can edit, or how to organize related projects so the right people always have access.
- Adjust collaborator roles—learn the difference between viewer, editor, and admin access and when to use each.
- Organize projects into spaces—group related projects so your whole team has a shared home base.
- Duplicate a project—create a working copy to experiment without affecting what collaborators see.
- Archive a project—keep your dashboard tidy when a project wraps up, without deleting any work.
- Transfer project ownership—hand off a project to another team member when your role on the exhibit changes.