Understanding Moments and Flows
Every Zibit project is built from two core building blocks: moments, which are the individual screens a visitor sees, and flows, which define how navigation moves between them. By the end of this tutorial, you'll know how to read the graph view, add new moments, and use the moment card menu to manage your project's structure—giving you the foundation to design any multi-screen interactive experience, from a museum kiosk to a classroom station.
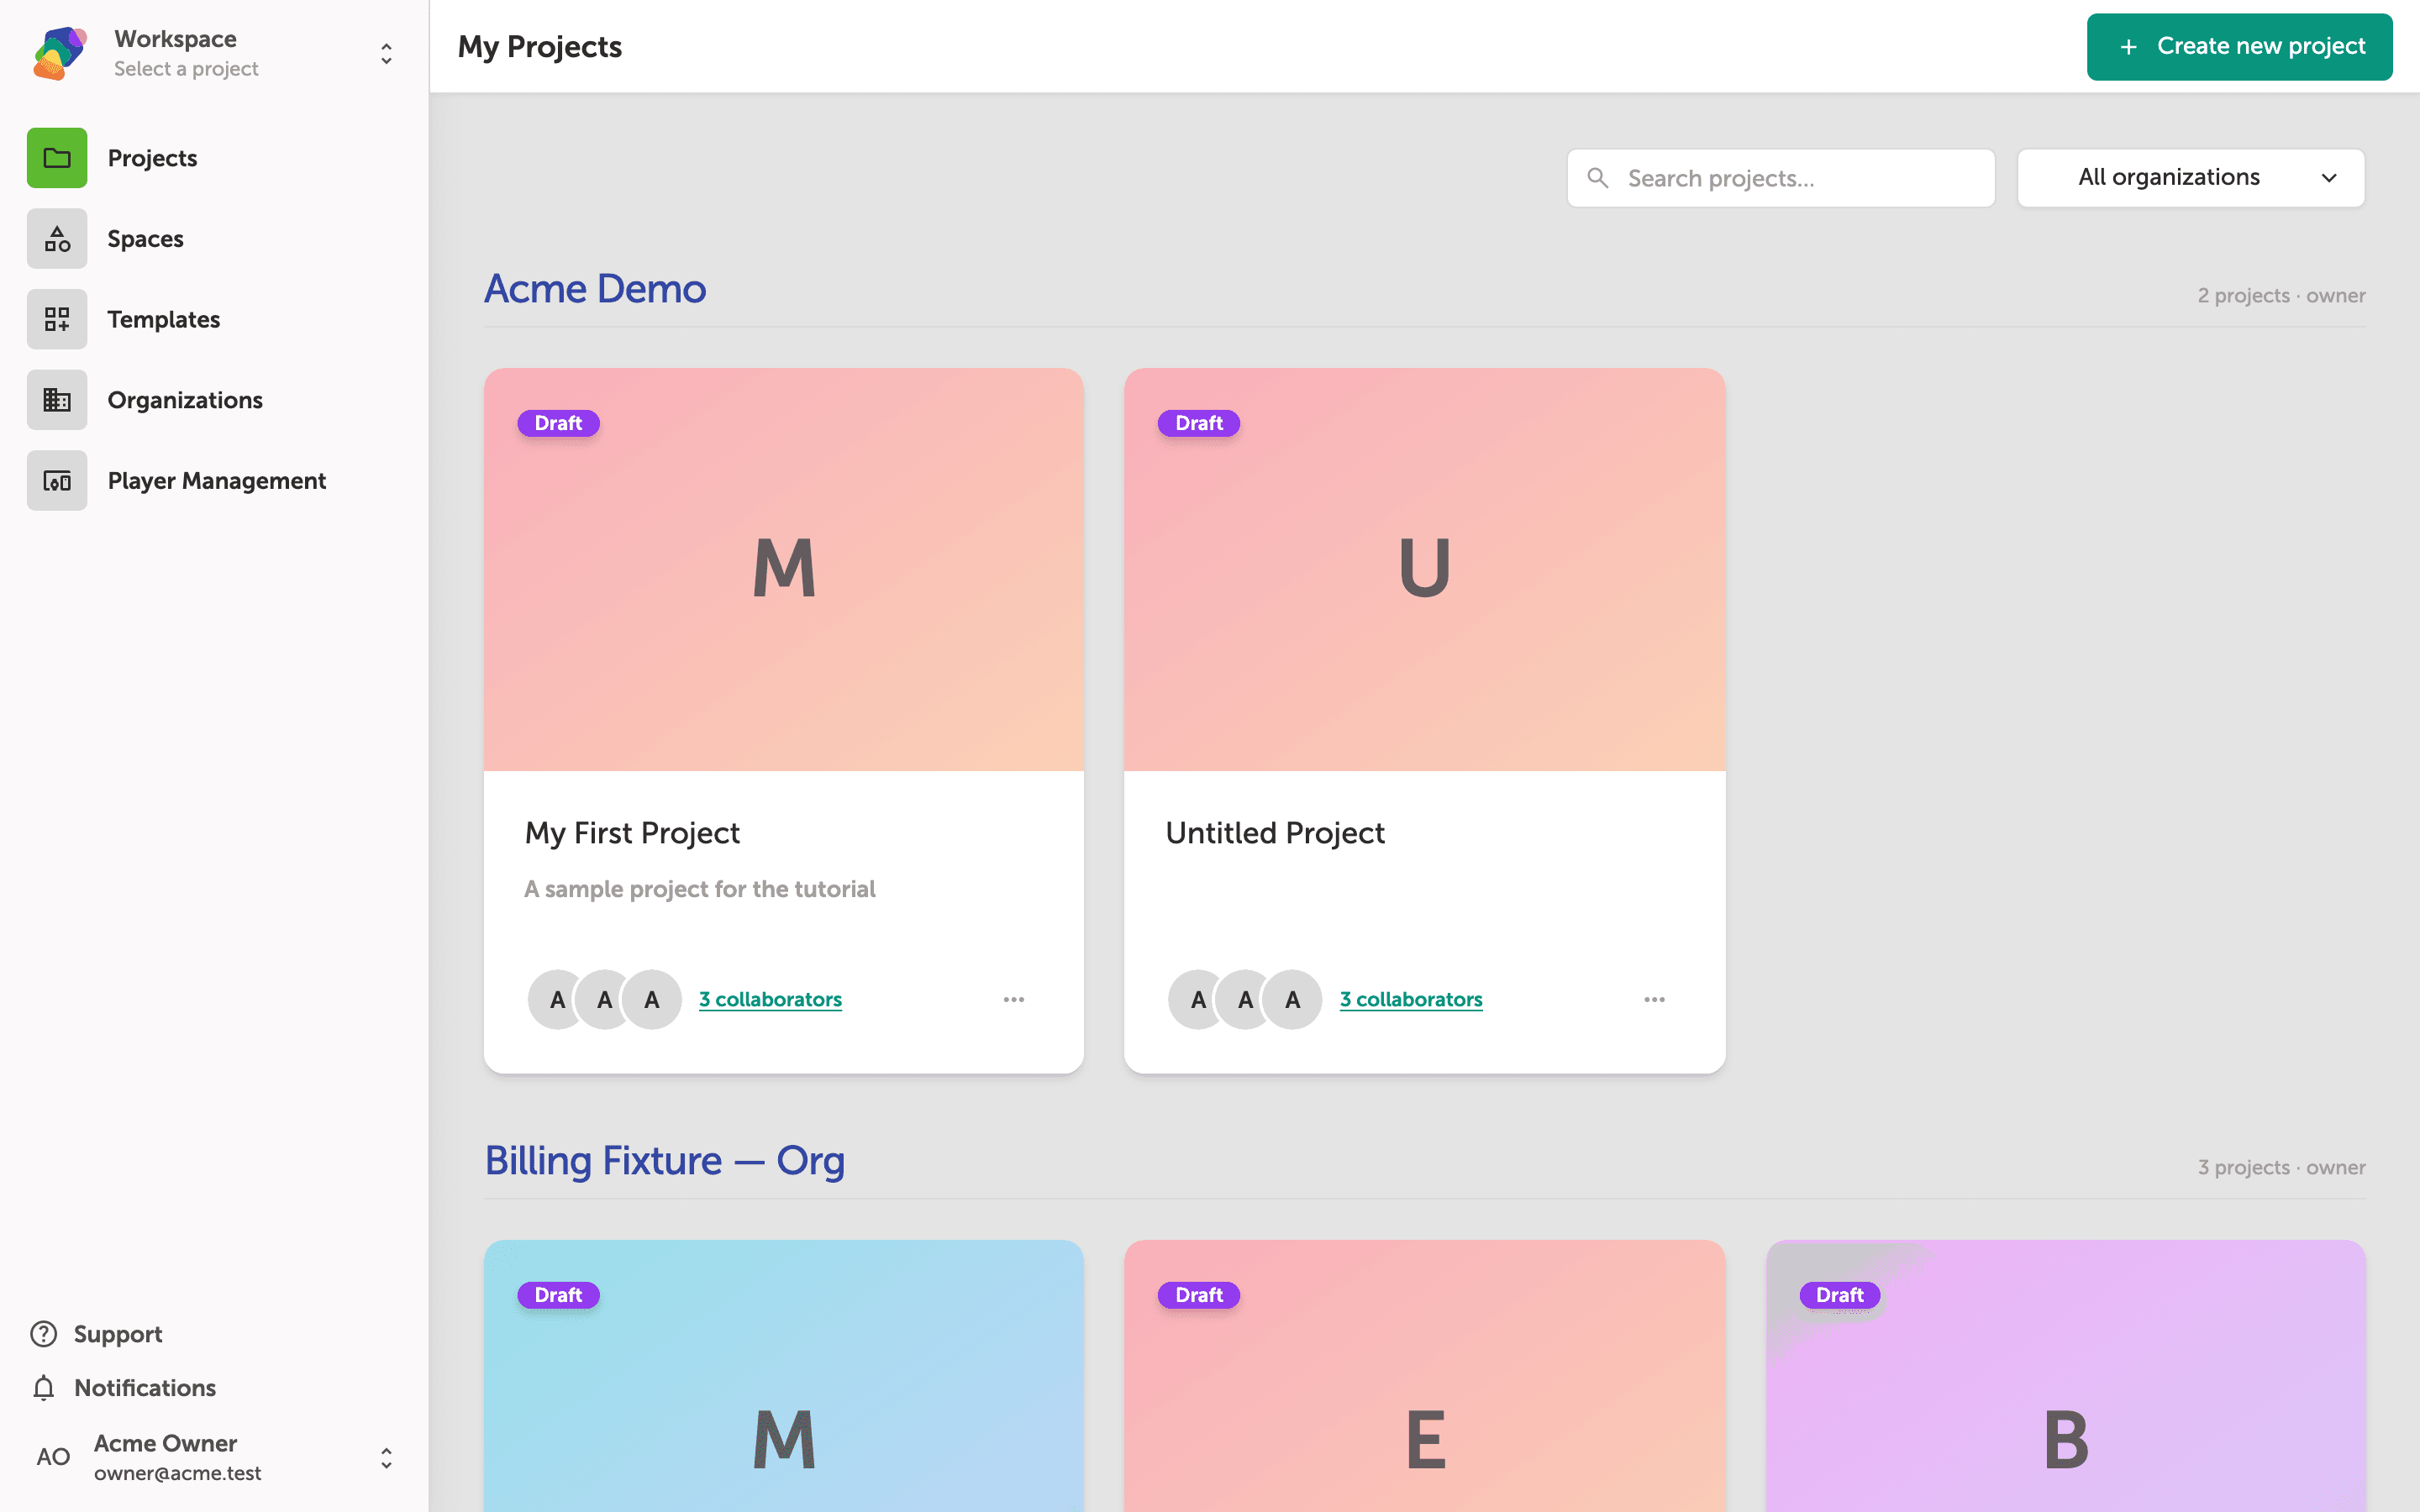
The My Projects dashboard is your starting point
The My Projects page shows every project you have access to, organized by space. Each project card displays its name, status badge (such as Draft), and collaborators. From here you can open an existing project or create a new one using Create new project in the top-right corner.
For this tutorial, you'll open an existing project to explore how moments and flows work inside it. Find the project you want to work with and click its card to open it.
The Moments graph shows your project's structure at a glance
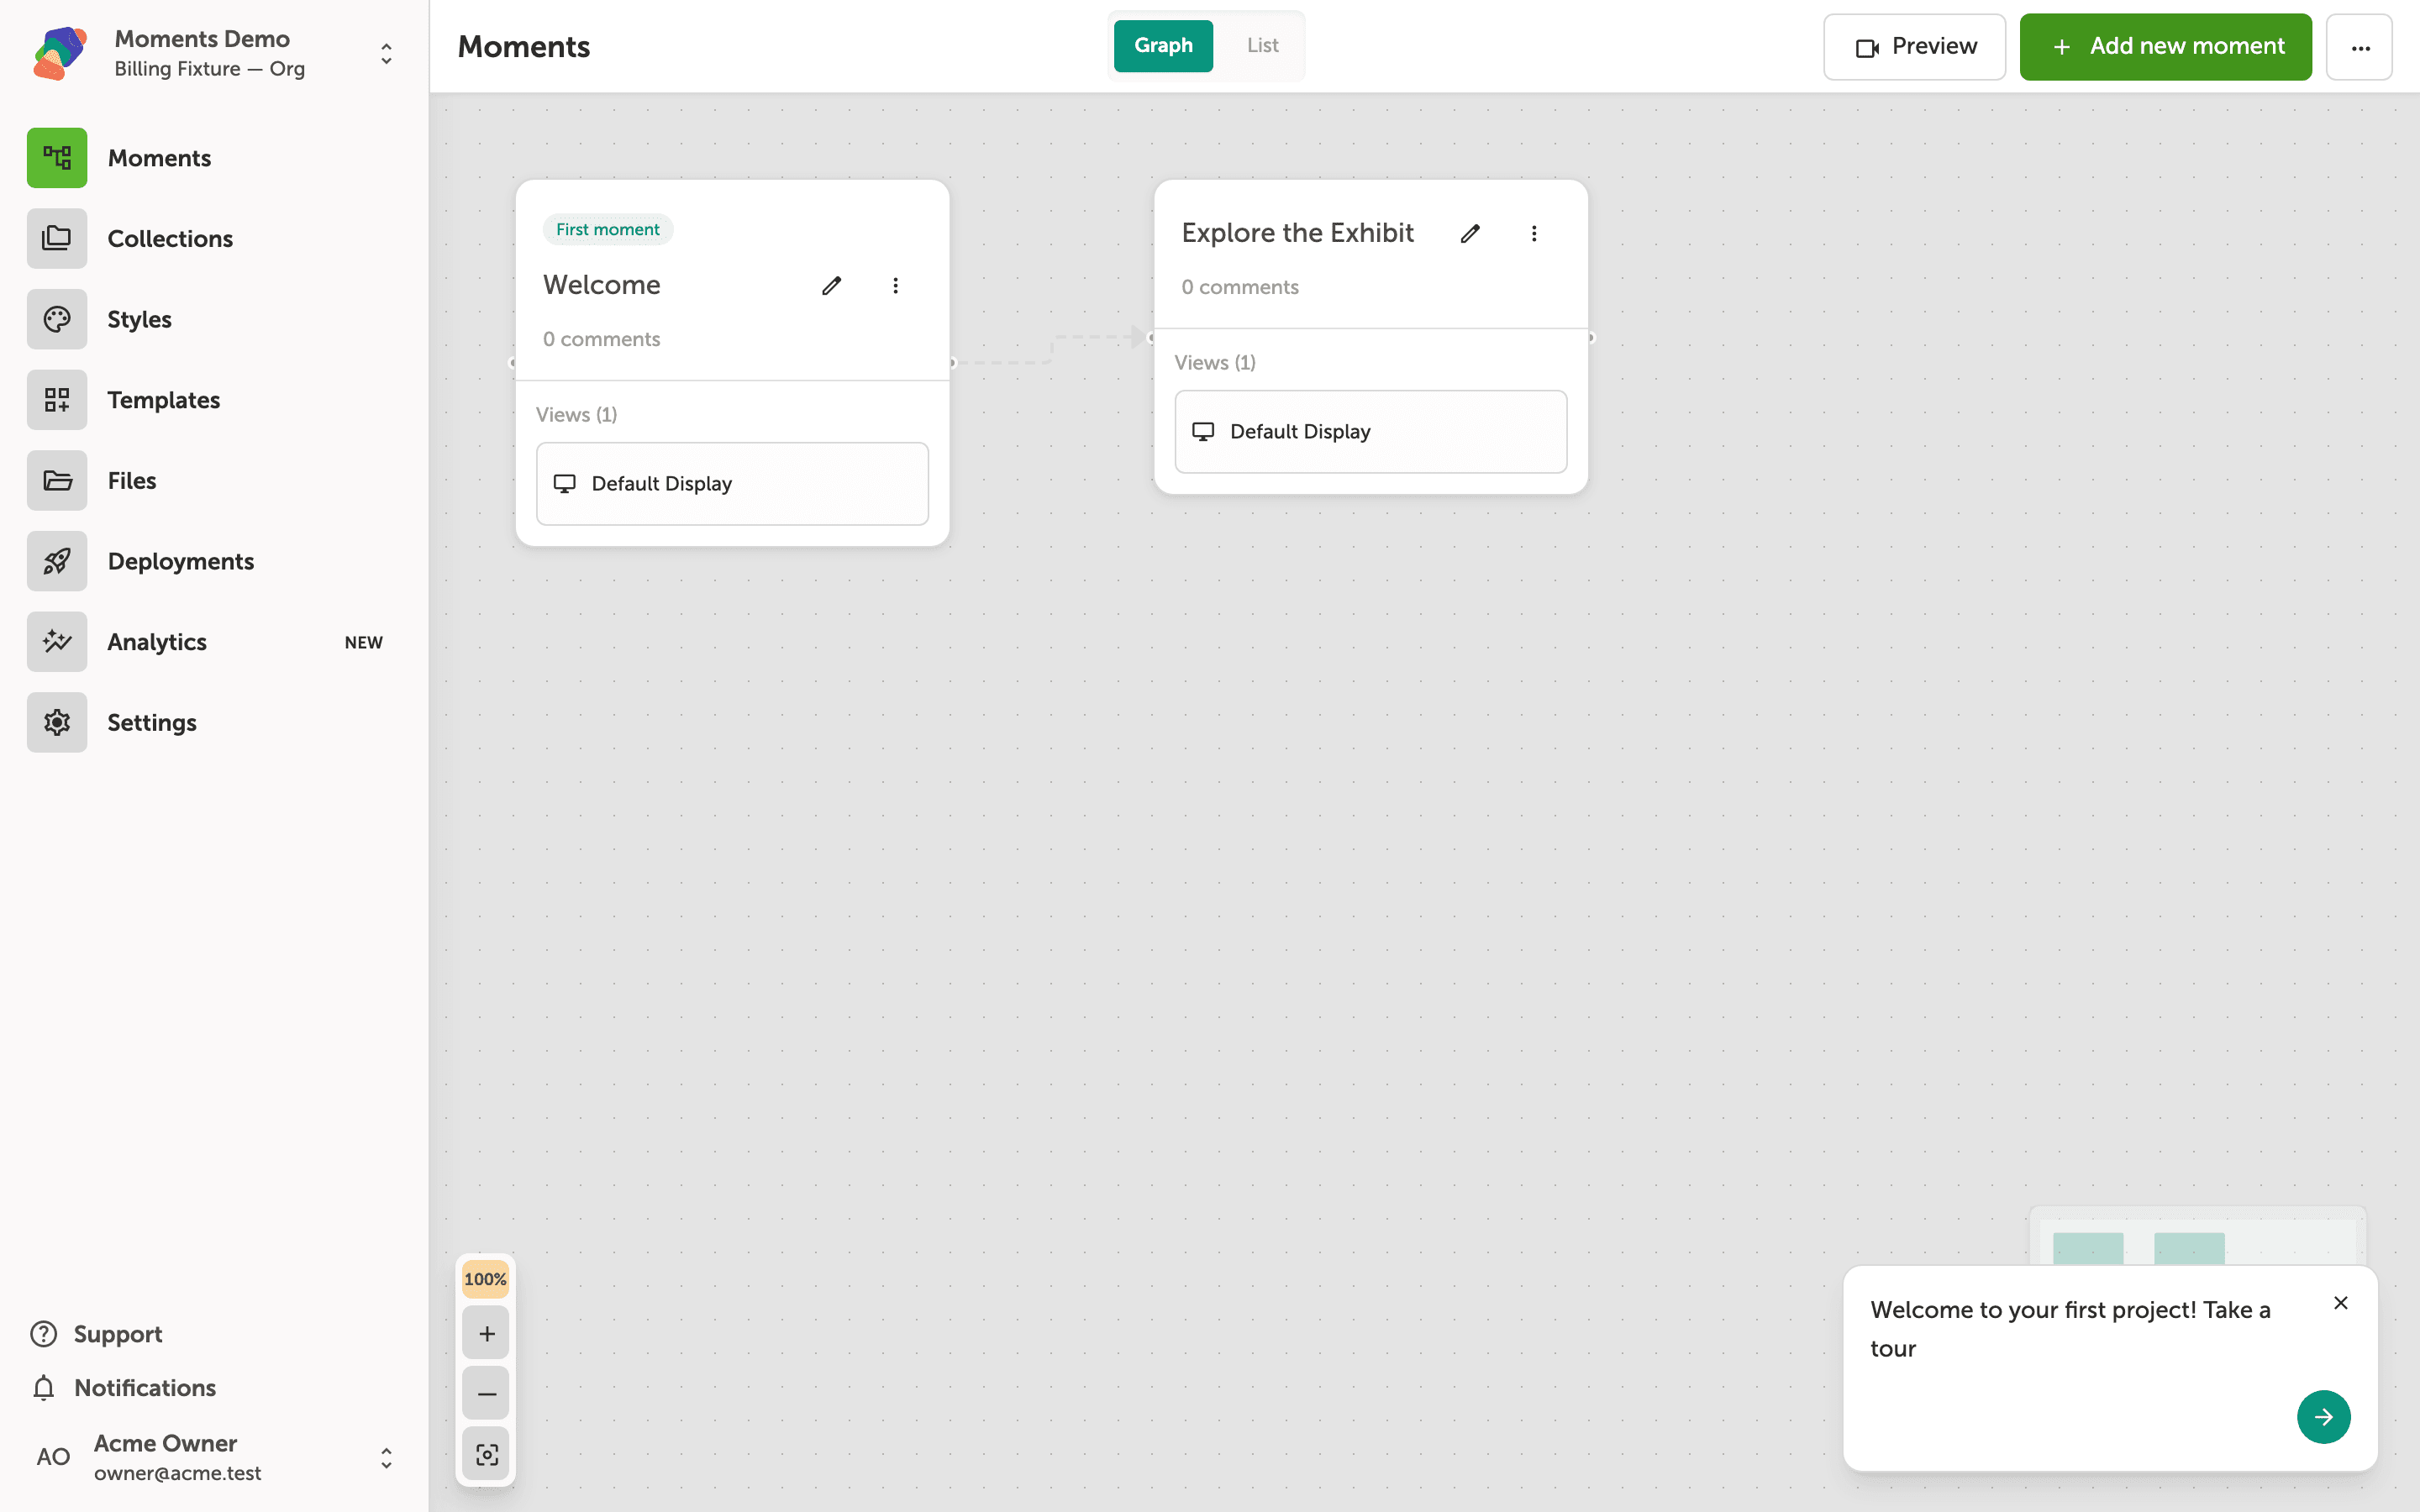
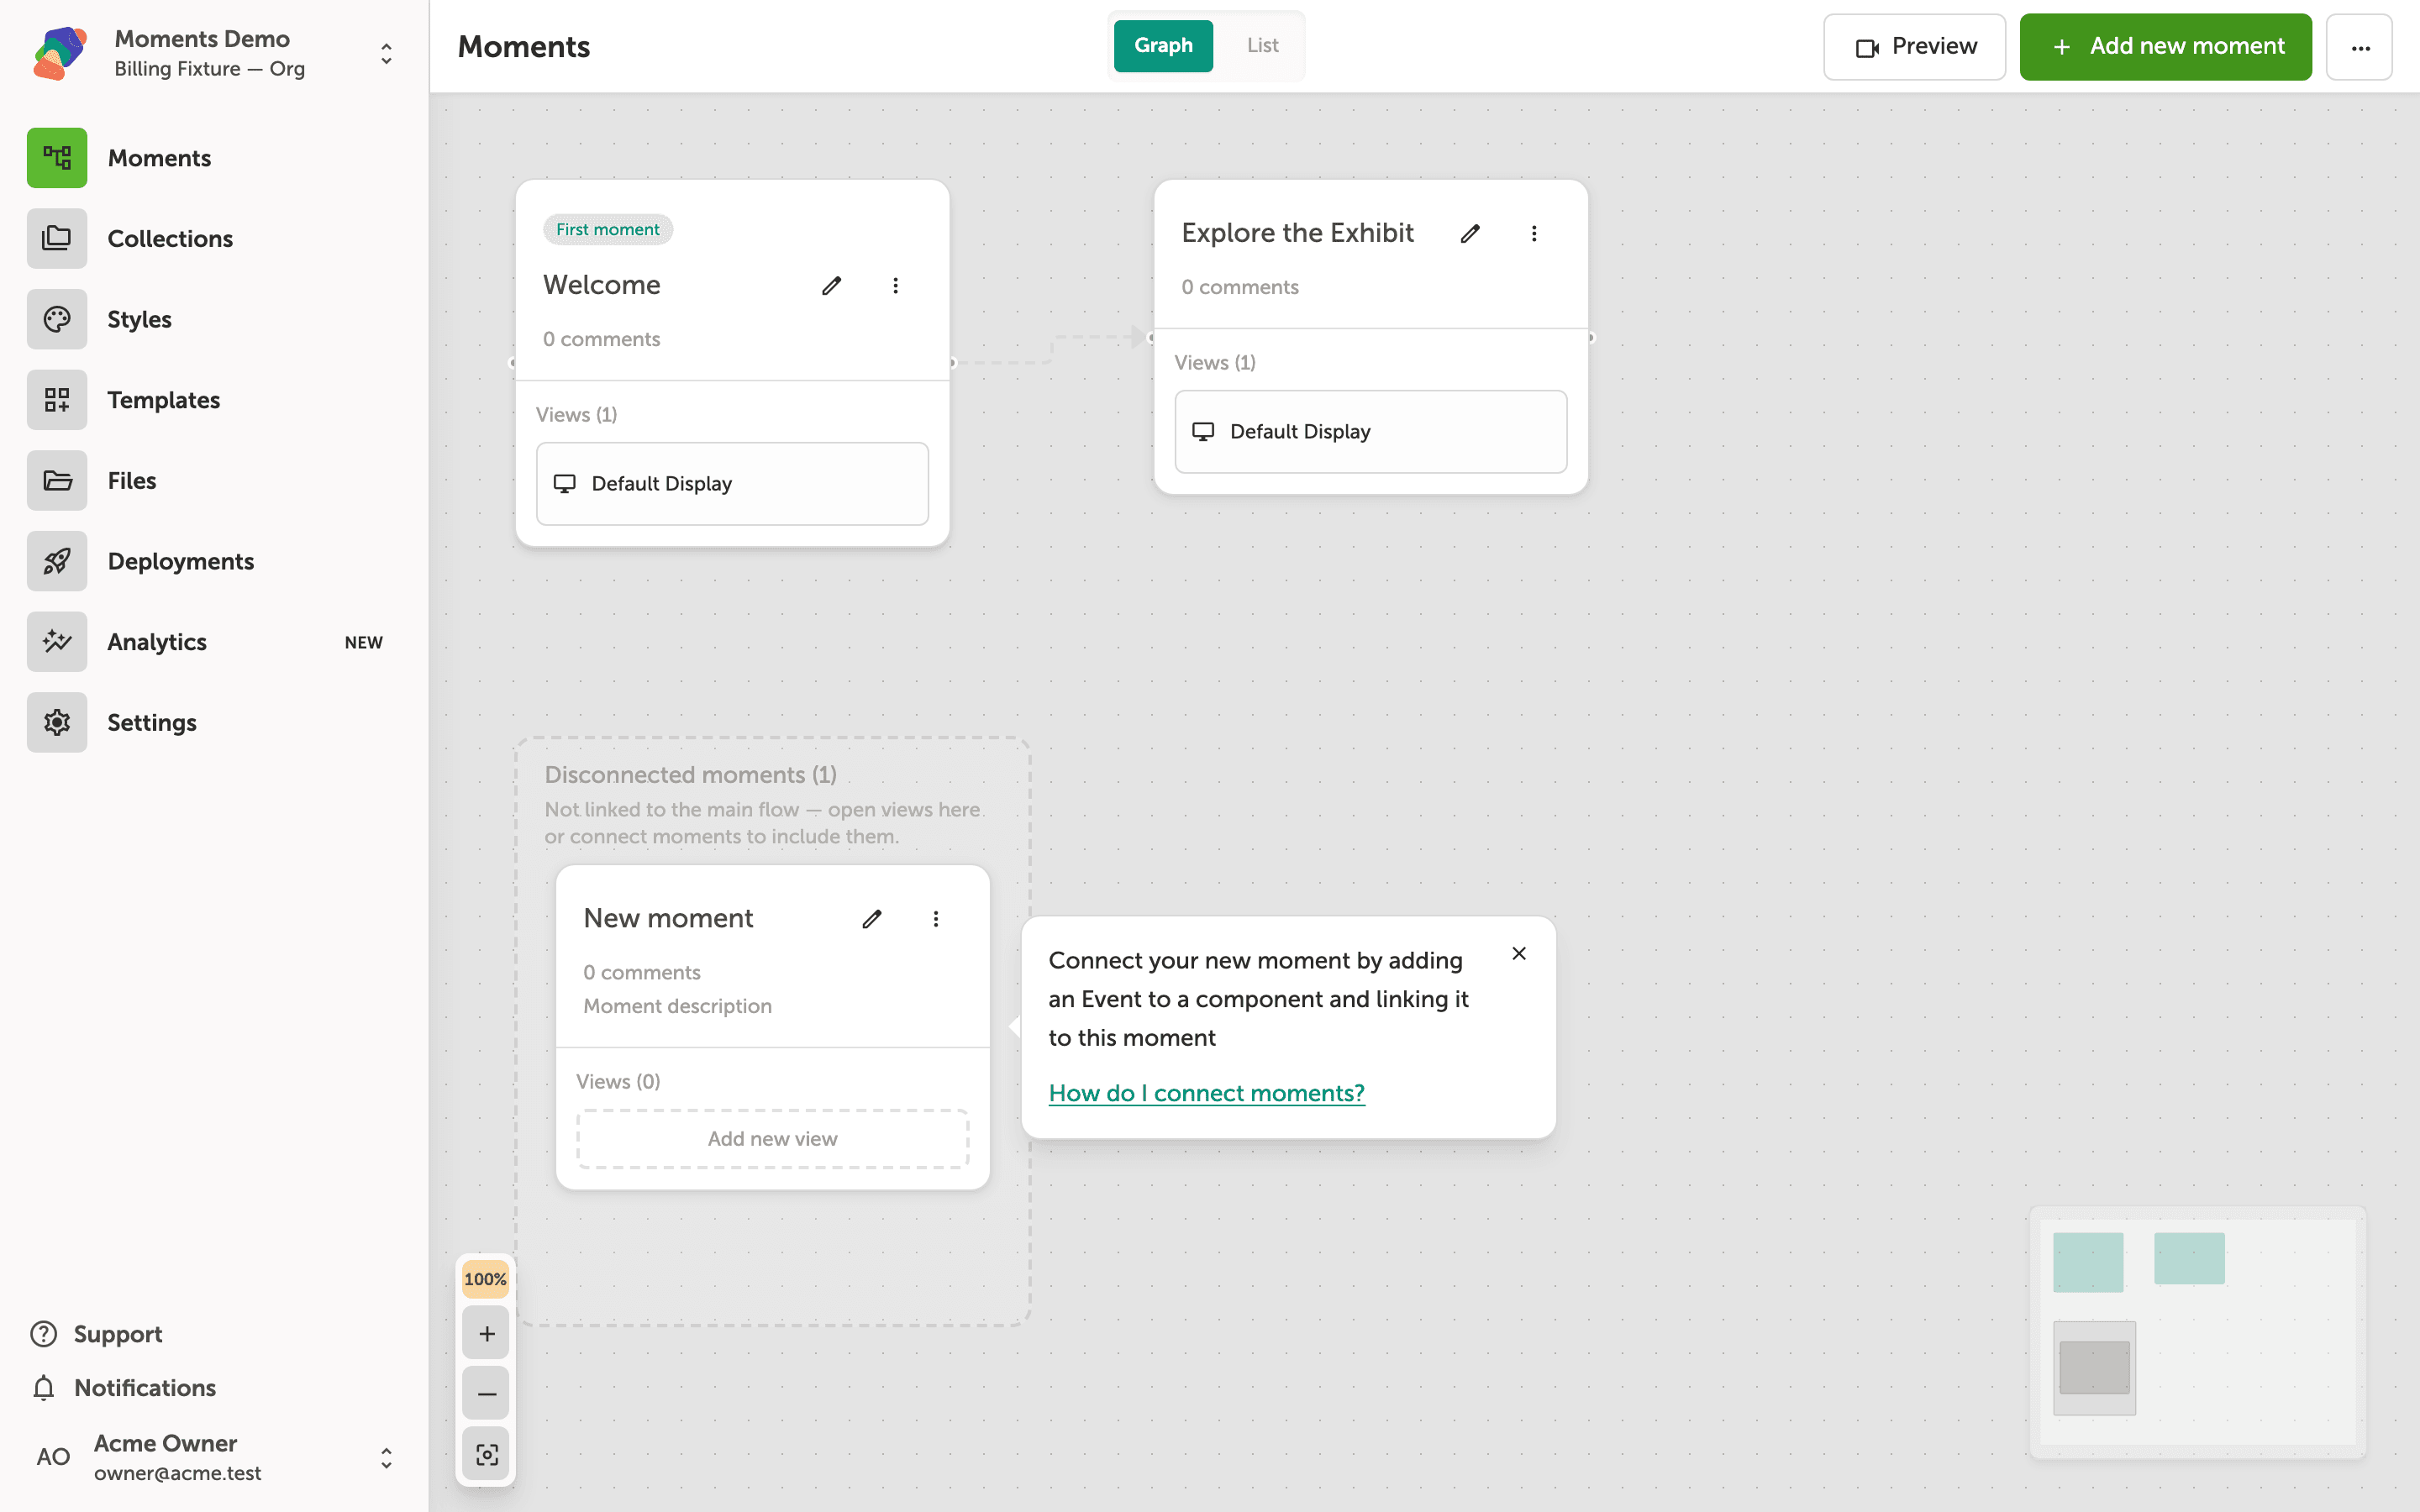
The Graph view displays each moment as a card and shows how they connect through flows. Your project's starting point is labeled First moment—here, that's the Welcome moment, which already has one view assigned to it (Library Display).
A dashed arrow from Welcome to Explore the Exhibit is a flow: it is the path a visitor follows when they navigate from one moment to the next. Explore the Exhibit has no views yet, which is normal for a moment you have just added to the structure and have not designed.
New moments appear in the Disconnected moments area
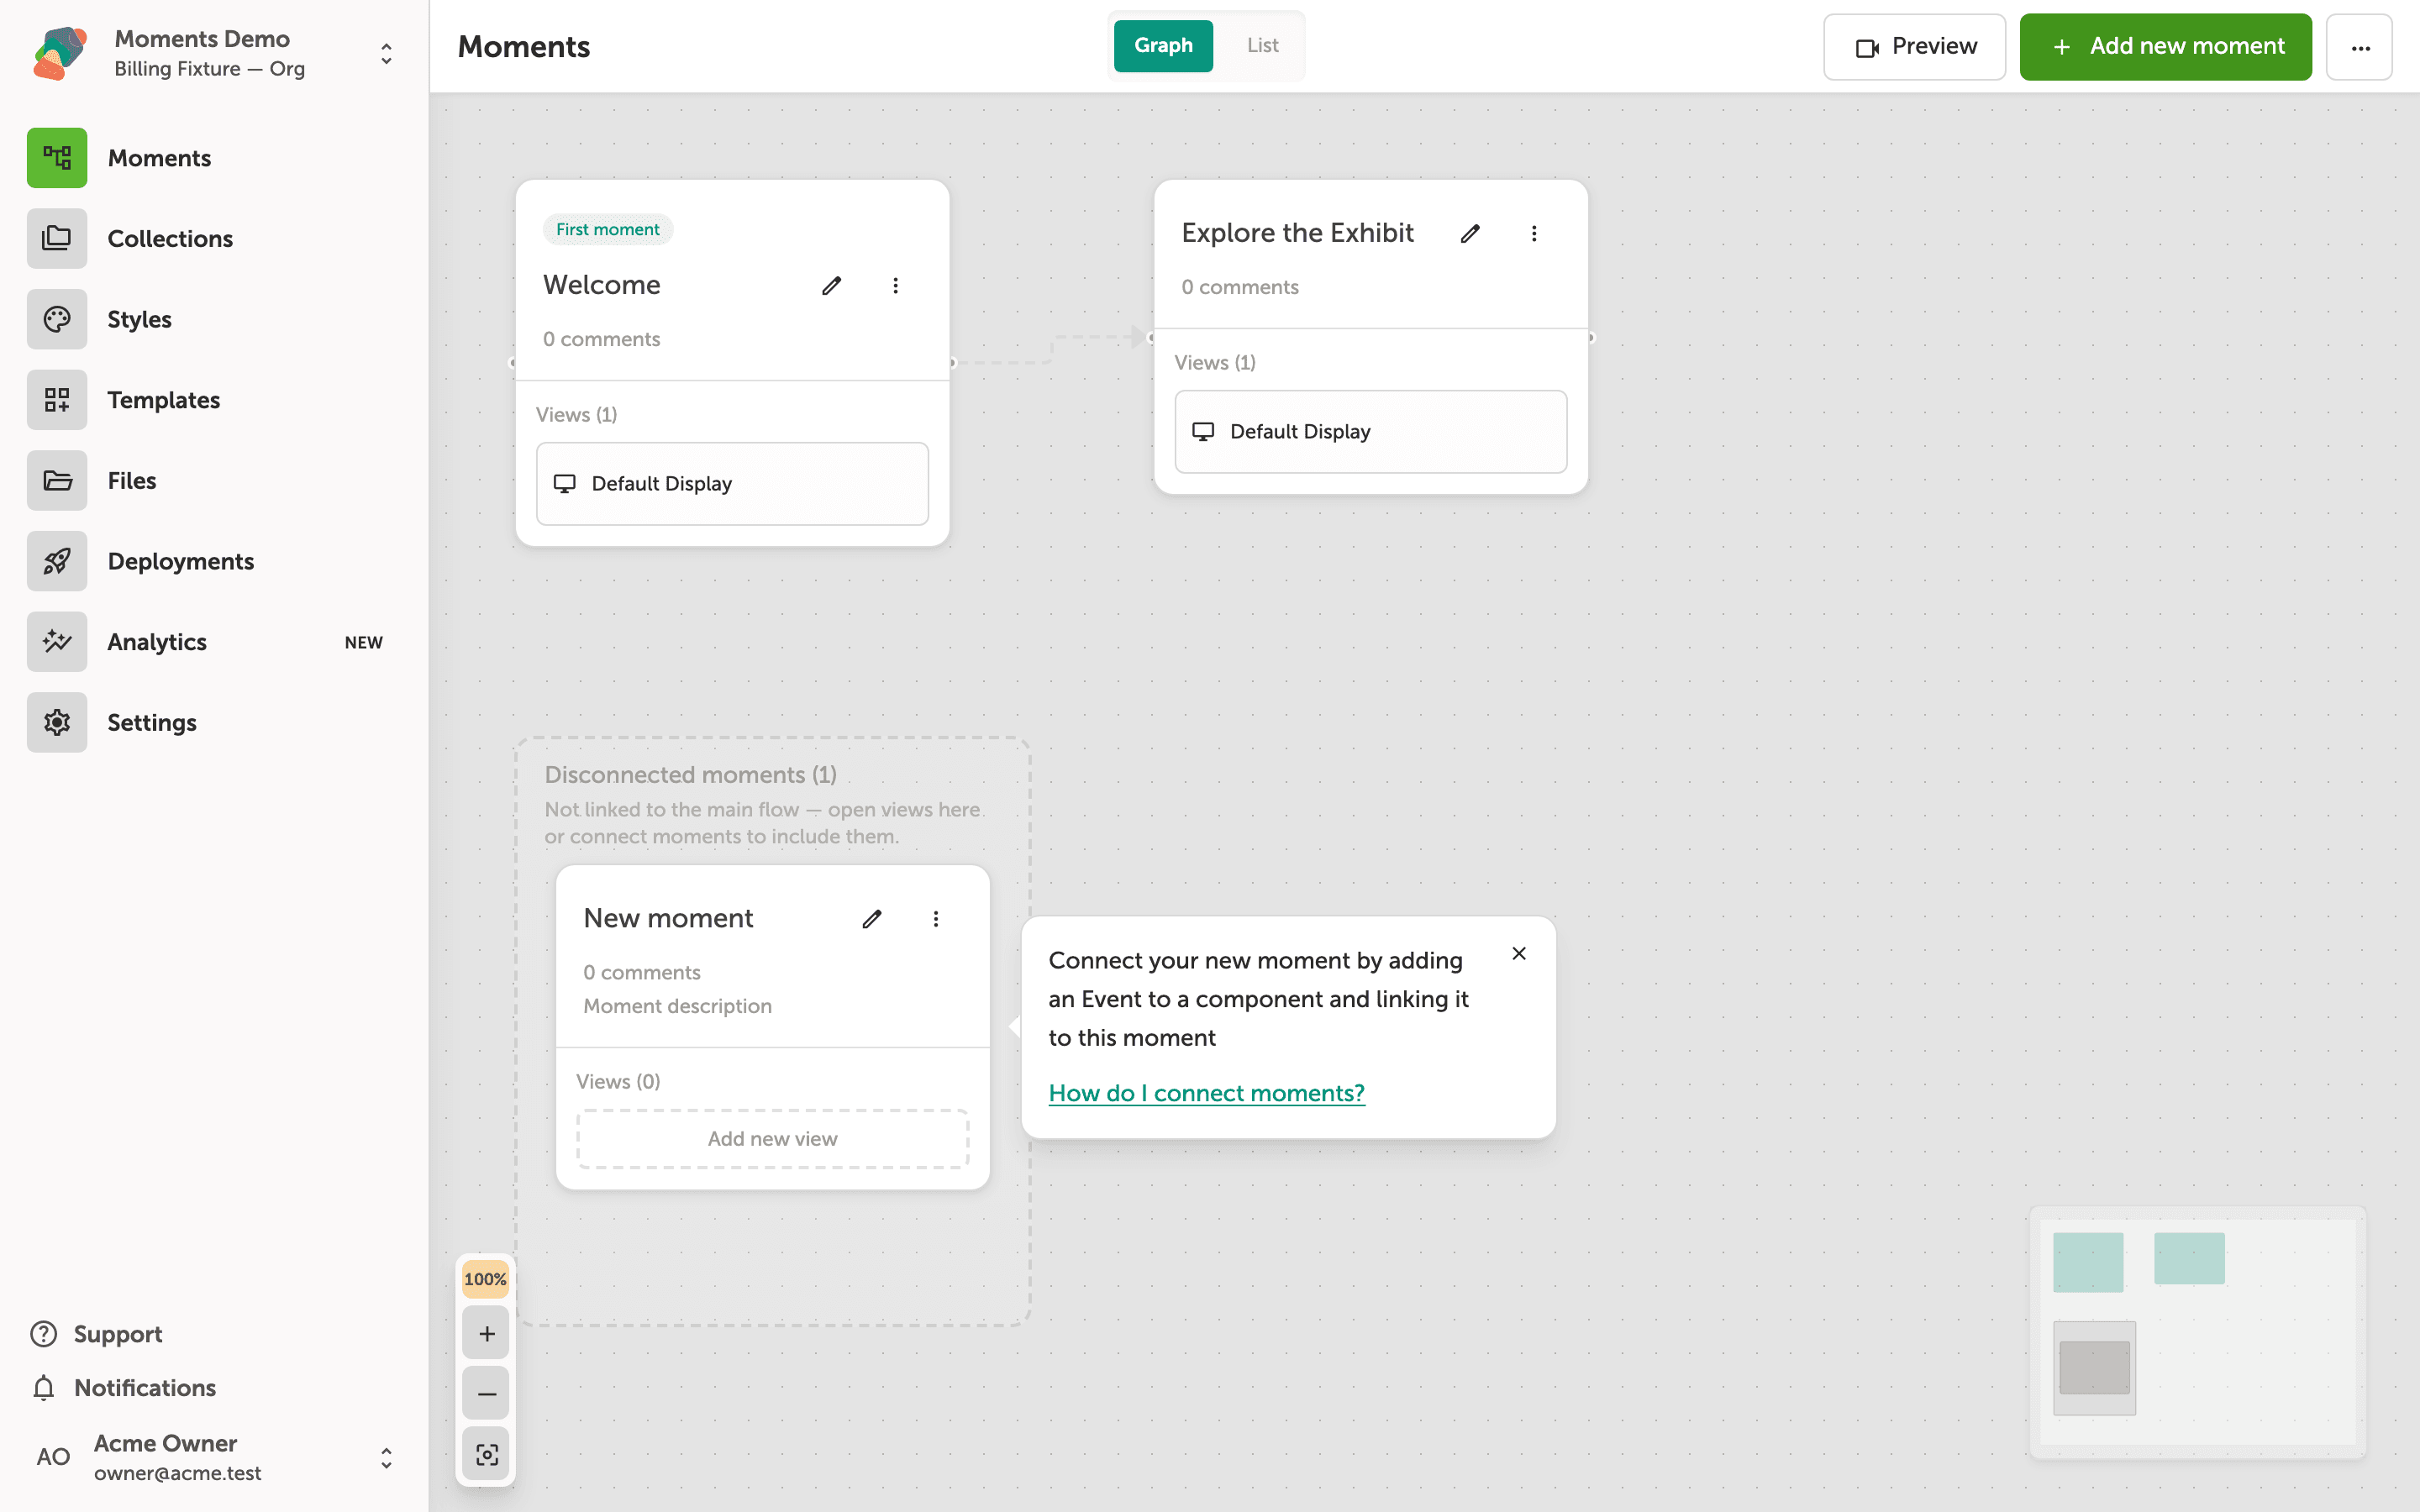
Click Add new moment in the header to create another screen. Zibit places it in the Disconnected moments region—the dashed box at the bottom of the graph. Moments here are not yet part of your project's flow, so visitors cannot reach them from the main experience.
The new card is titled New moment and already includes a default view on Library Display. To bring it into the experience, connect it to an existing moment with a flow—for example from Explore the Exhibit into this new screen.
The overflow menu gives you quick actions for any moment card
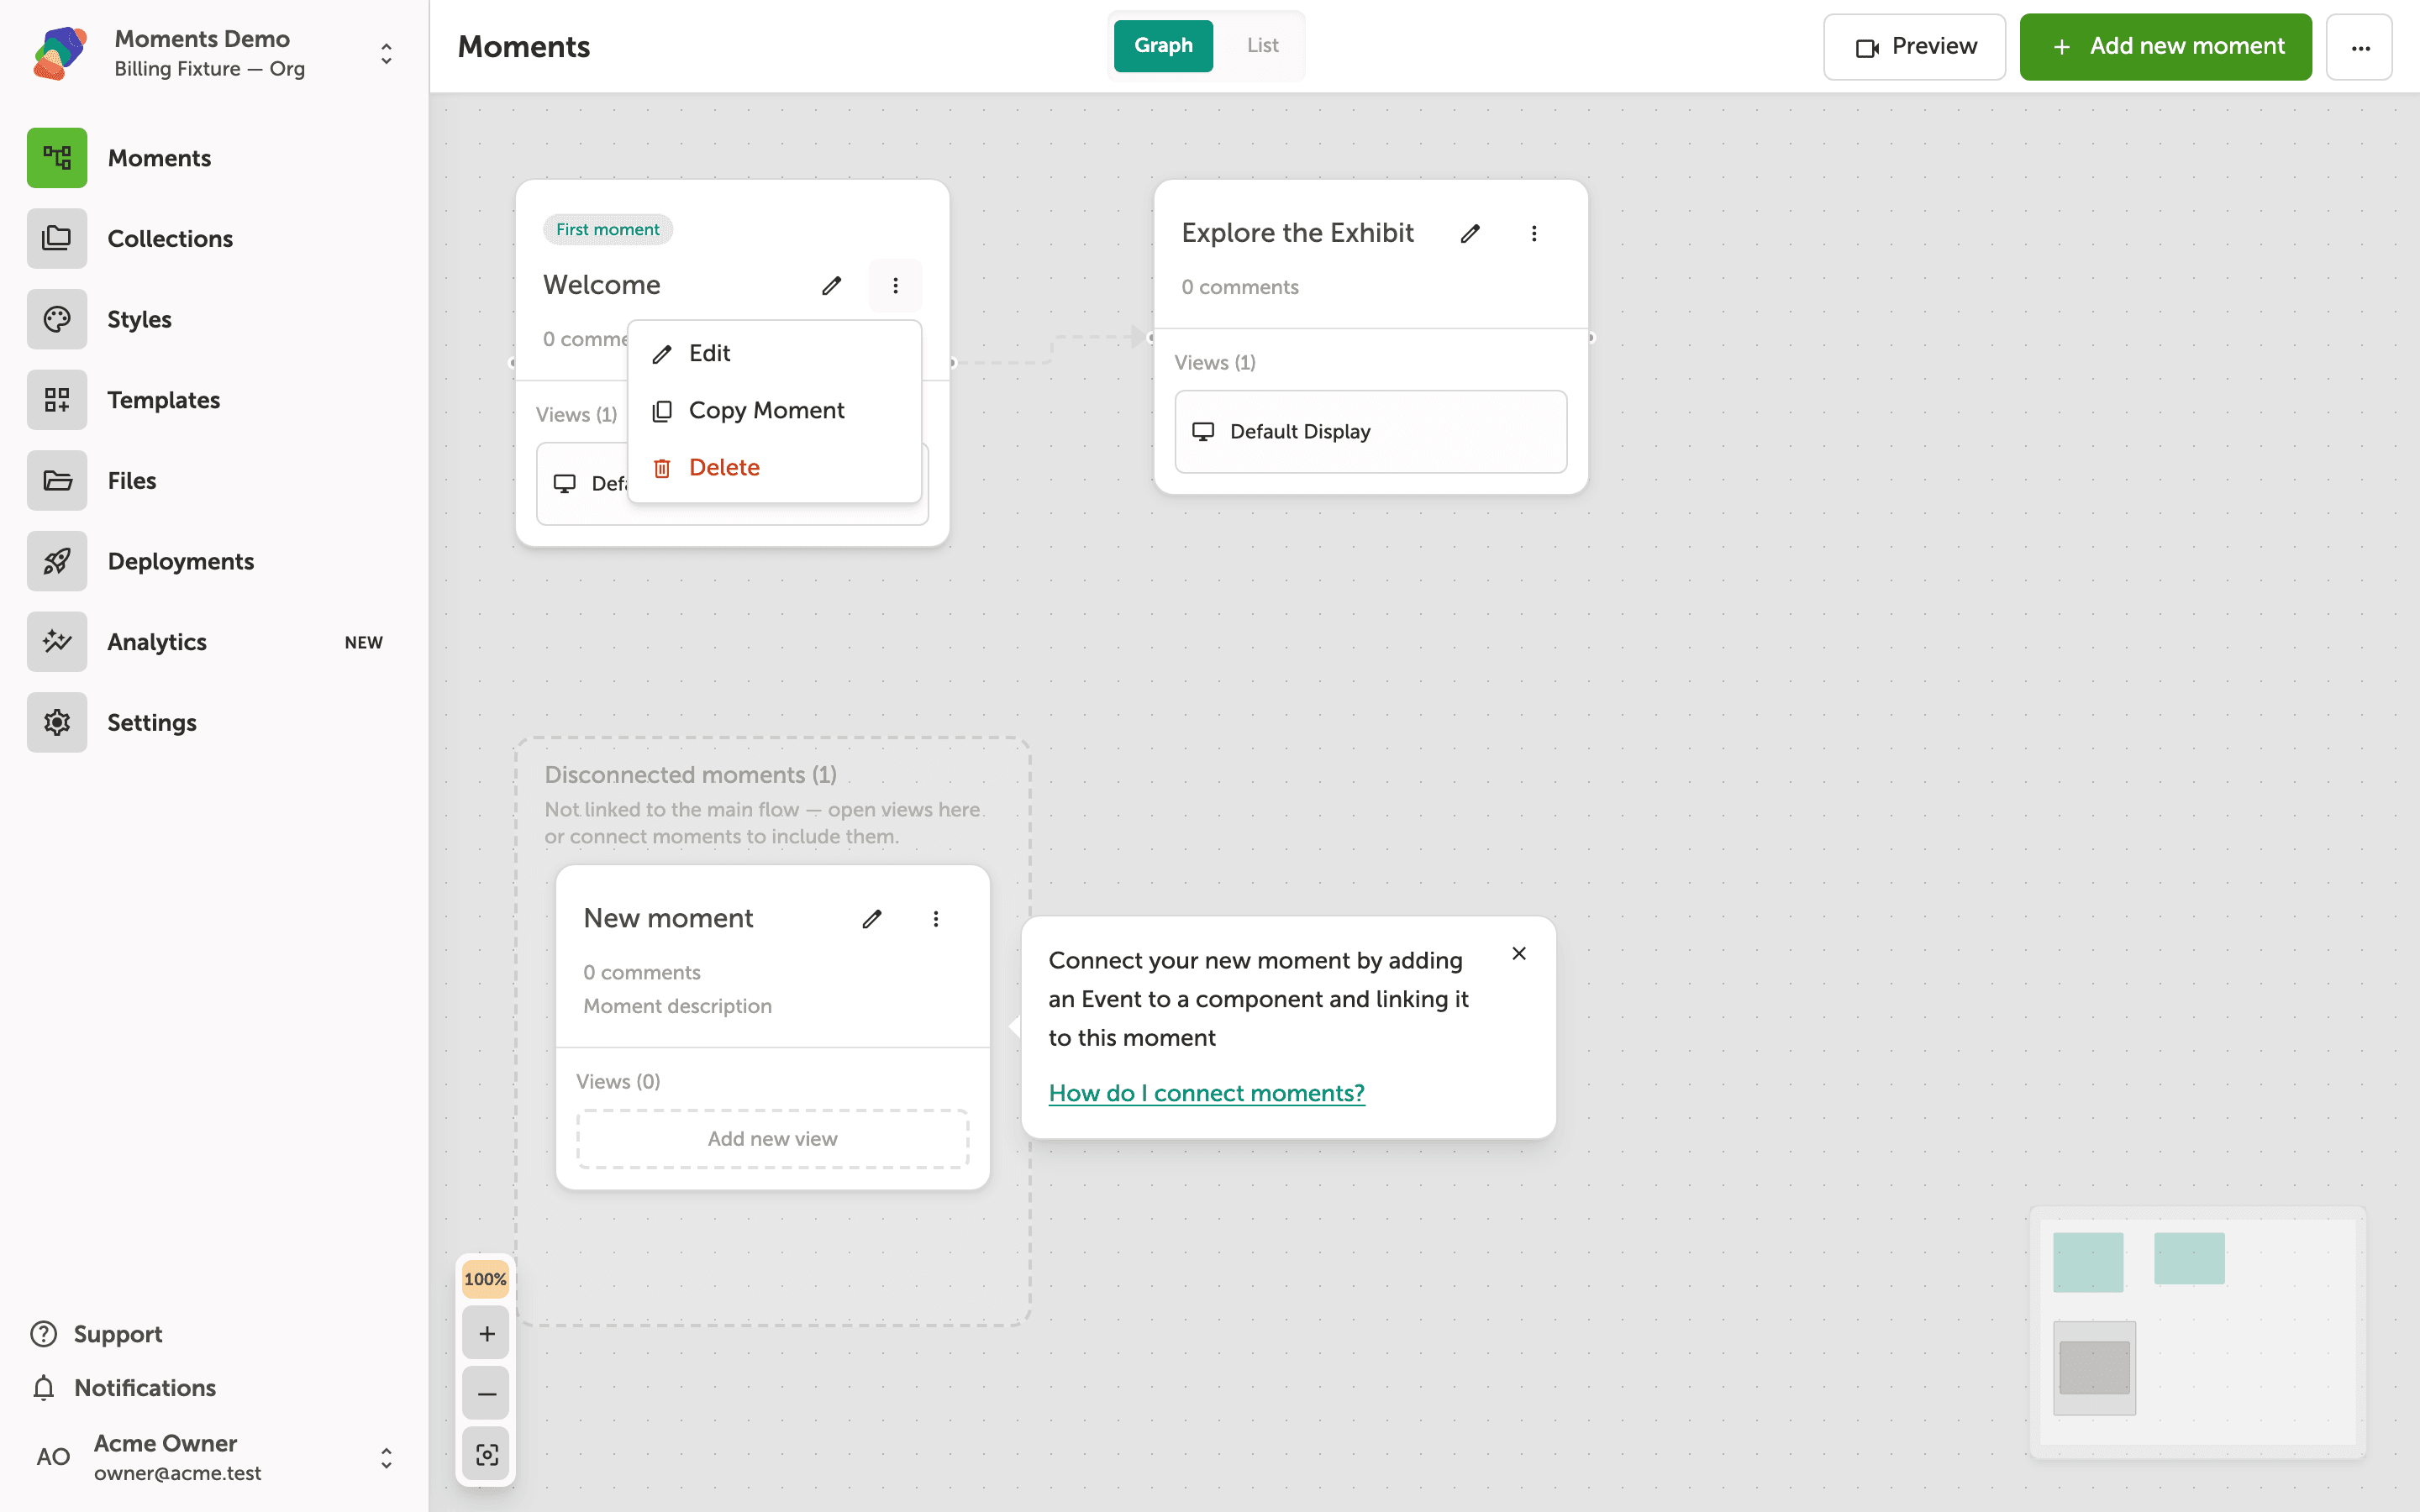
Each moment card has a more options button (the three-dot icon) in the top-right corner. Hovering the card makes it easier to target; clicking the icon opens the actions for that moment.
Use this menu when you want to edit the moment, add another view, copy it, or remove it from the project—without leaving the graph.
The moment overflow menu options: Edit, Add View, Copy Moment, and Delete
Clicking the three-dot button on any moment card opens a context menu with four actions. Edit opens the moment's editor, Add View lets you create an additional view for a different display, Copy Moment duplicates the card and its views, and Delete removes the moment from the project.
Use Copy Moment to quickly scaffold similar moments—for example, duplicating a template-style card before customising each one for a different section of your experience. Delete is permanent and cannot be undone from this menu.
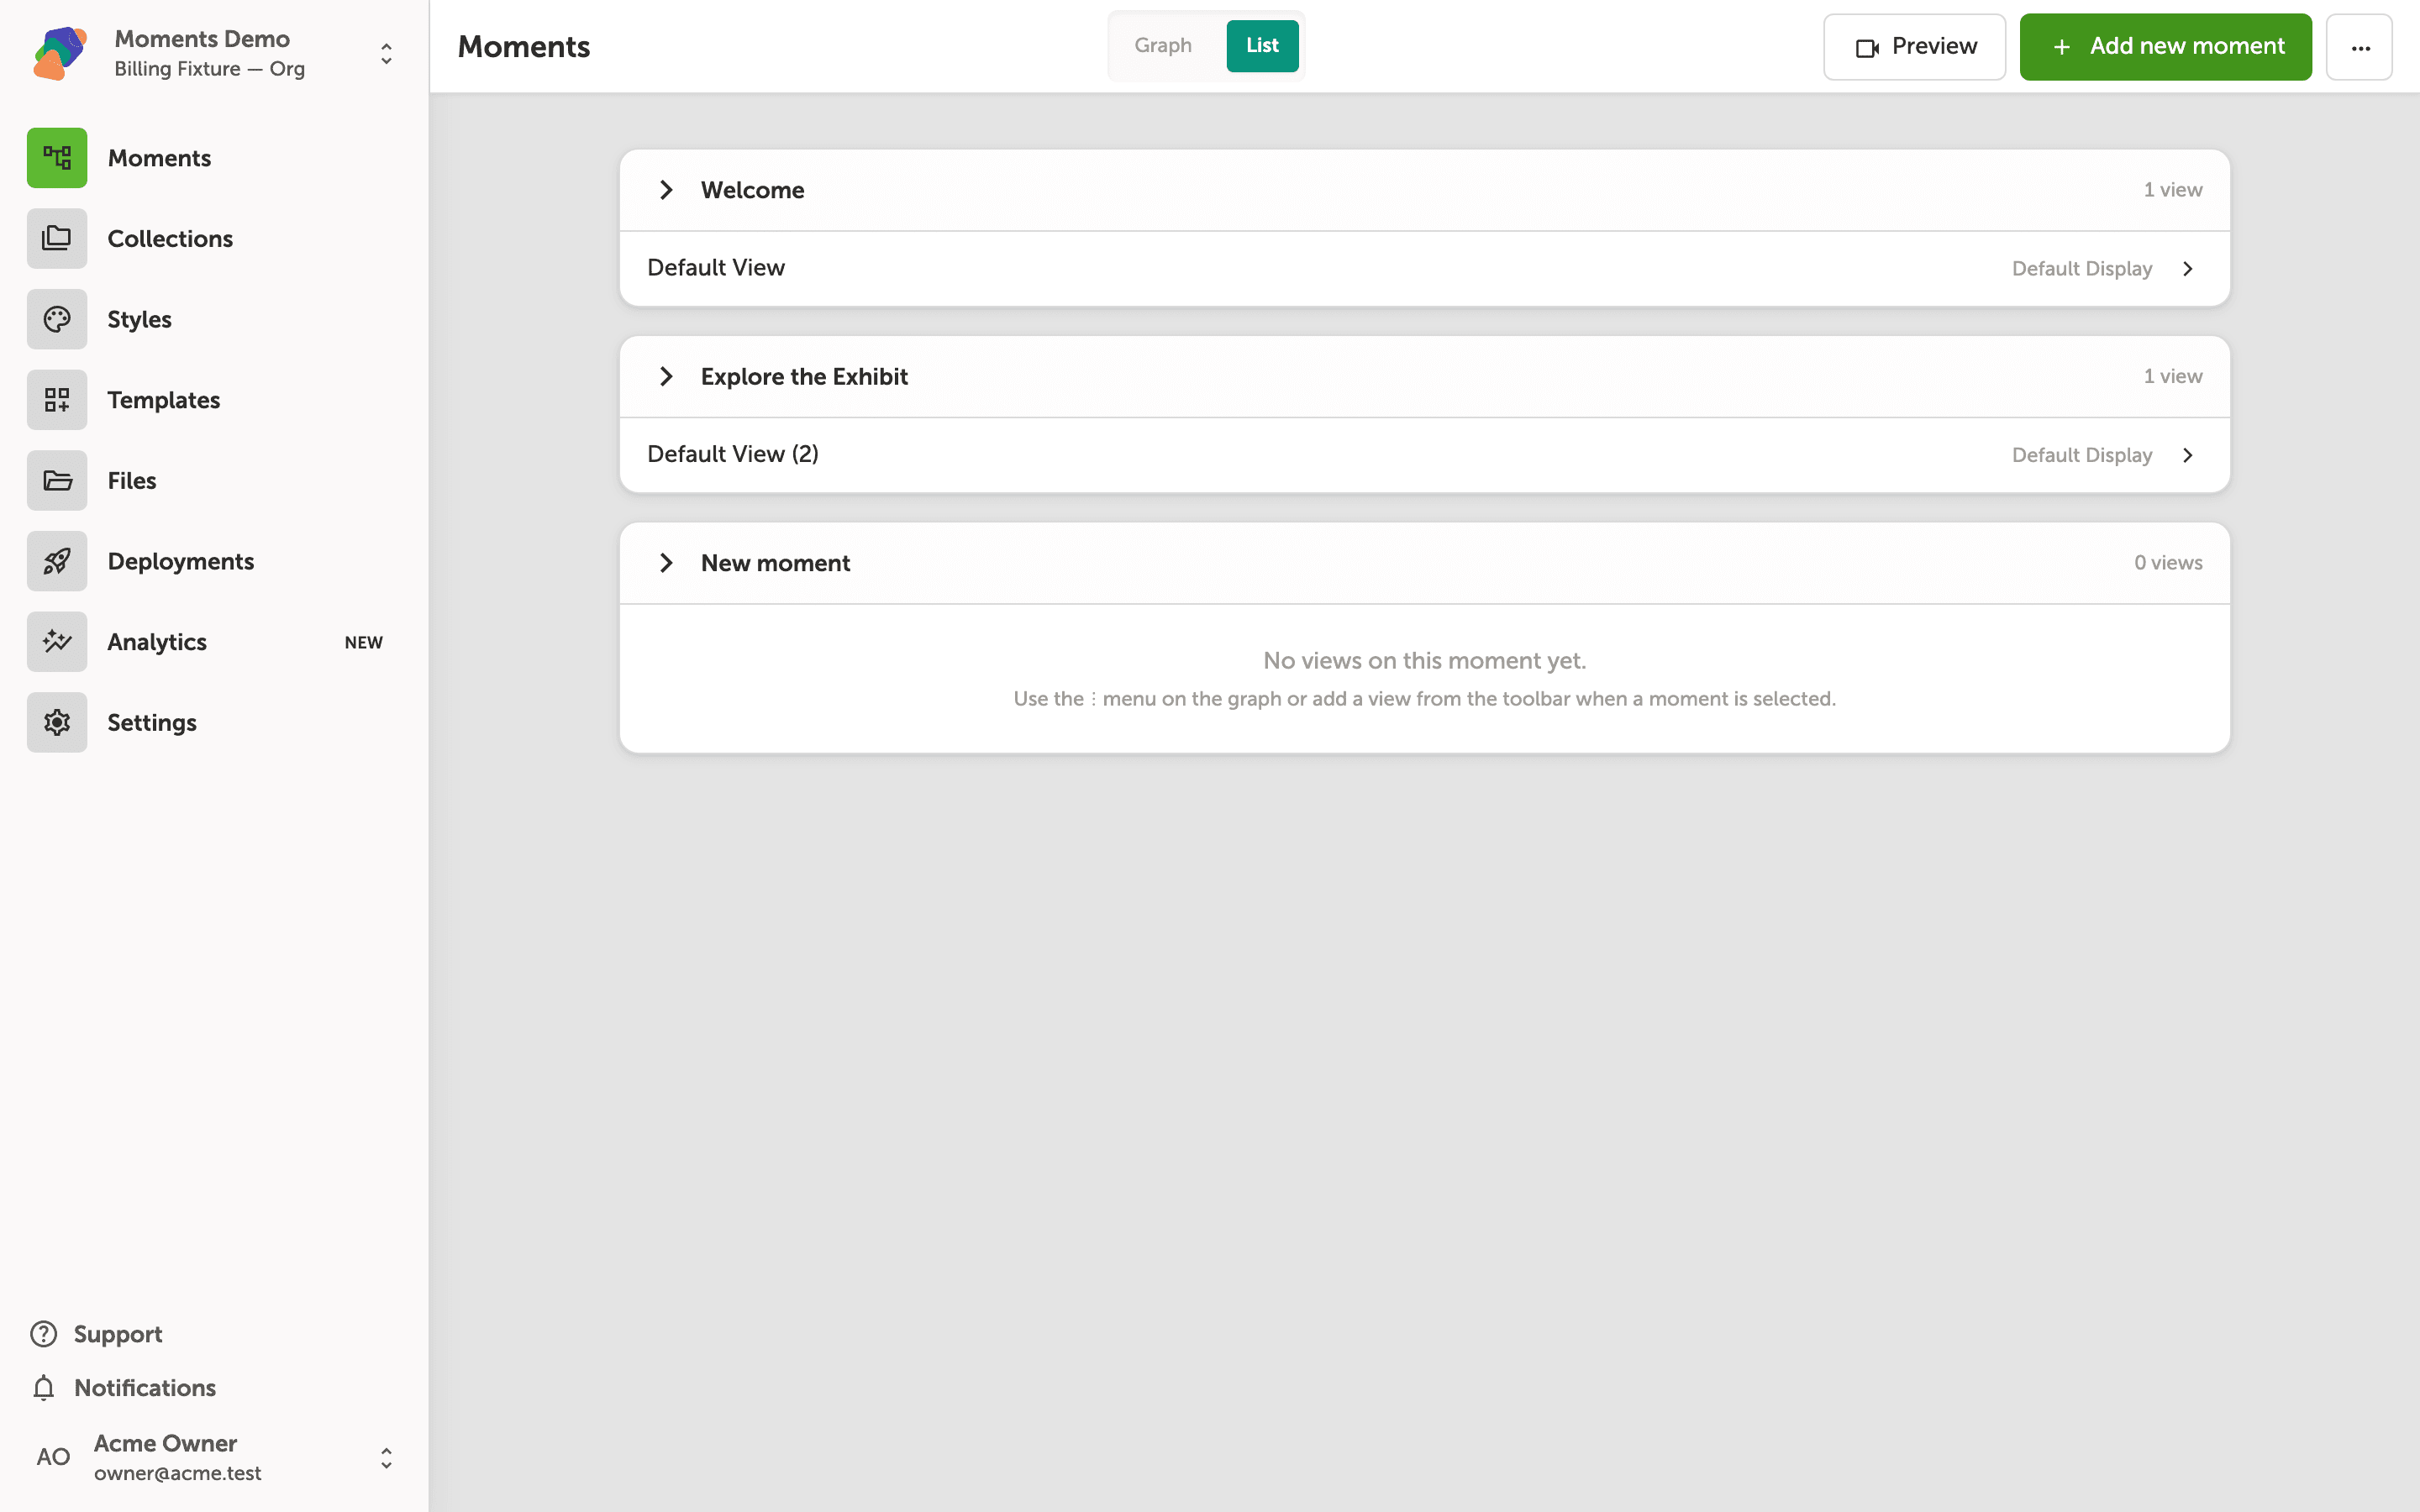
List mode stacks moments and their views
Switch to List in the header to see the same moments in a scannable layout. Each row is a moment; expand it to see the views attached to that screen. Welcome and New moment each have one view on Library Display, while Explore the Exhibit still has none.
List mode is useful when you have many moments and want to jump straight to a view without tracing arrows on the graph. Switch back to Graph any time you need to see how flows connect.
With a clear picture of how moments and flows work, you're ready to start shaping real visitor experiences in Zibit. From here, consider exploring how components, views, and style sets let you control what appears inside each moment.
- Add components to a moment: Place text, images, buttons, and video onto a moment's view to build out its content.
- Connect moments with events—put a Go to a moment action on a button so visitors can reach the next screen.
- Work with multiple displays: Set up views for different screen resolutions so your project looks right on any device.
- Apply a style set: Use a style set to enforce consistent typography and colors across all your moments at once.
- Link a collection: Connect a reusable data set to your project to power dynamic, data-driven moments.