
Setting Up a Device Schedule
This tutorial walks you through setting up a device schedule so your player hardware starts and stops automatically—no manual intervention needed each day. When you're finished, each device you configure will follow a weekly timetable that fits your venue's opening hours, whether that's a museum gallery open Tuesday through Sunday or a lobby kiosk running nine to five.
The My Players page lists all registered devices across your organizations
Player Management is where you see every device connected to your Zibit account, grouped by organization. Each card shows the device name, the project currently deployed to it, and the player version running on that device.
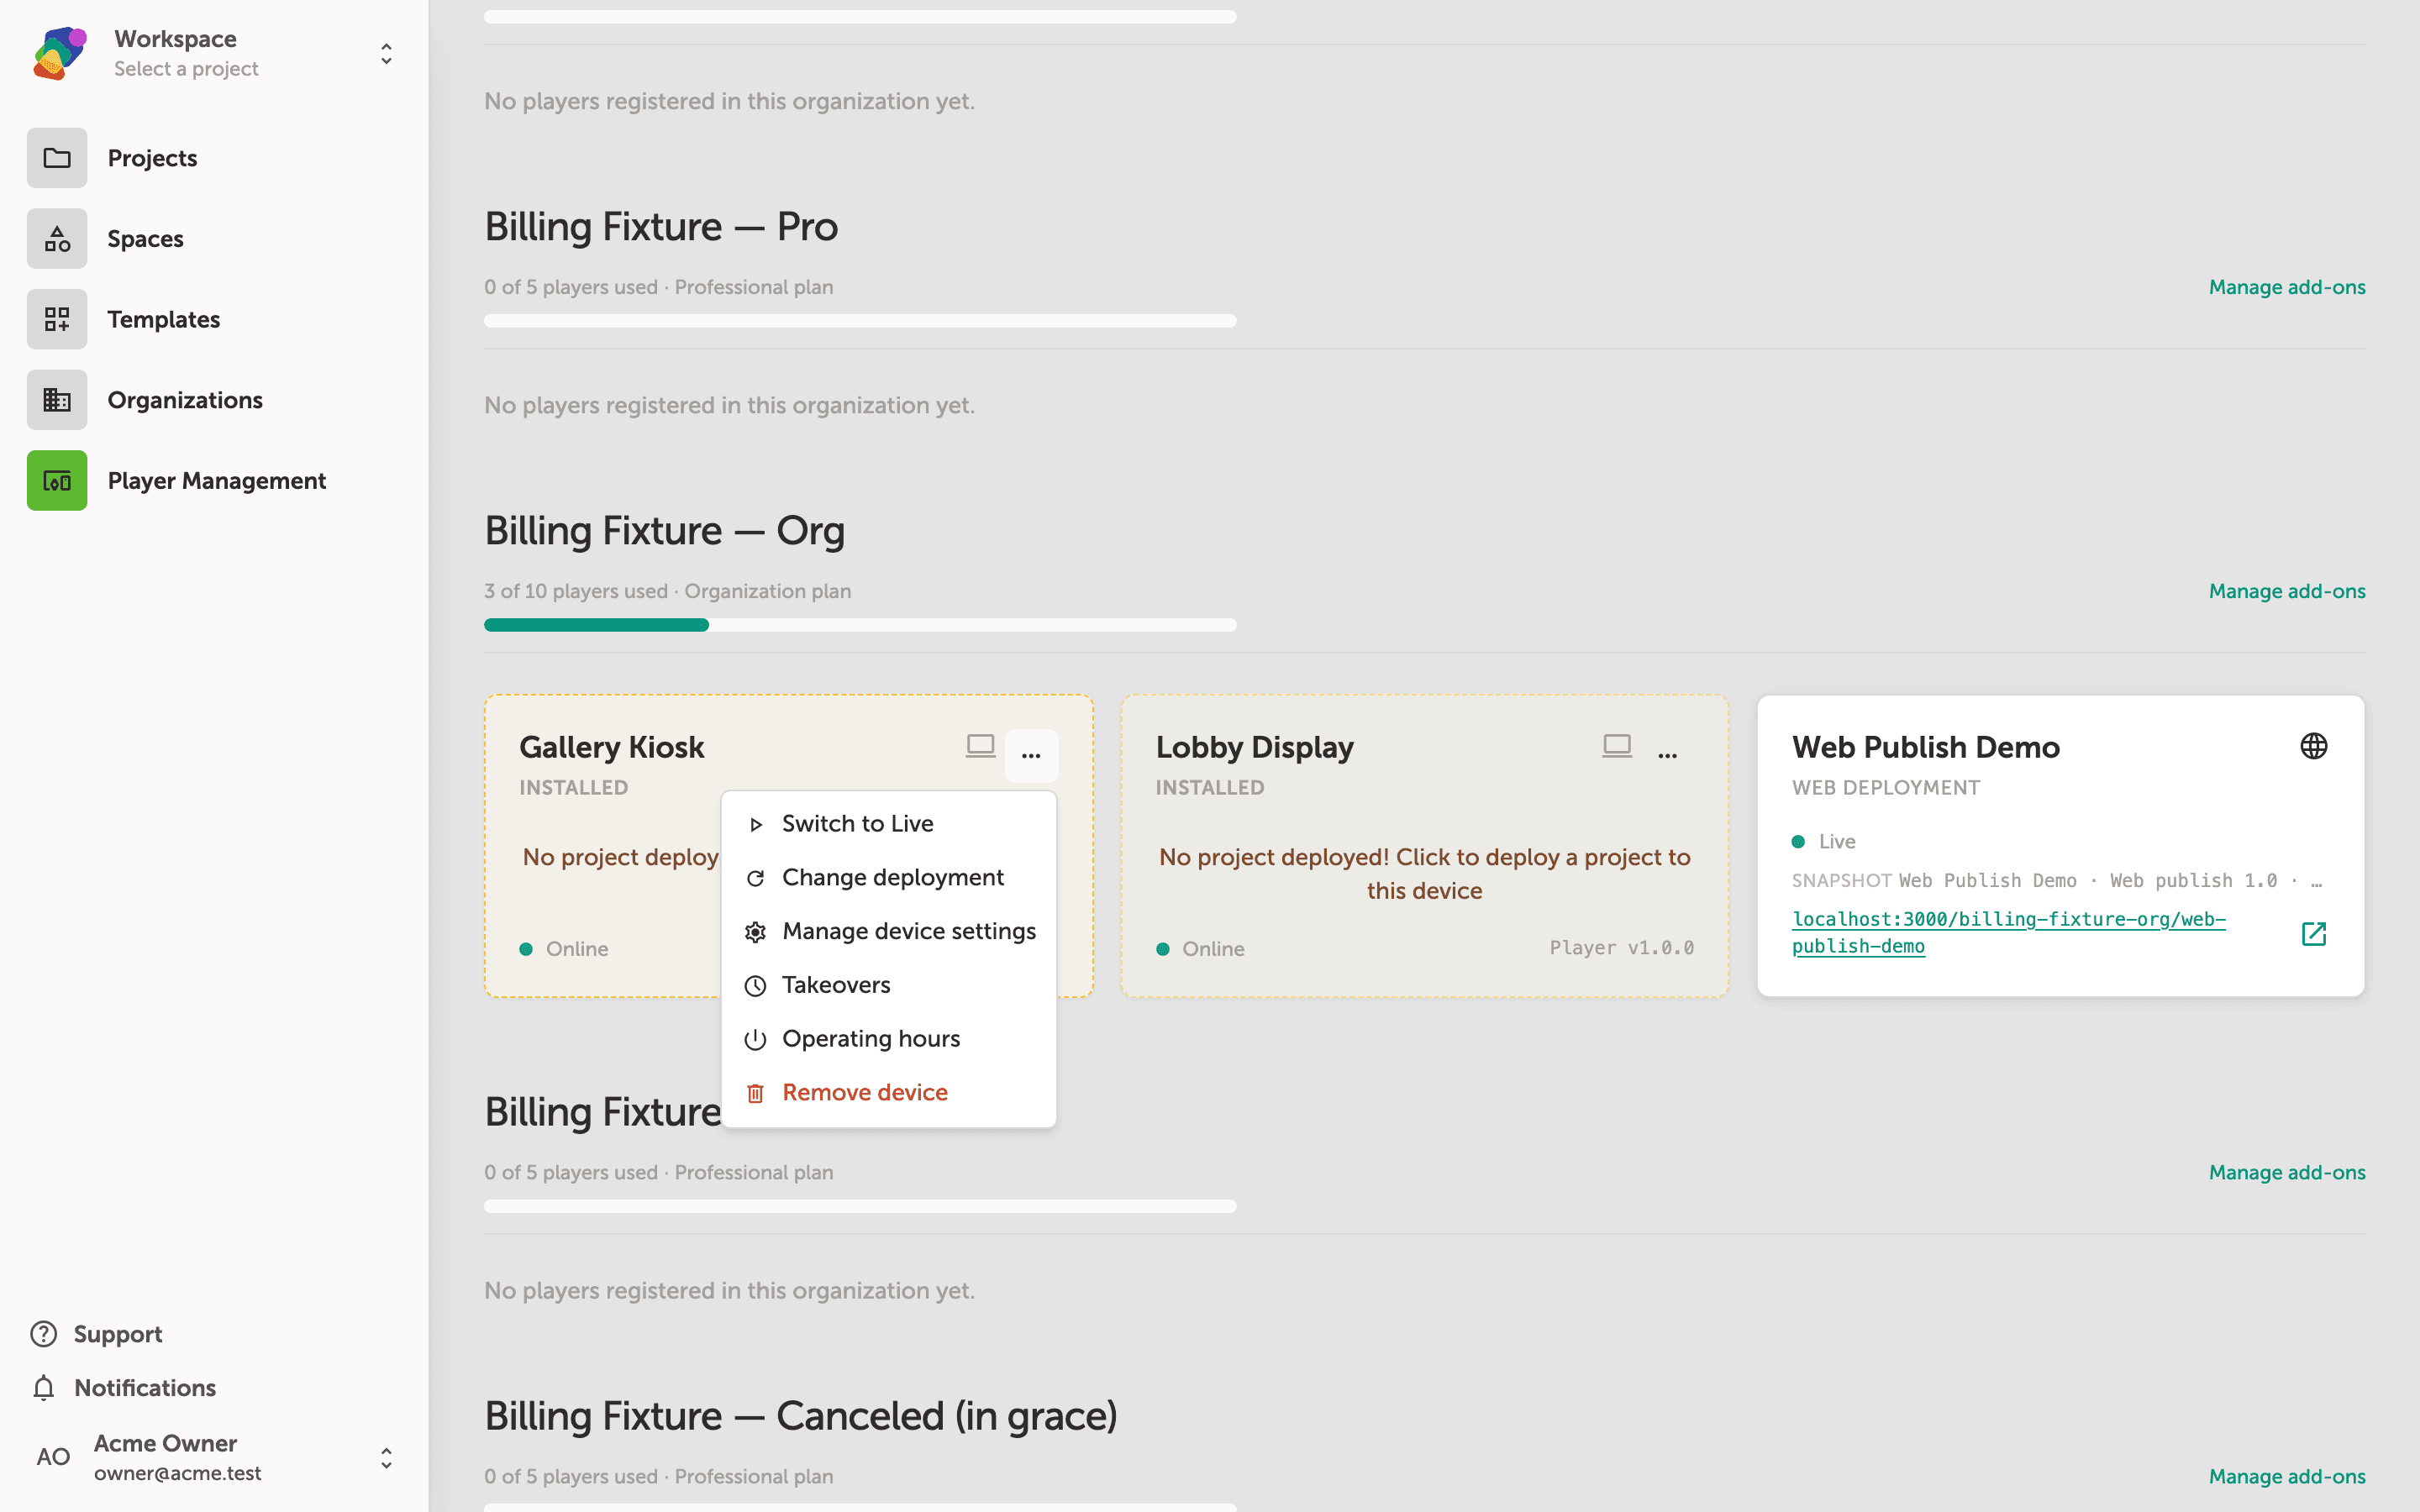
To set up a playback schedule, start by finding the device you want to configure—for example, Gallery Kiosk under Acme Owner's Workspace. Click the ... (actions) button on that device's card to open its options menu.
The device actions menu for a registered player
Click the more_horiz (···) button on any player card to open its actions menu. You'll see options including Change deployment, Manage device settings, Scheduled deploys, Operating hours, and Remove device.
Select Operating hours to set the daily start and stop times for this player—for example, powering a gallery kiosk on at opening time and off after closing.
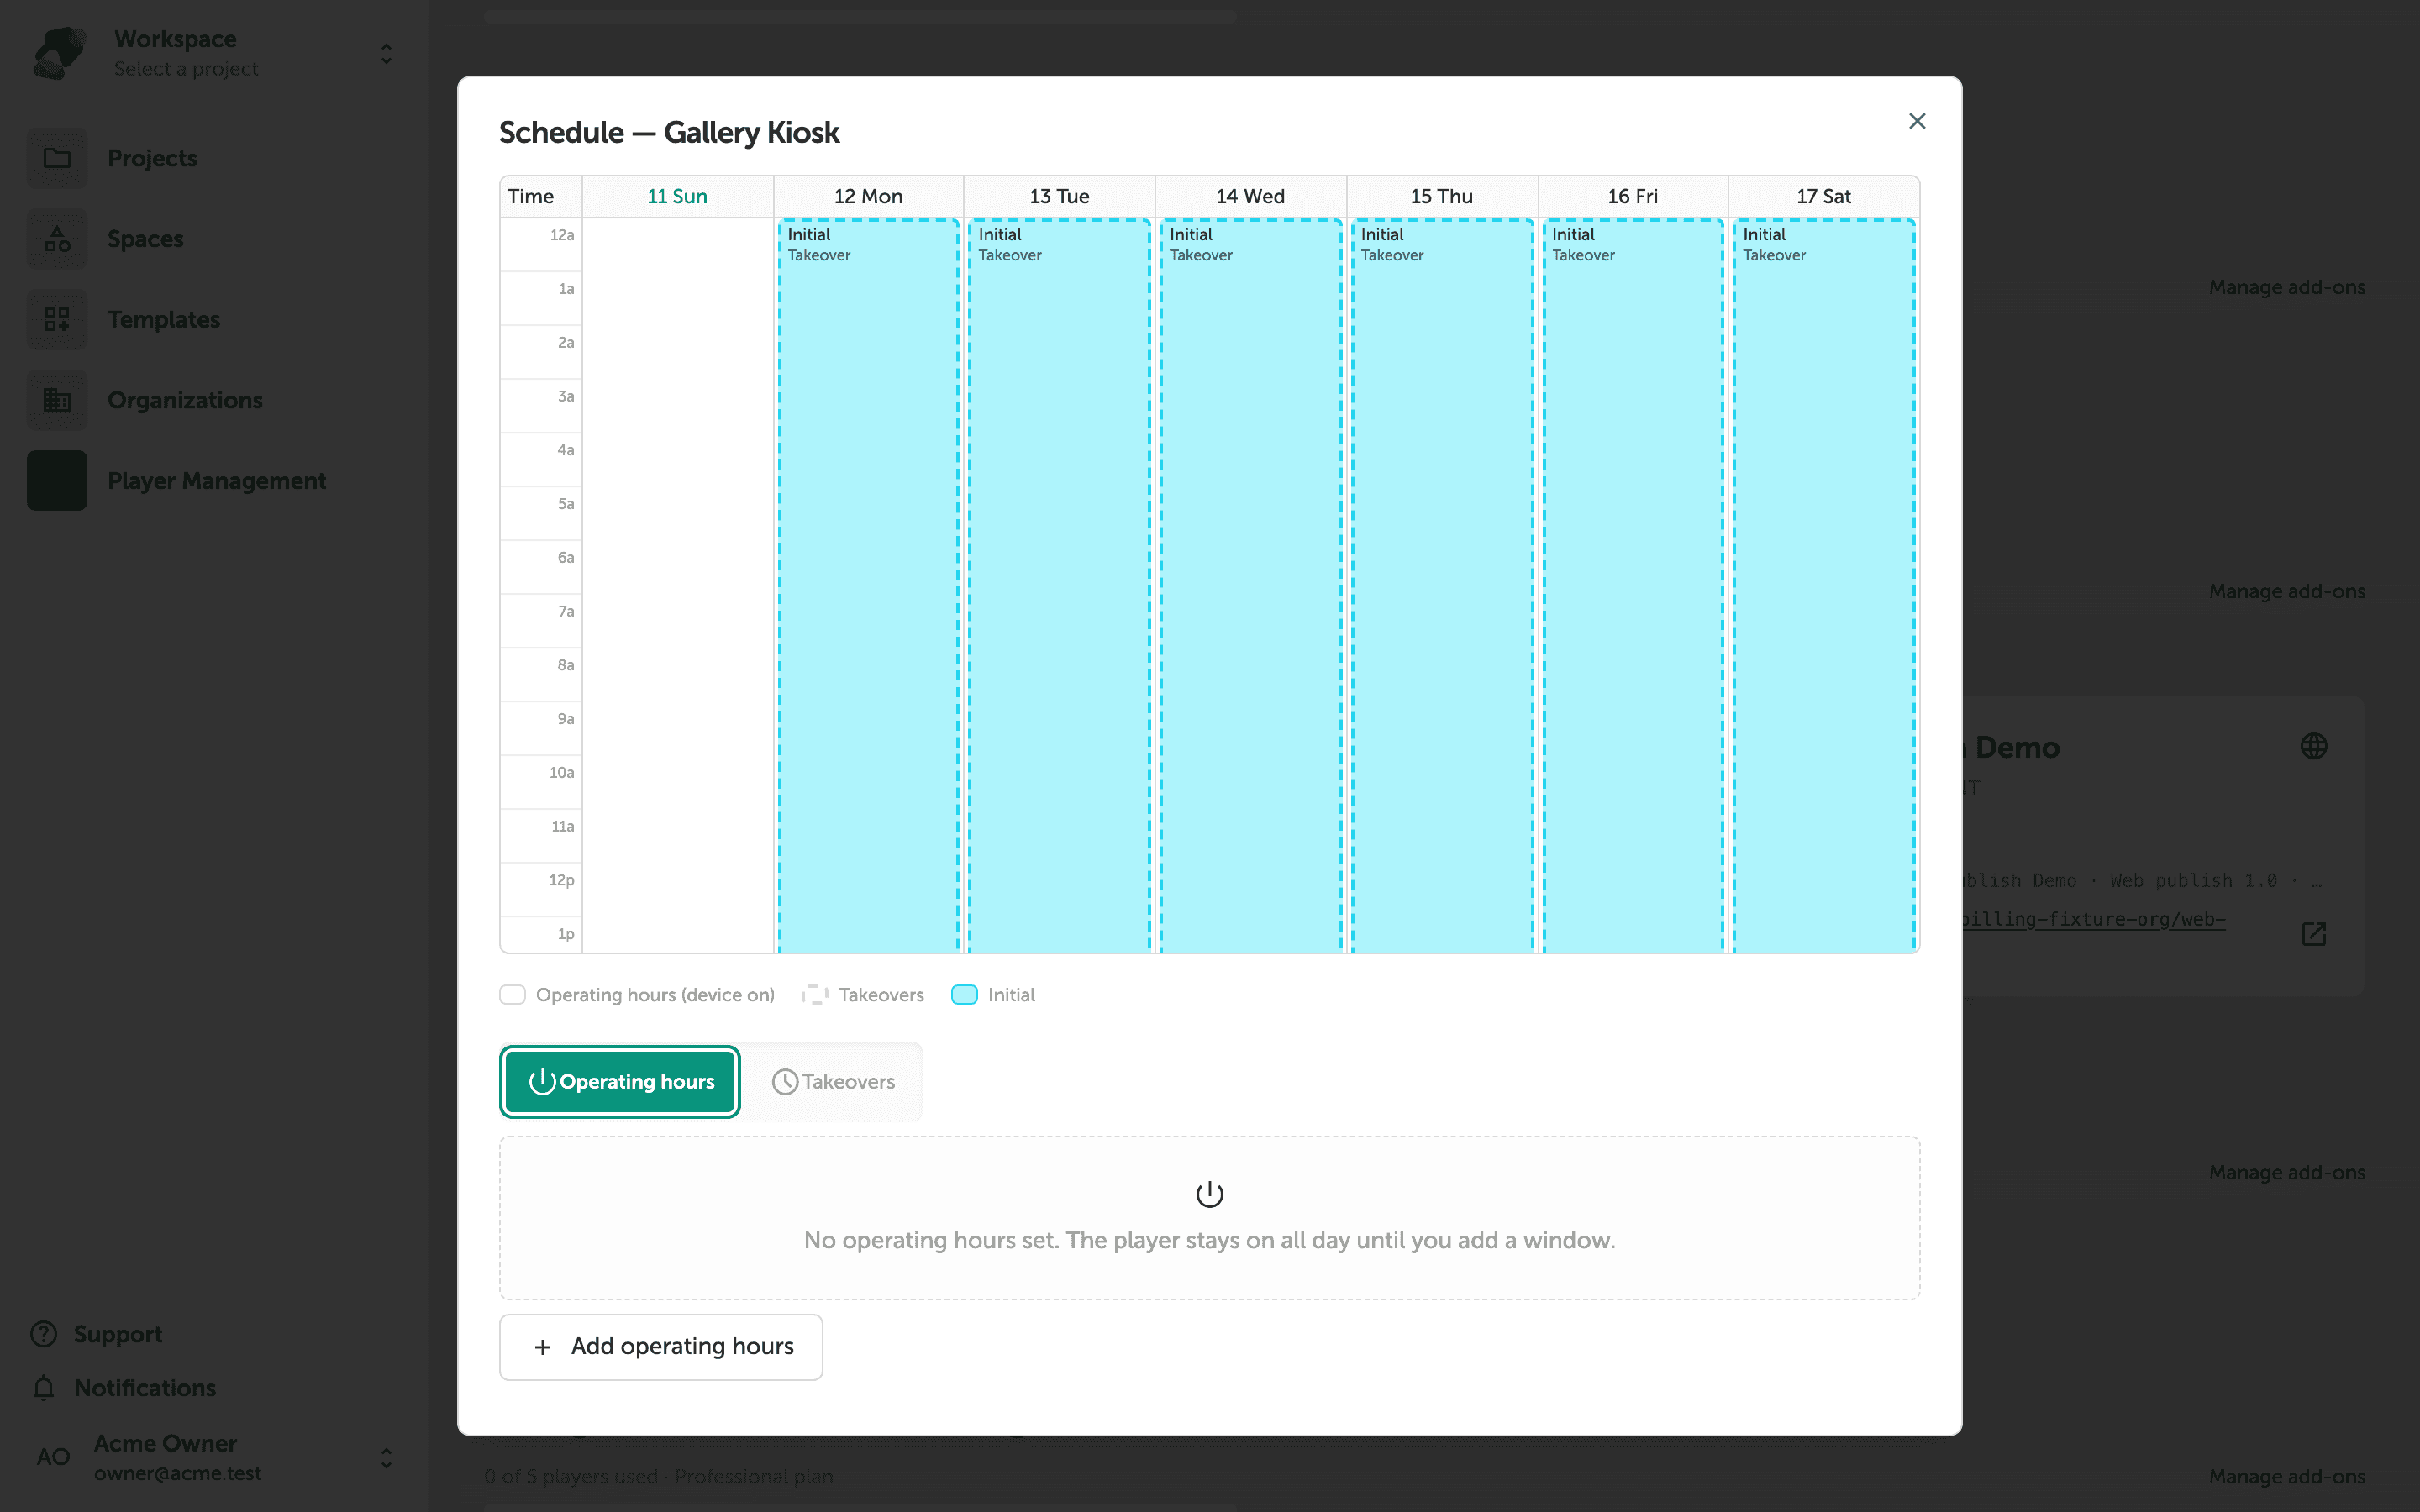
The Schedule dialog shows a weekly calendar for a device
The Schedule—Gallery Kiosk dialog displays a seven-day grid with hours along the left side. Each day column shows when content is active—the light blue blocks labeled Initial indicate that a default content state is assigned around the clock. Two tabs let you switch between Operating hours (controlling when the device is powered on) and Content deploys (controlling which project snapshot runs at a given time). The Operating hours tab is active now.
To add a time block, click + Add operating hours at the bottom of the dialog. The calendar will update to reflect any entries you create.
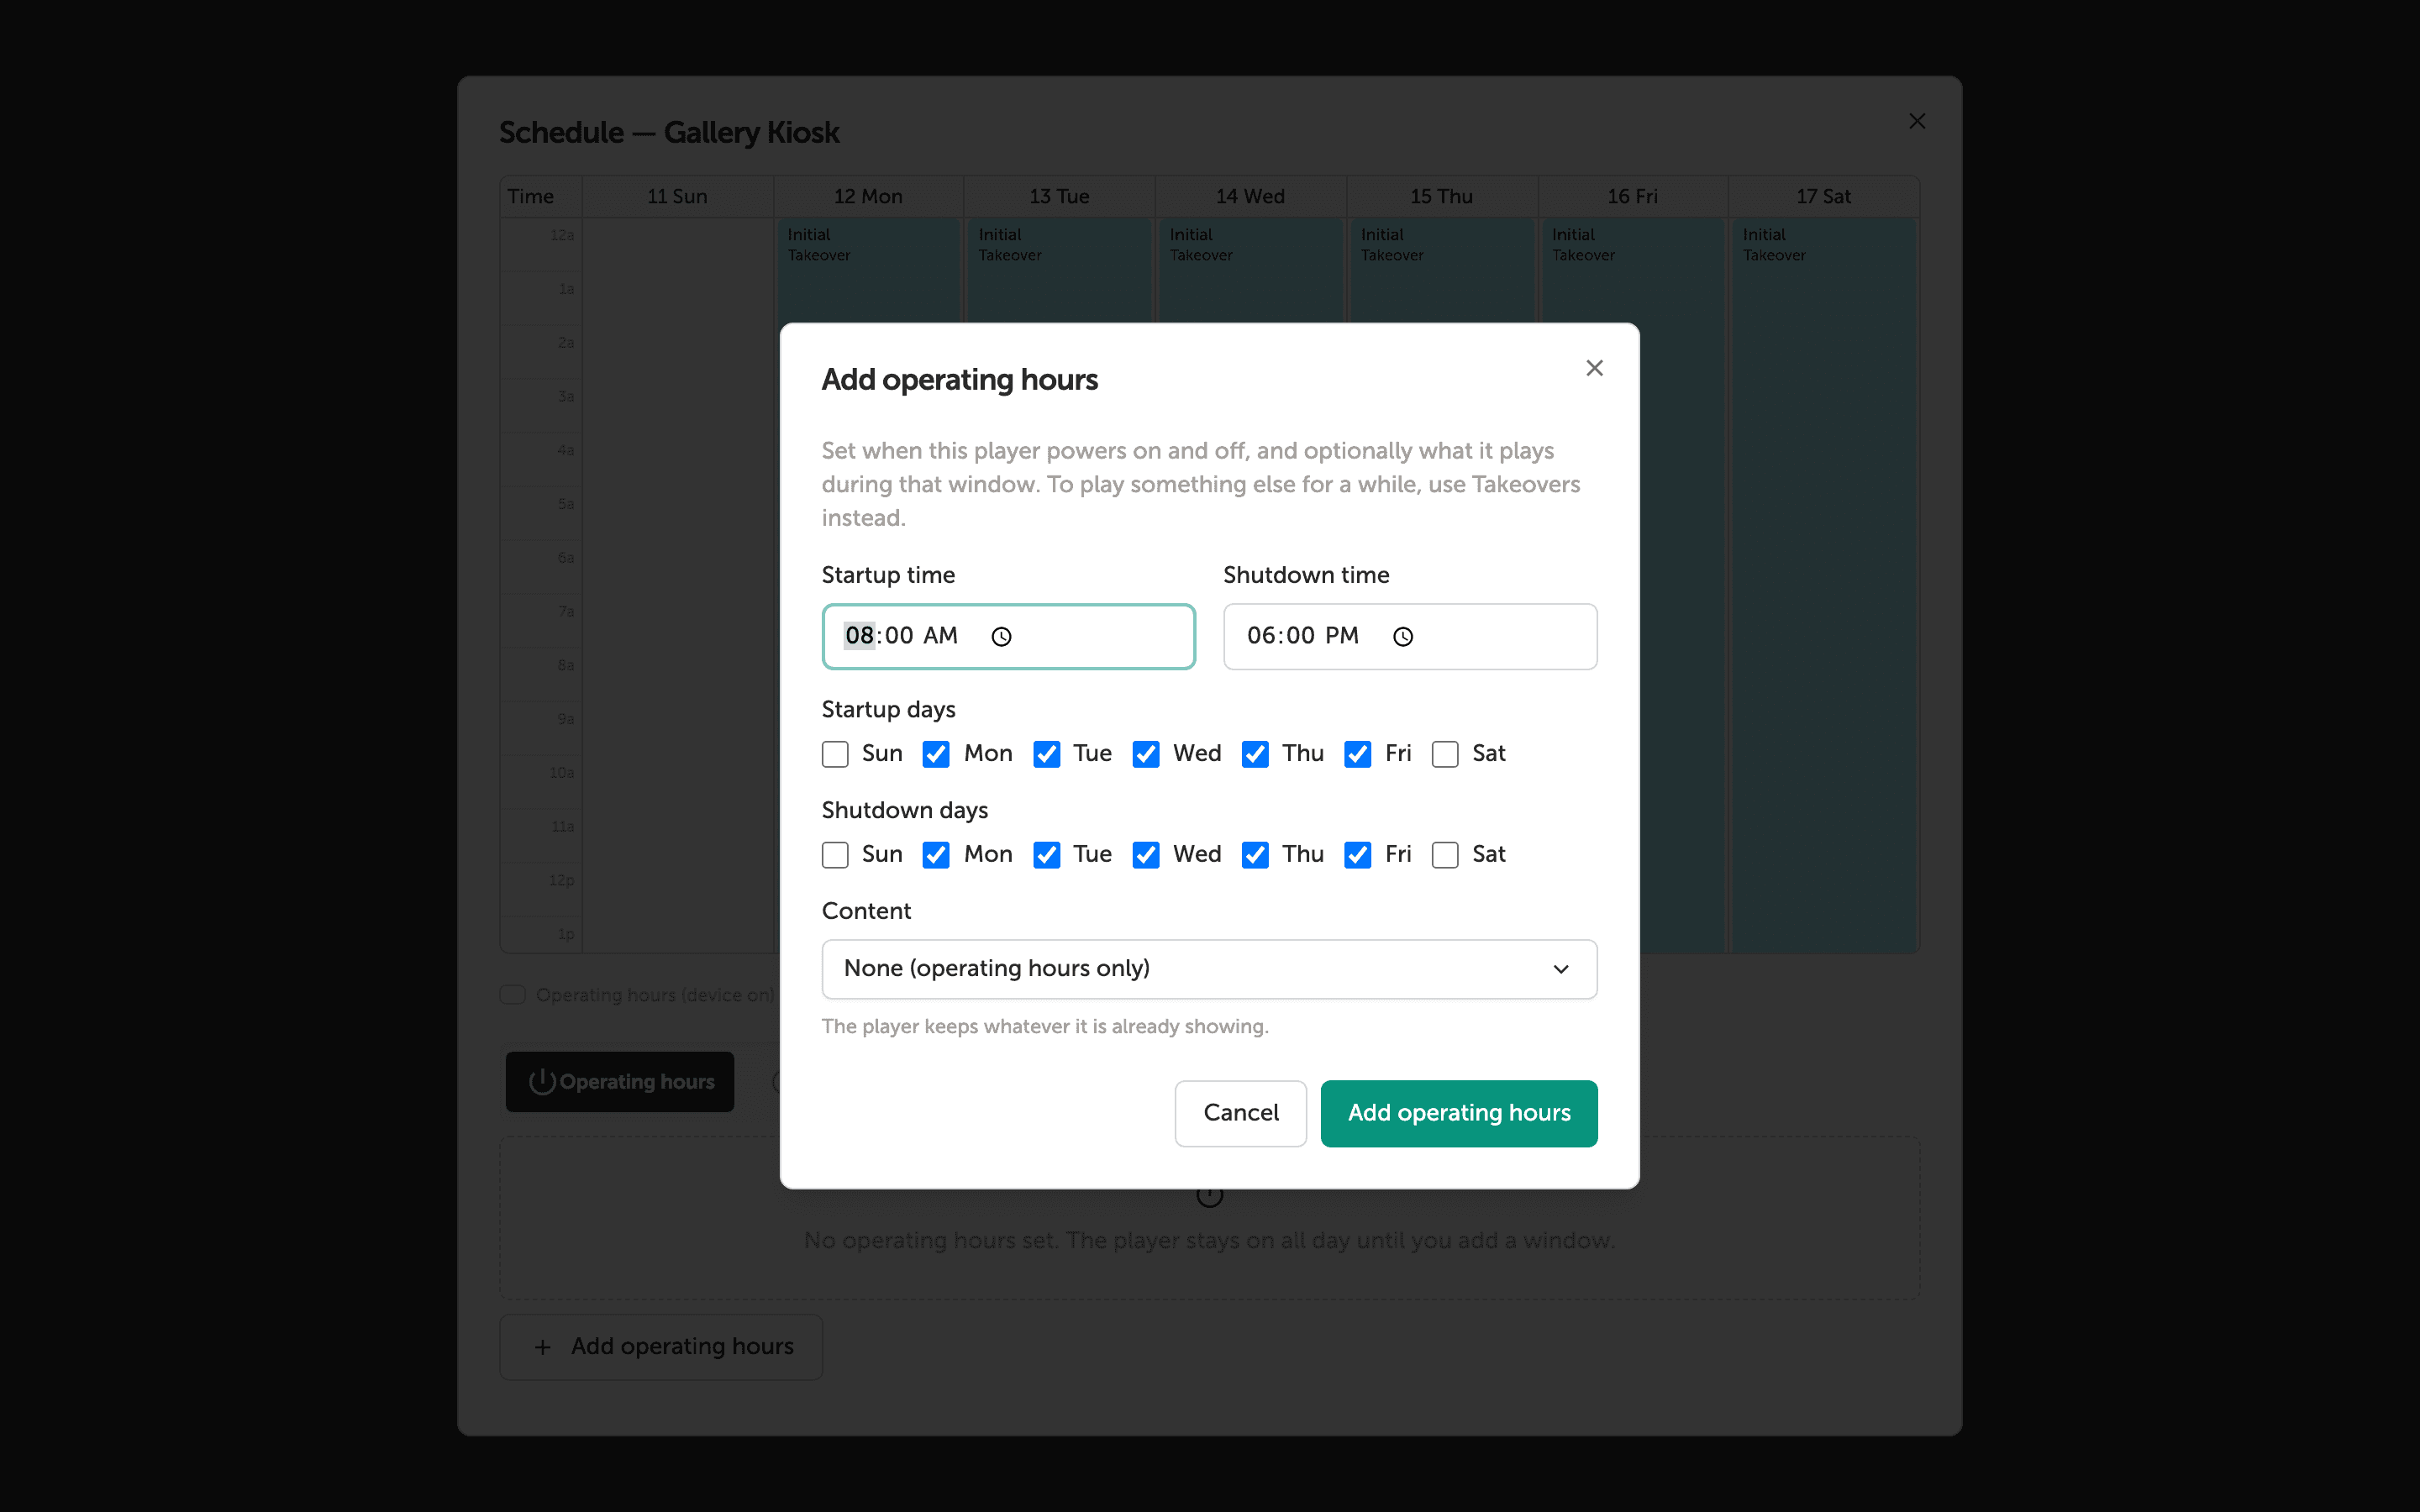
The Add operating hours dialog sets power-on and power-off times
In the Add operating hours dialog, set Startup time and Shutdown time using the time fields—currently showing 08:00 AM and 06:00 PM. These times control when the device powers on and off, not when content changes; content scheduling is managed separately under Content deploys.
Under Startup days and Shutdown days, check the days of the week when each schedule should apply. In the example above, Monday through Friday are selected for both, leaving Sunday and Saturday unchecked. When the times and days are set, click Add operating hours to save the schedule, or Cancel to close without saving.
With your schedule in place, your devices will run only when you need them. From here, you can refine how your content behaves during those hours or manage the broader deployment across your space.
- Publish content to a player—push a project or collection to your scheduled devices so they display the right experience when they power on.
- Manage multiple displays—learn how to register additional devices and group them within a space for easier oversight.
- Set up a style set—apply consistent typography and colors across every moment in your project before it goes live on device.
- Configure flows—control how your project moves between moments so the on-screen experience runs without interruption.
- Monitor player status—check device connectivity and last-seen timestamps from the Player Management page to catch issues early.