
Creating a View Template
Once you've designed a view layout that works well—say, a hero welcome screen or a content-rich informational moment—you can save it as a reusable template so you don't have to recreate it from scratch in future projects. Zibit's view templates capture the full layout of a view, including its component arrangement and grid positioning, and make it available as a starting point whenever you or a teammate adds a new view to a moment.
Open the view editor
Start by navigating to the view you want to save as a template. From your project's moments graph, click into the moment that contains the view, then open the view in the editor. You'll see the view's canvas with all of its components arranged on the grid—this is the layout that will be captured when you save the template.
Take a moment to make sure the layout is in the state you want to preserve. Any components currently on the canvas, along with their positions and sizes, will be included in the template. You can always edit the template later, but it's easier to get it right before saving.
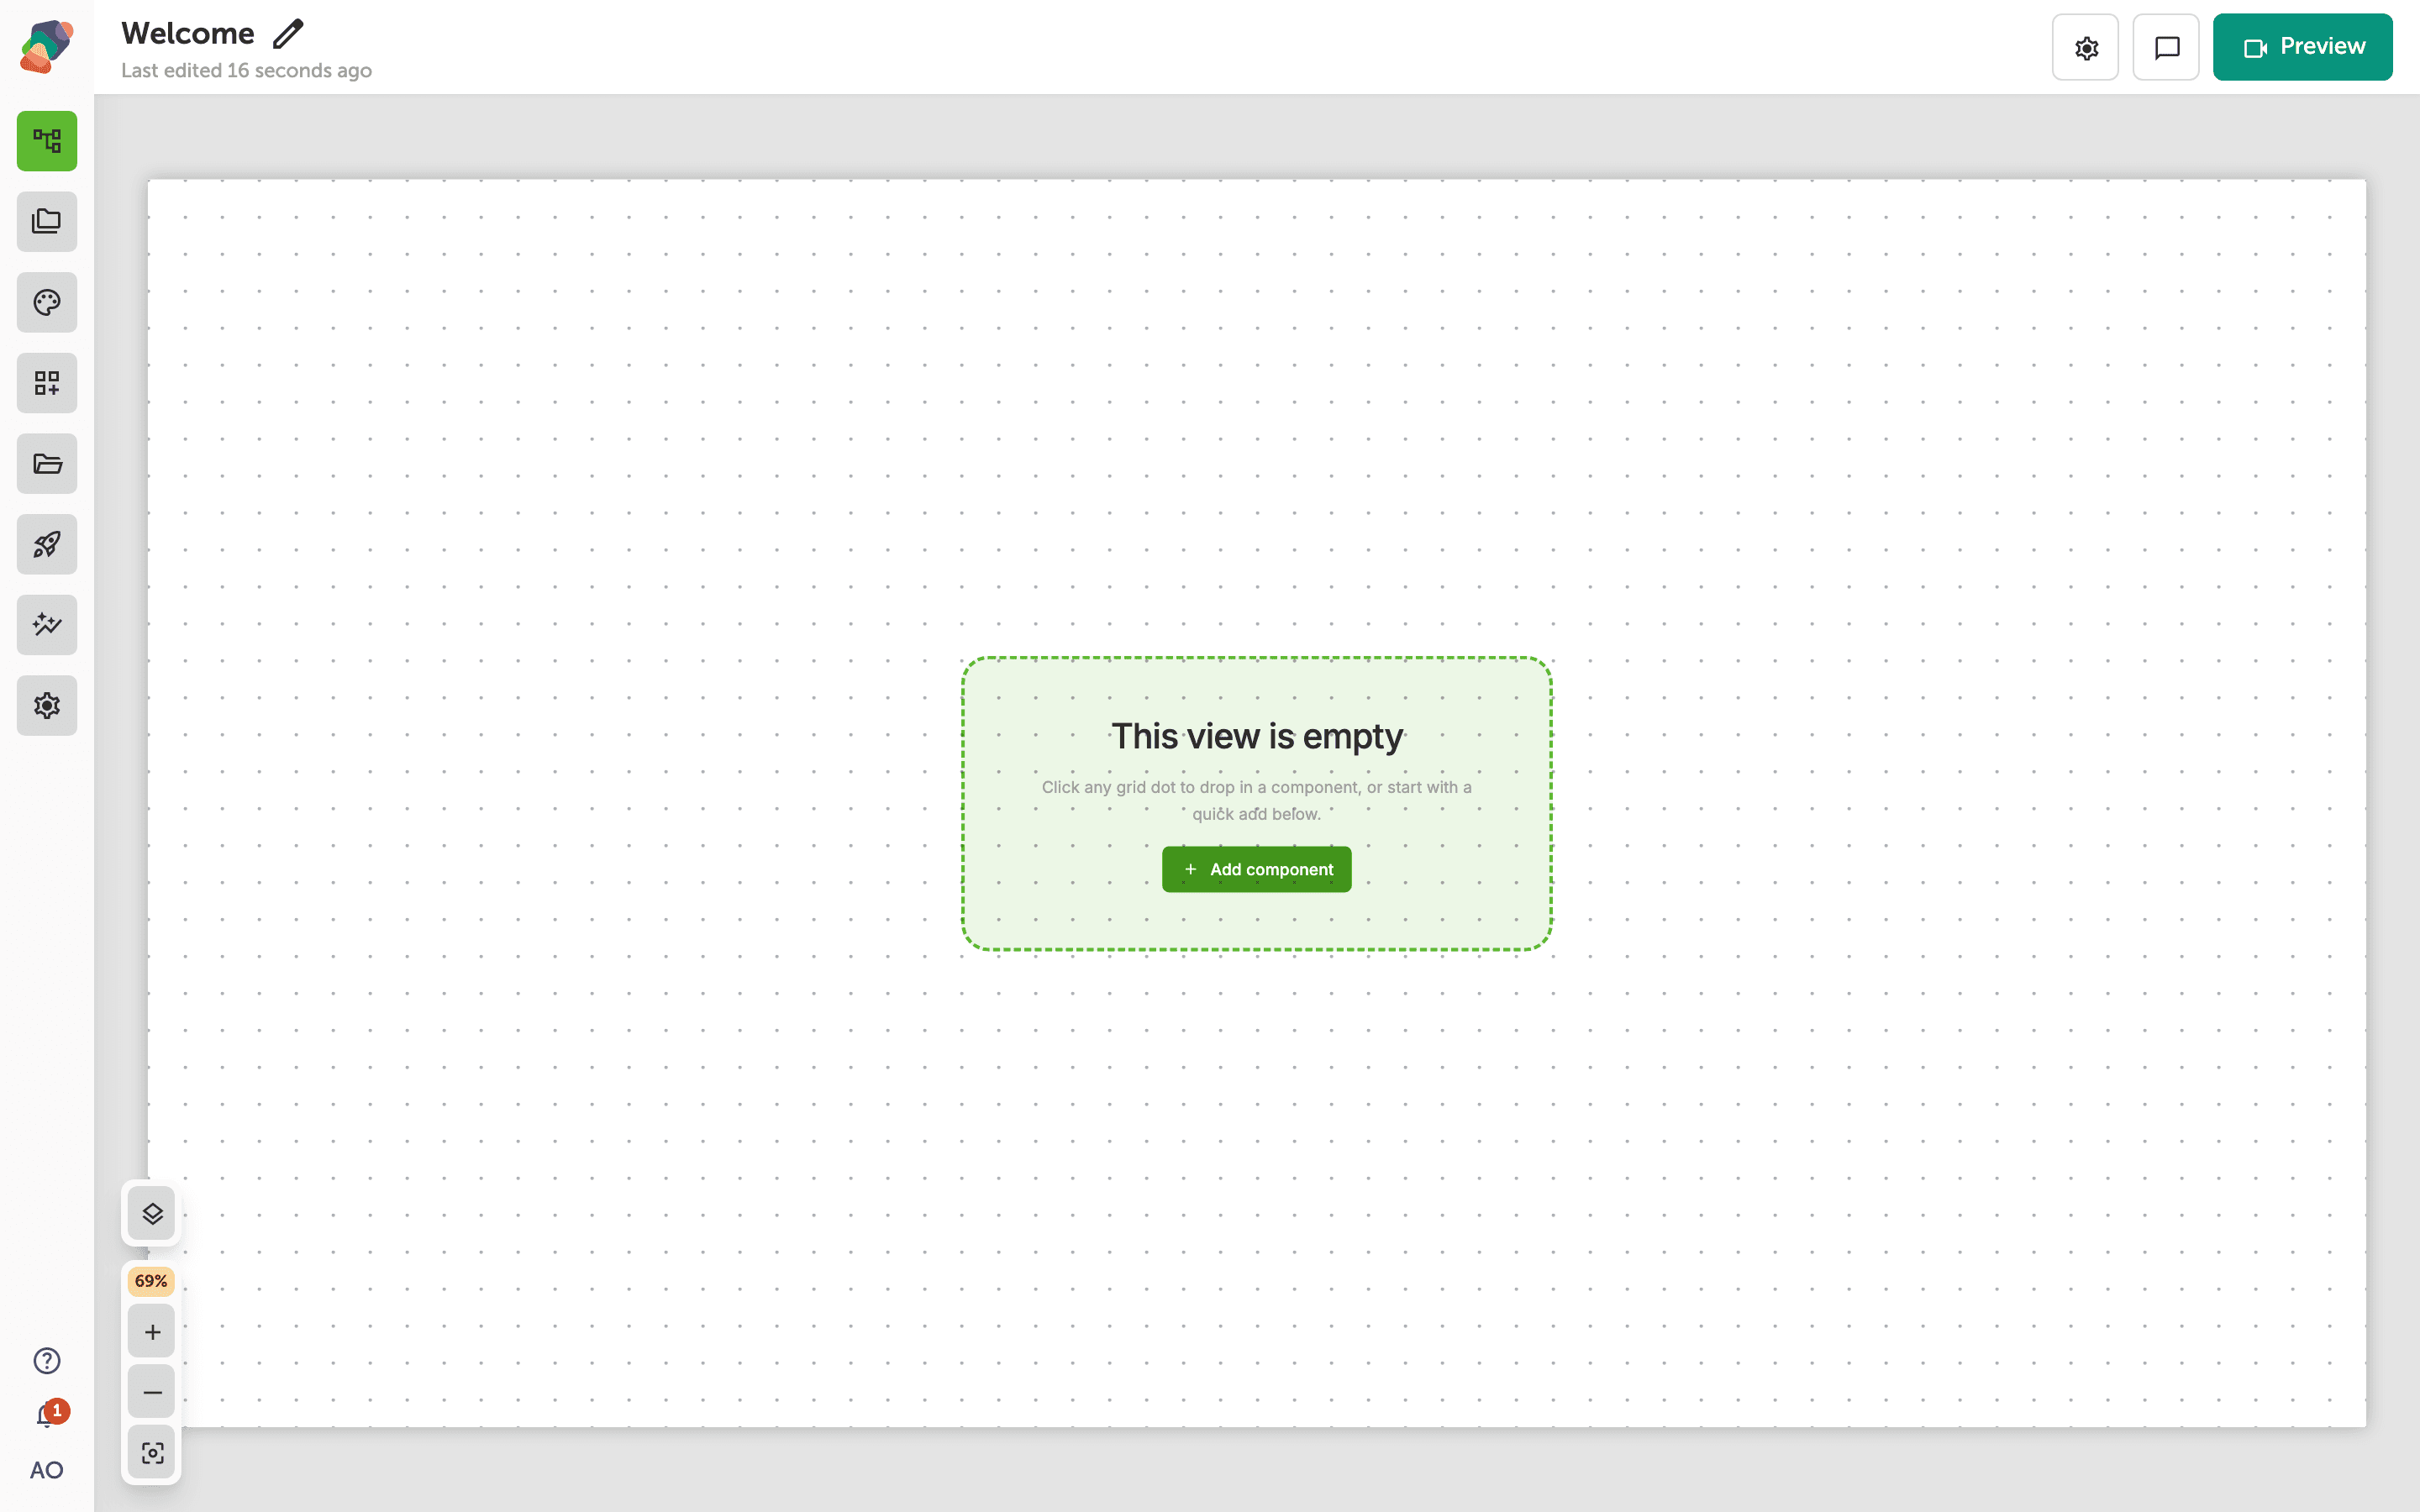
Open View settings from the header gear
Click the gear icon in the header bar (labeled View settings) to open the view's settings panel. This is the same panel where you configure grid and collection options for the current view.
Scroll to the Templates section and click "Save as view template". That captures the current view layout—component positions, sizes, and grid arrangement—into a reusable template.
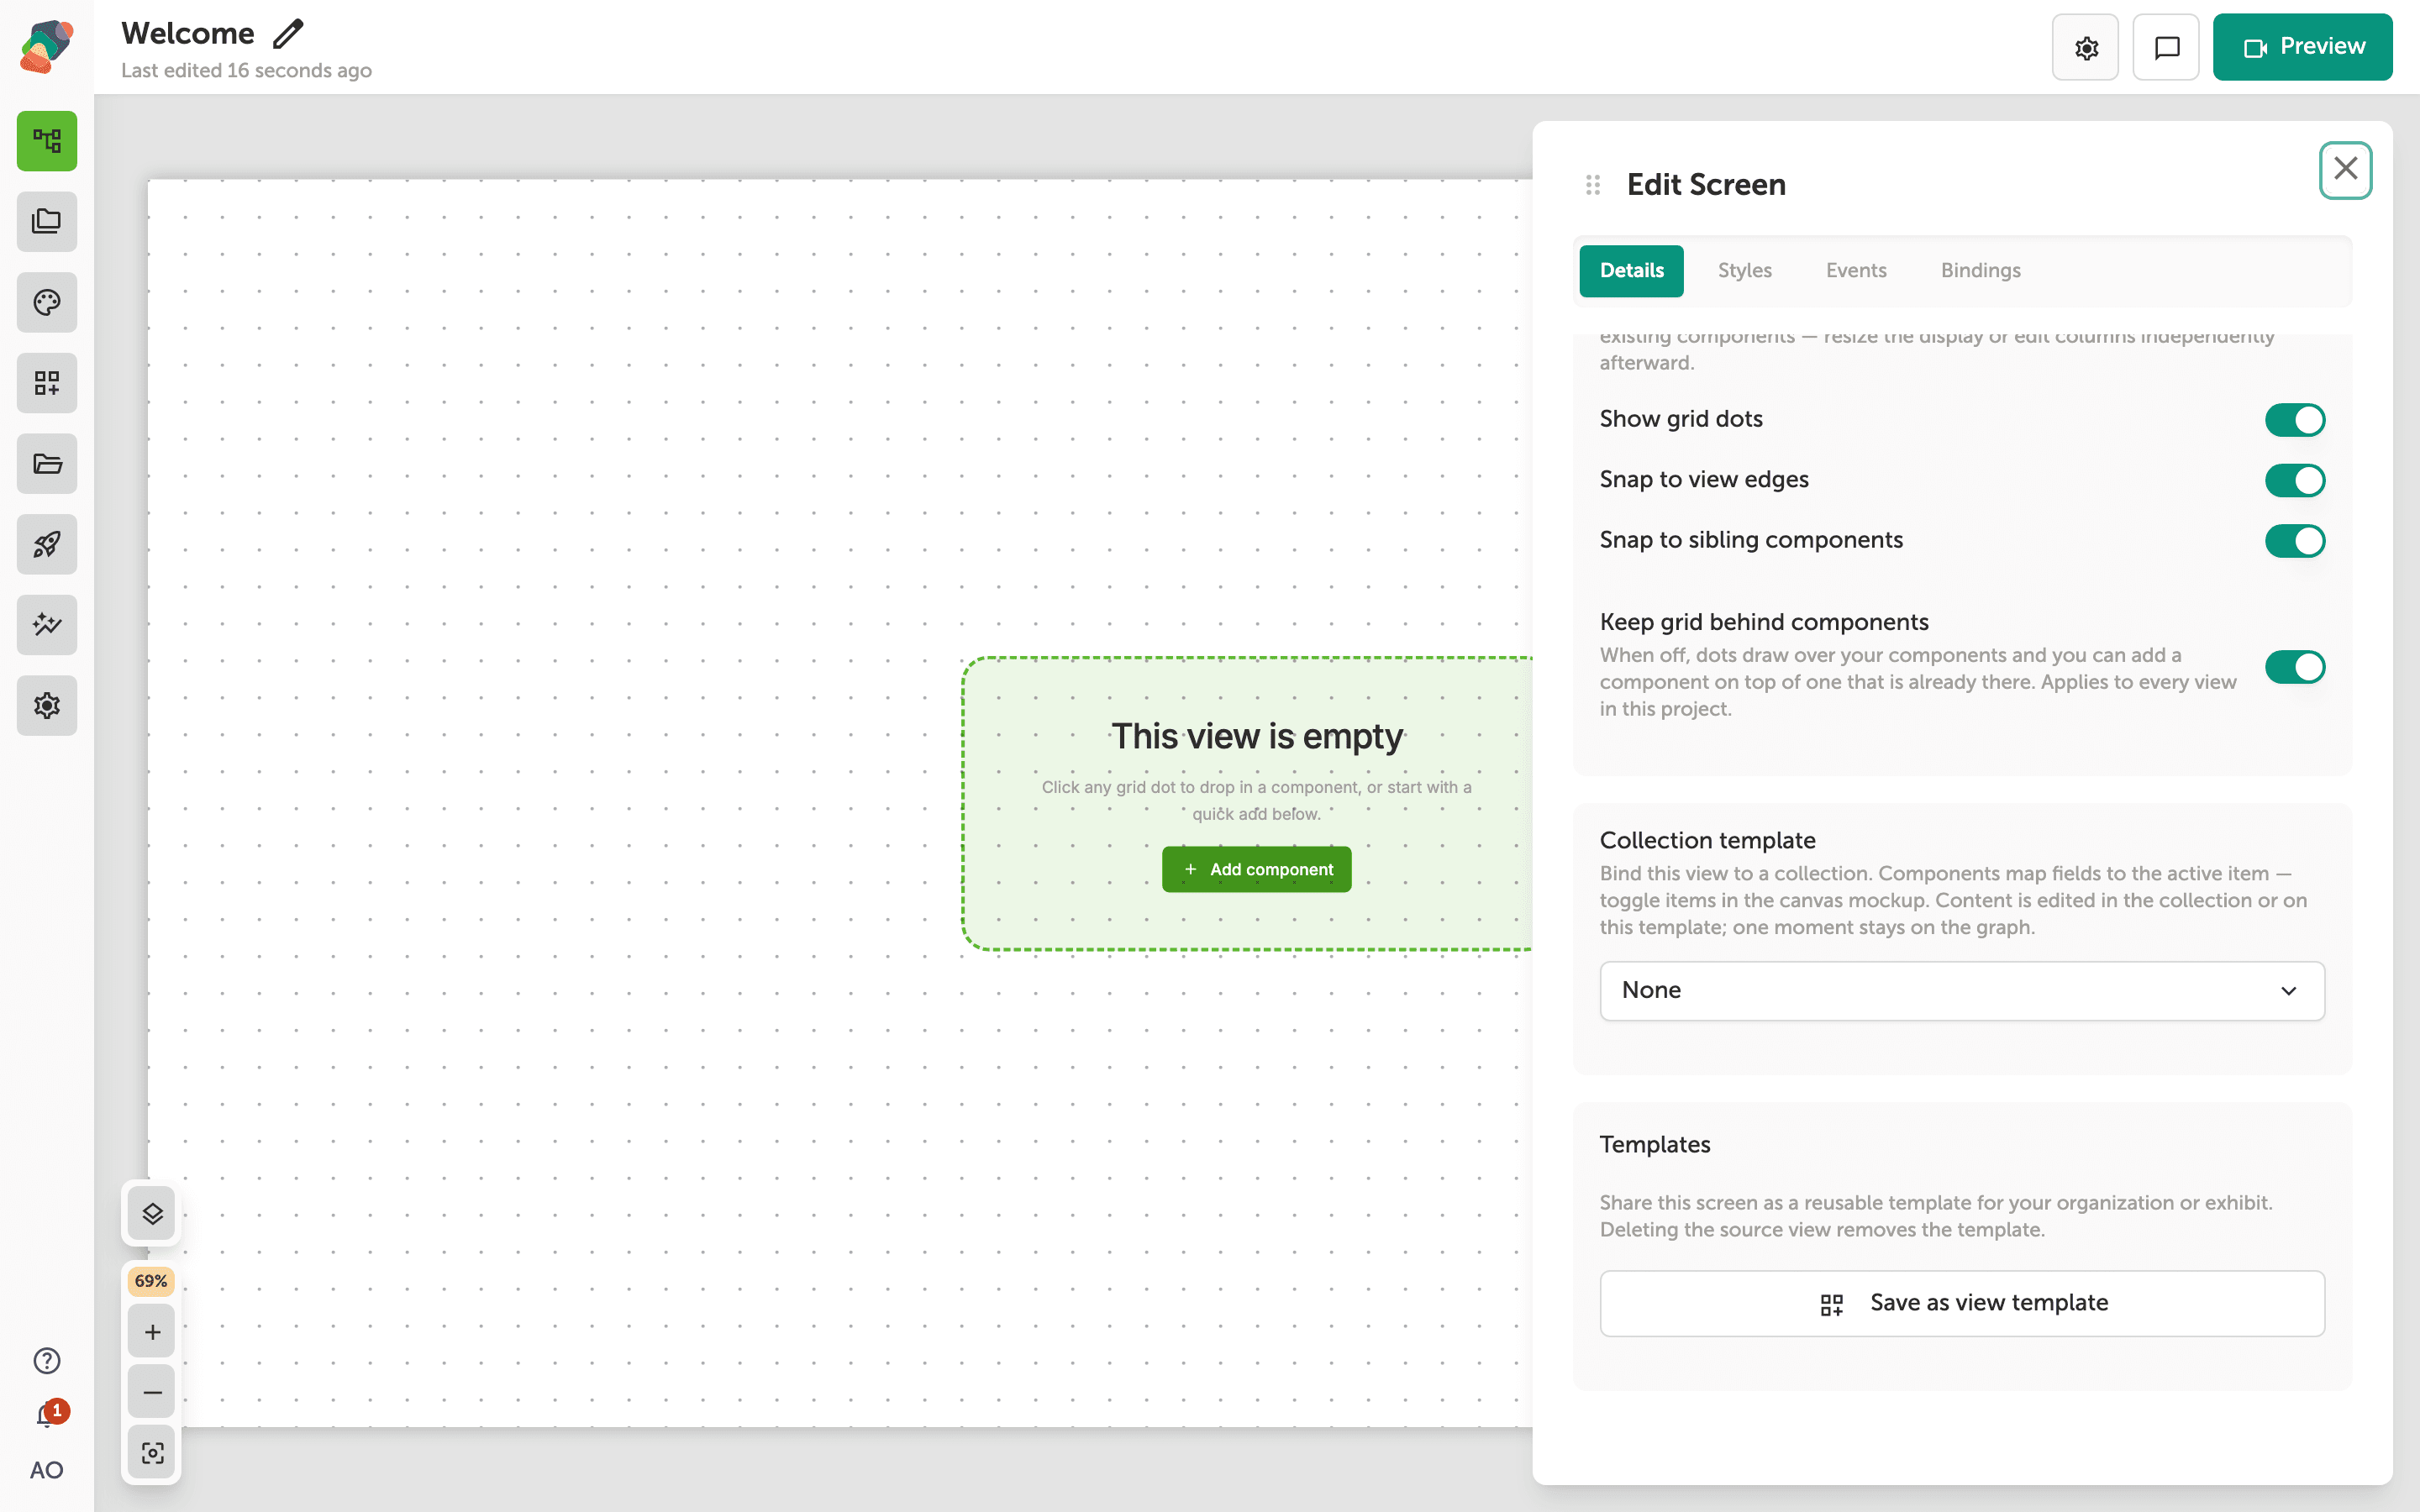
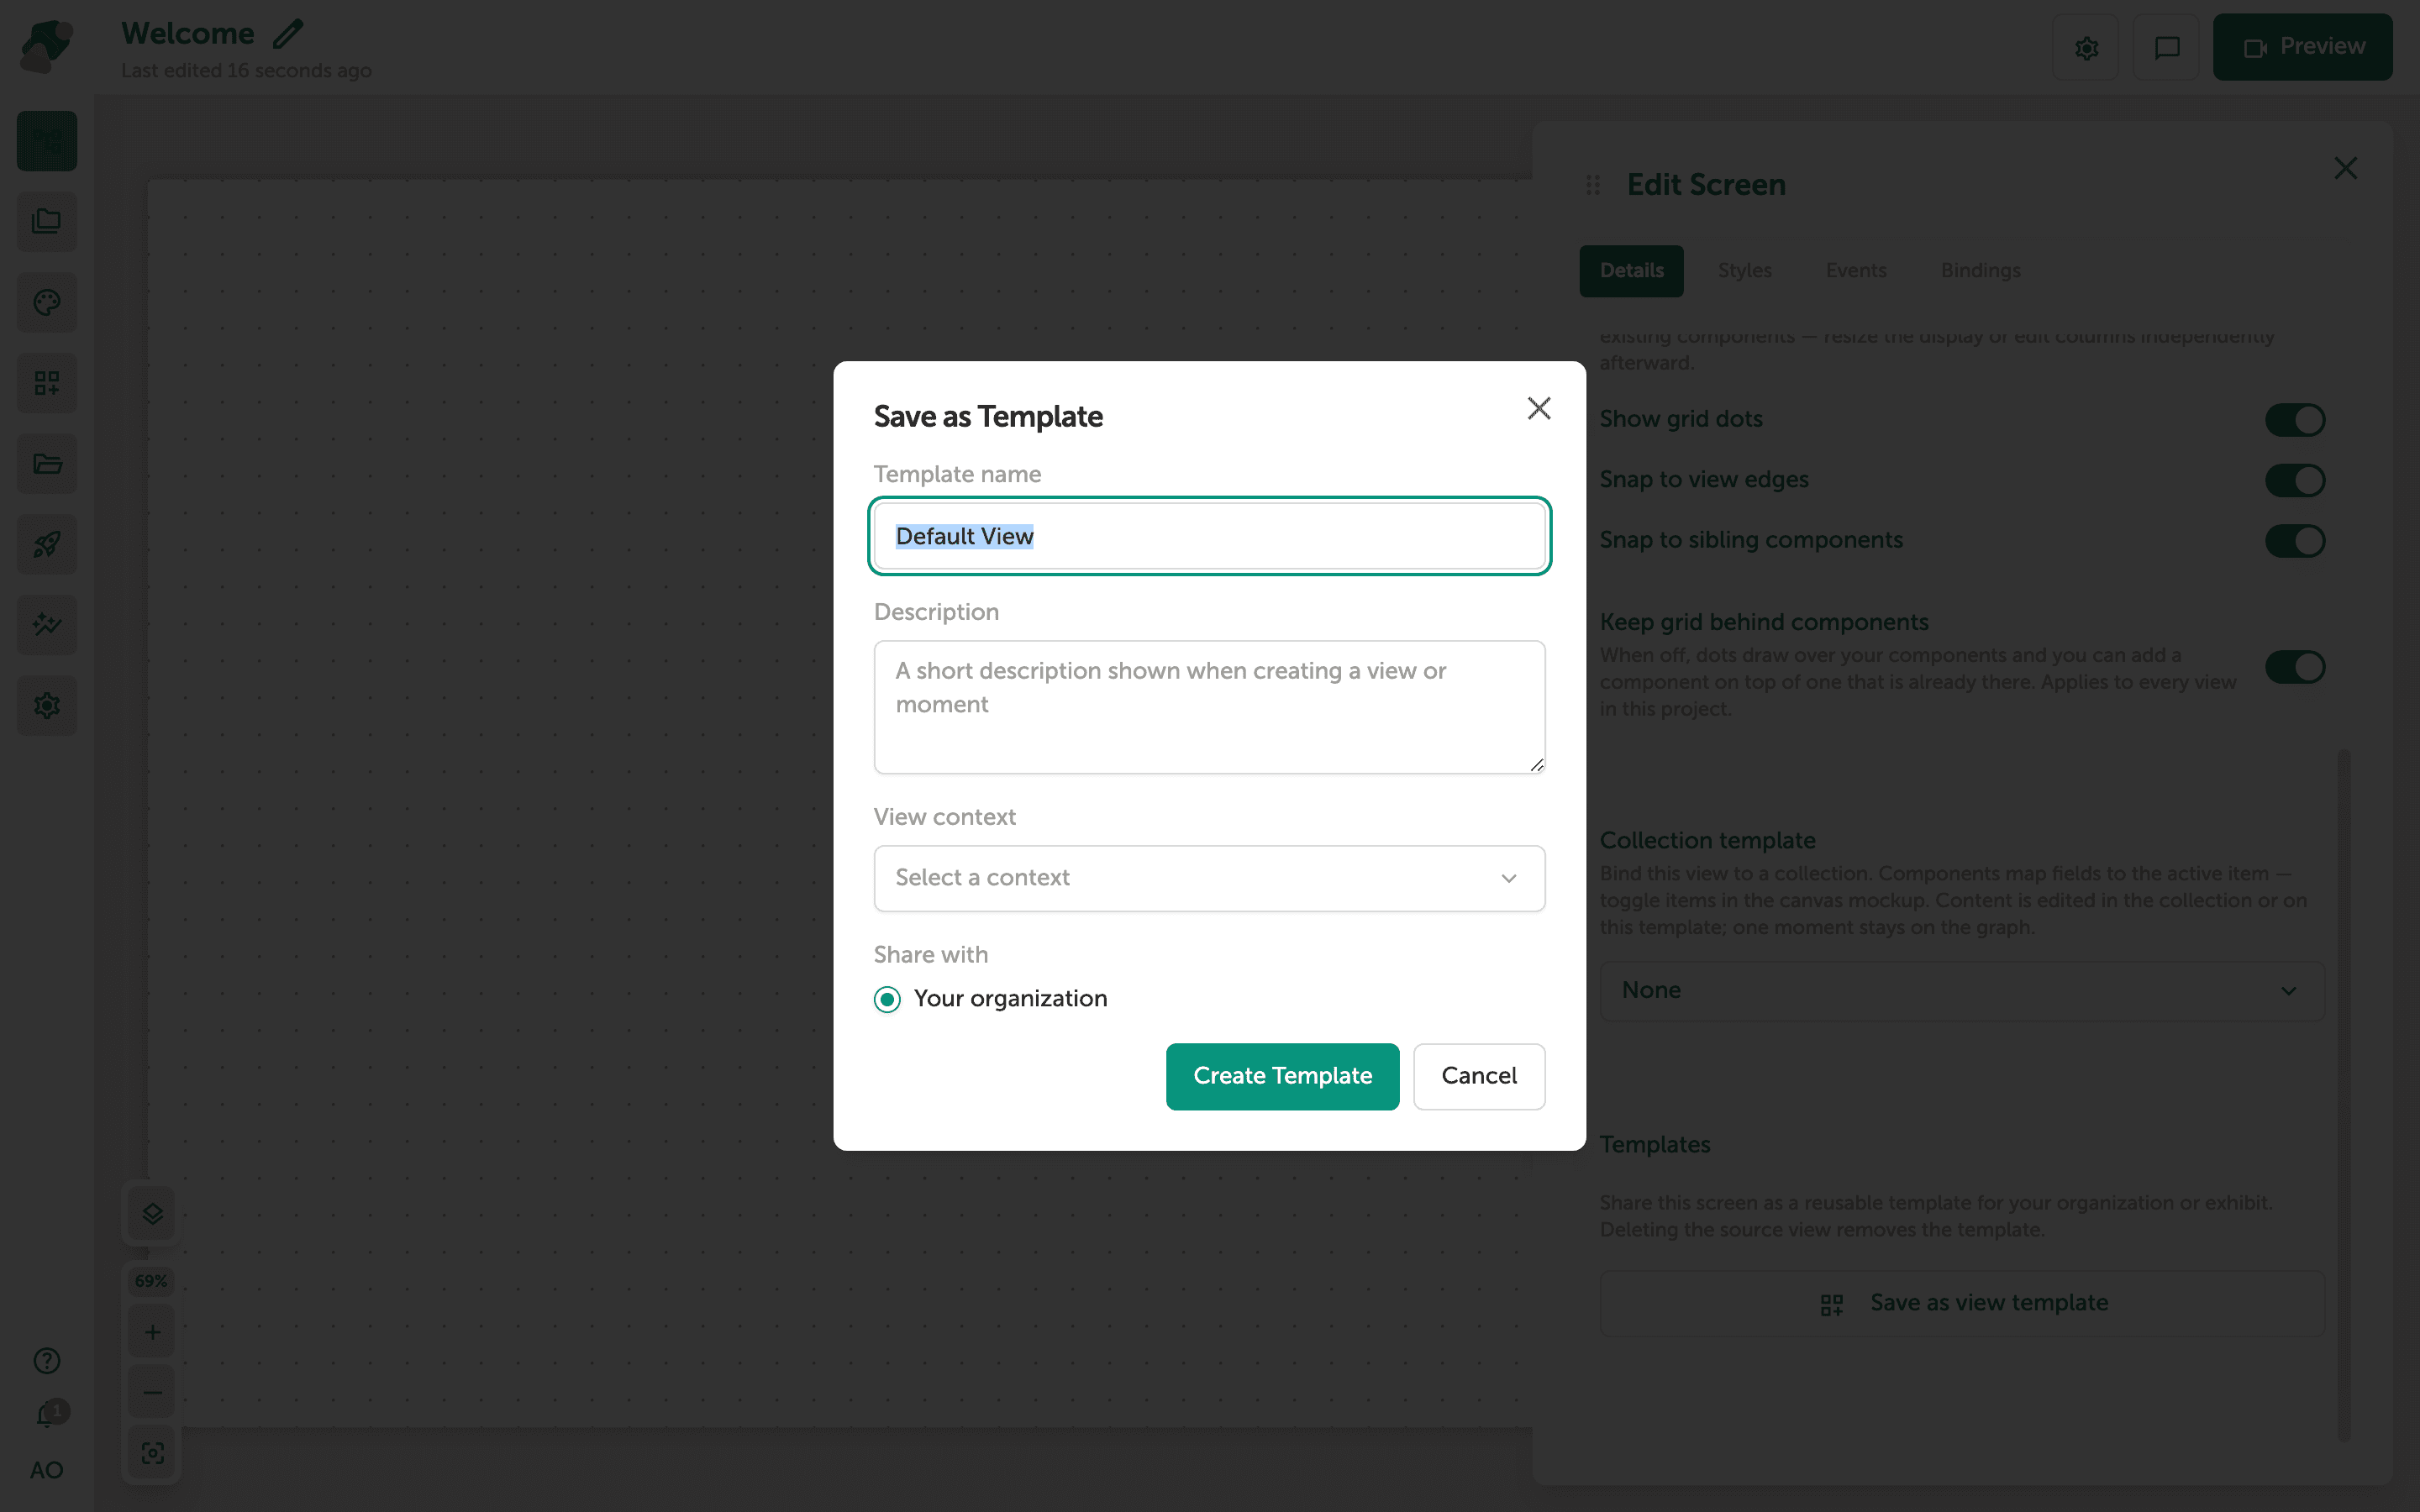
Name and save the template
The Save as Template dialog asks for a name and an optional description. Give your template a descriptive name—something like "Hero screen — full-width image" tells teammates exactly what the layout looks like without previewing. Choose whether to save the template for your organization, the current Space, or (if you have access) the Zibit library, then click "Create Template" to finish.
Your new view template will now appear on the Templates page and in the template picker whenever you or a teammate adds a new view to a moment.
You've saved your view layout as a reusable template. Here's what you can do next:
- Use your template in a new view—The next time you add a view to a moment, your template will be available as a starting point. See Creating a view from a template for a walkthrough.
- Browse all your templates—Visit the Templates page to see your view templates alongside component, project, and theme templates.
- Save a project template too—If the entire project structure is worth reusing (not just a single view), you can save it as a project template. See Creating a project template to learn how.
- Refine the layout—If you want to tweak the template later, create a view from it, make your changes, and save it as a new template.